![]() Besides the obvious sewing items like scissors and pin cushion, there are two items I keep on hand at all times. They are masking tape and tracing paper. Here are some ways they can make your sewing process easier.
Besides the obvious sewing items like scissors and pin cushion, there are two items I keep on hand at all times. They are masking tape and tracing paper. Here are some ways they can make your sewing process easier.
Tracing Paper
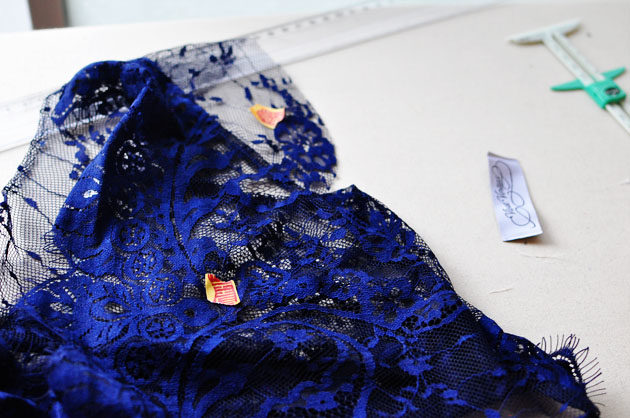
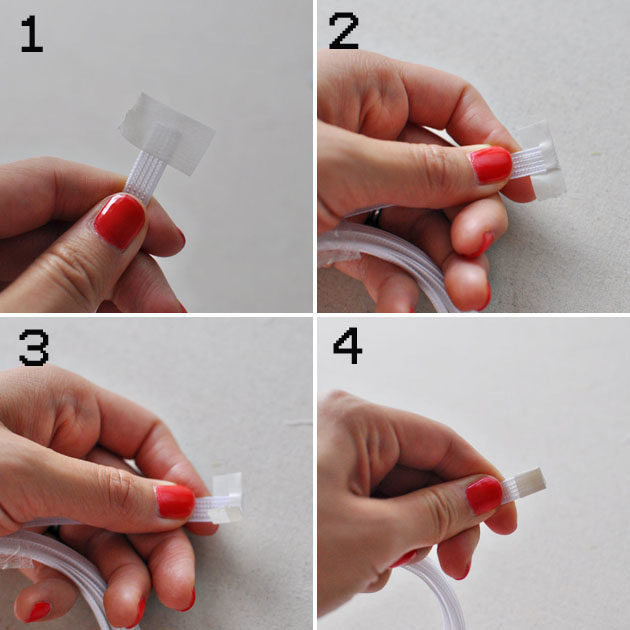
I use it when I sew clear elastic band (to avoid fabric from over stretching) , laminated fabrics or leather. For clear elastic (pictured above), I layered the strip of tracing paper on top of clear elastic so the clear elastic does not stick to the sewing foot. I sewed lace, clear elastic and tracing paper together. Once you are done with the seam, just rip the paper to remove it.
Masking Tape
 1. Use it to mark the right side of fabric.
Some fabrics are hard to tell which side is right and which side is wrong. In order to avoid mistakes, I cut a piece of masking tape and put it on the right side of the fabric as I cut the pattern pieces.
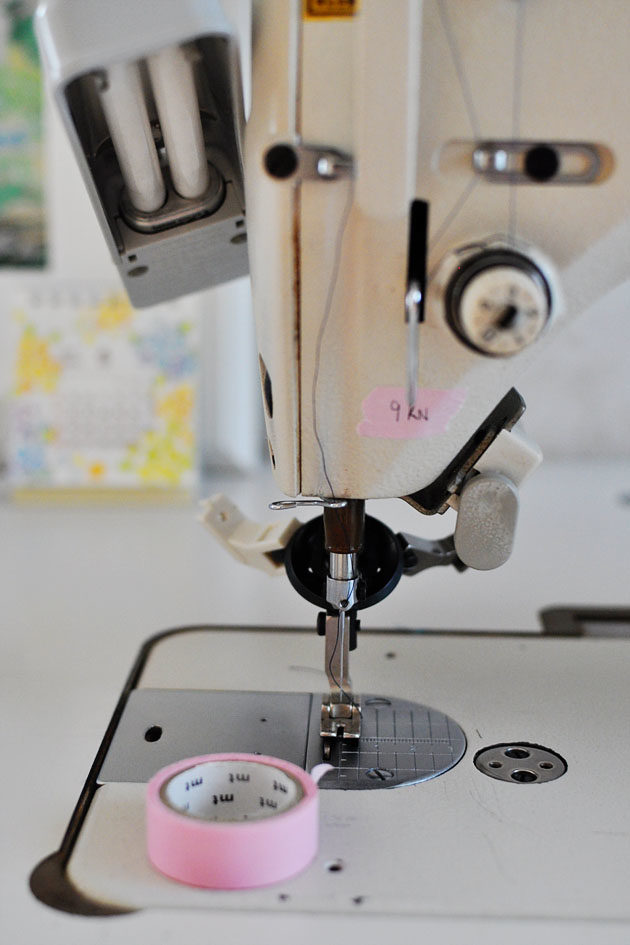 2. Write down the needle size
I often get confused with what needle I’m currently using. I change the needle and keep using it, completely forgetting if it’s 11, 9, or a ball point needle. Sewing needle sizes are hard to tell from just looking at the needle. Now I have a solution. Whenever I change a needle, I write down the needle size on a masking tape and stick it right above the needle so I know exactly what I’m using.
 3. Cover the edge side of bones
Instead of creating a bone channel, I use a plain white masking tape to cover the edges of bones and sew it directly on fabric. This only works for plastic bones like the ones shown in the picture, not the steel bones.
More tips?
Tips on Sewing Tulle Dress
Tips on Sewing with Kimono Fabric
How to Attach Facings with an Invisible Zipper(No Hand Sewing Involved!)
私が良く使うソーイングアイテムの紹介です。
まずは100キンで買うトレーシングペーパー。
レザーをミシンで縫うときもこれさえあればちゃんと縫えます。
他にはラミネート加工された生地や、透明ストラップを縫い付ける時なんかにも。
一緒にトレーシングペーパーを縫い込めば、ラミネート生地などのべたべたした部分がミシンの押えに引っかかって縫い目が乱れることを避けることができます。
縫い終わったら、ゆっくりピリピリとペーパーを剥がすだけ。
マステも常に傍にあります。
布の表面と裏面を印つけるのに使ったり(私は表にマステを貼ることにしています)、ボーンの切り後の始末にも使います。
あとはいつも使っている針番が分からなくなっちゃうので、針を取り換えたら番号を書いたマステをミシンにぺたり。
 Find me elsewhere:


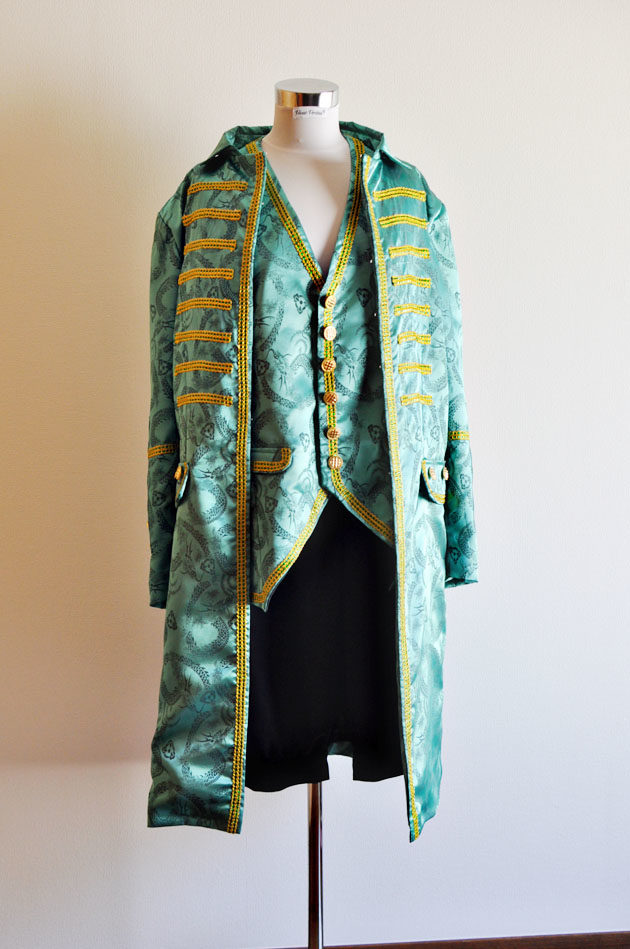 I’ve had some interesting assignments recently…making costumes! I haven’t had much chance to make costumes except for my failed attempt to sew a past
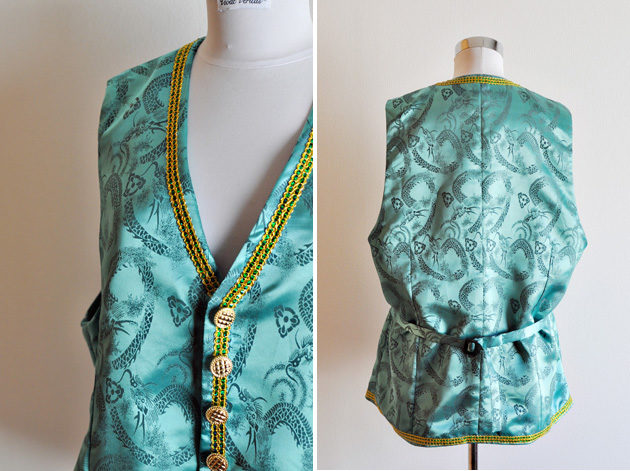
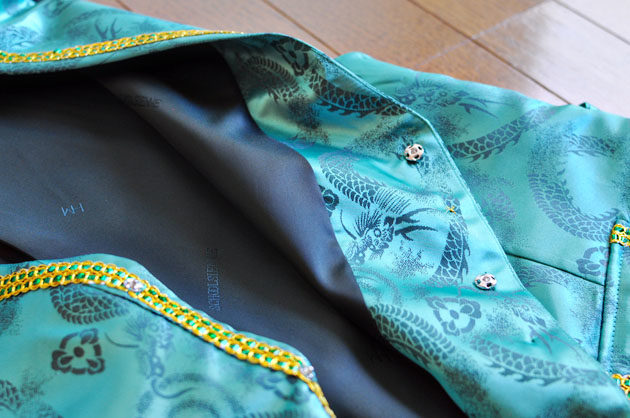
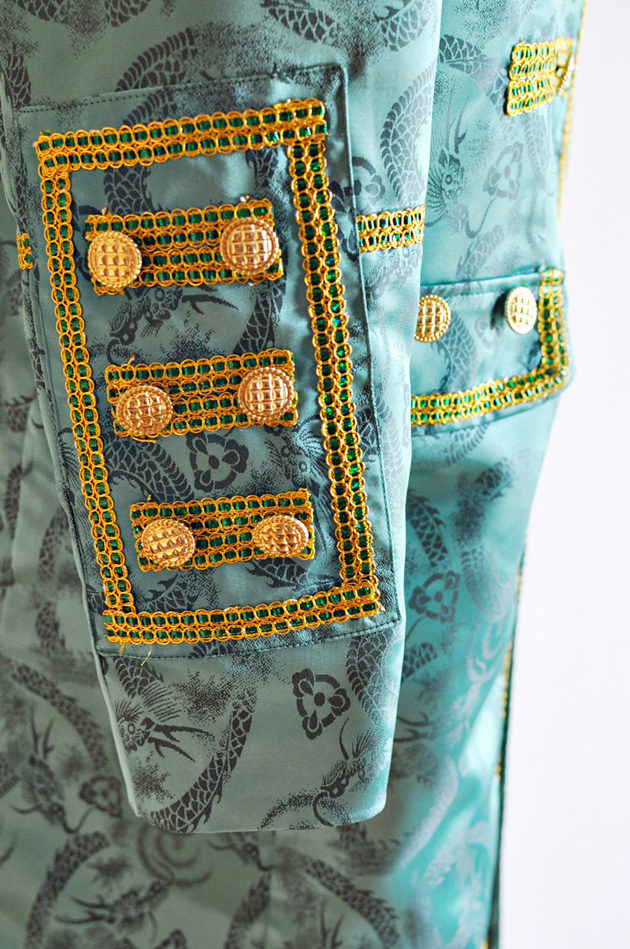
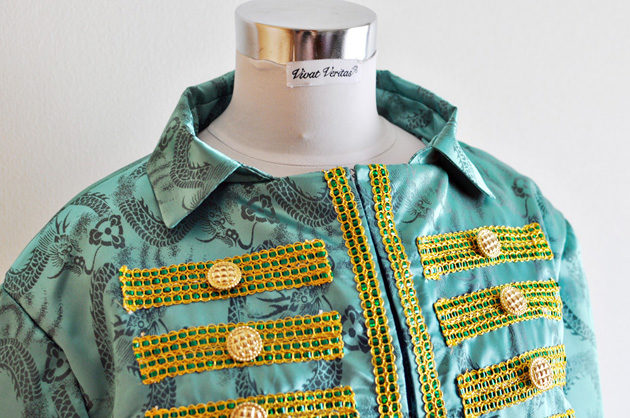
 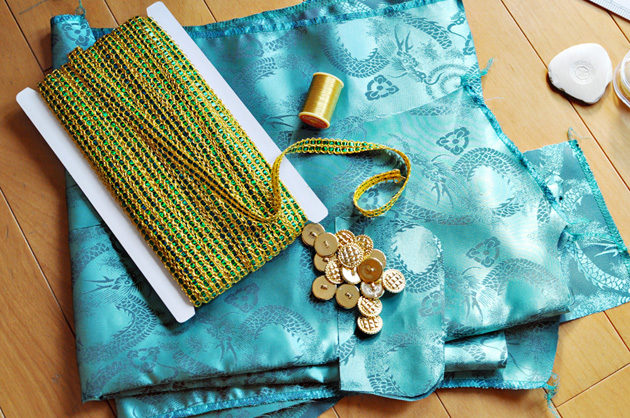 The fabric was provided by the client (bright green satin with dragon print!) and I bought the triming. The buttons are from Zakzak and ribbon is from Tomato, both in Nippori. Zakzak has some fun trims, like crazy belt buckles. Worth checking in whenever you are in Nippori.
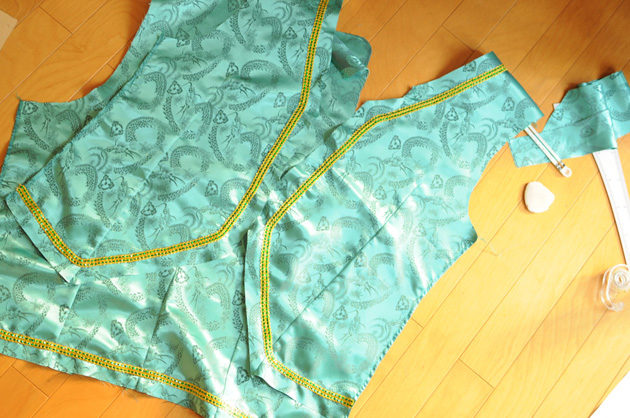 Ive made men’s vests, tuxs and pants in the past (
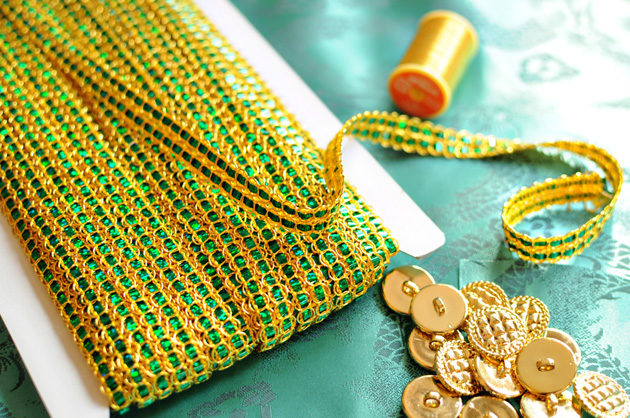
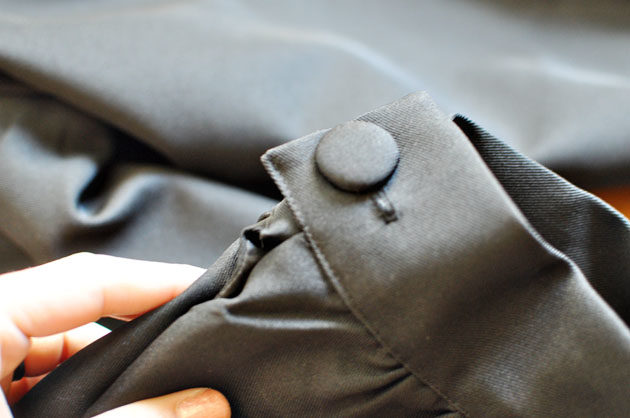
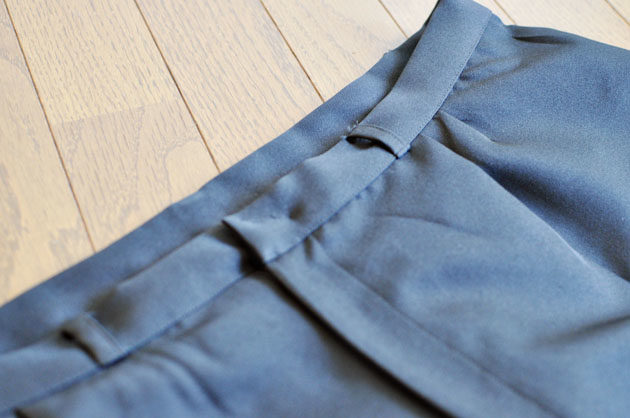
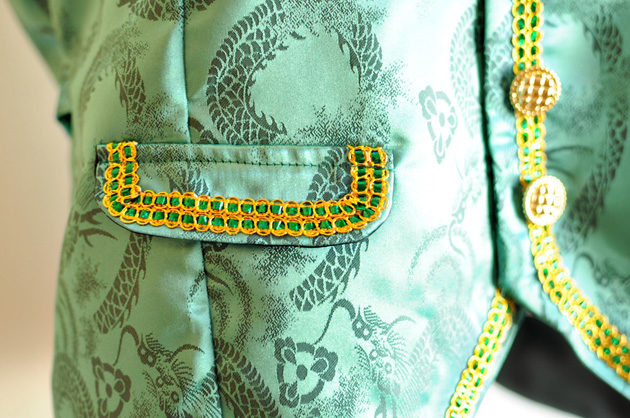 Added a mock pocket flap. One good thing about making costumes is that the clothes don’t necessarily have to be functional.
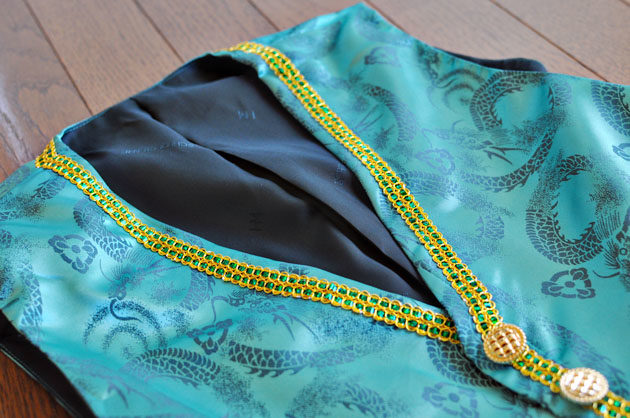
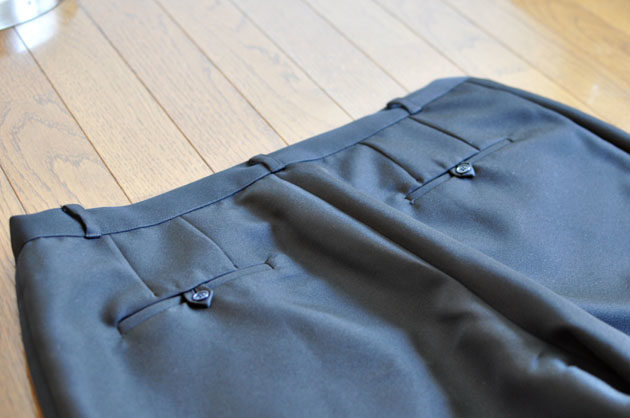
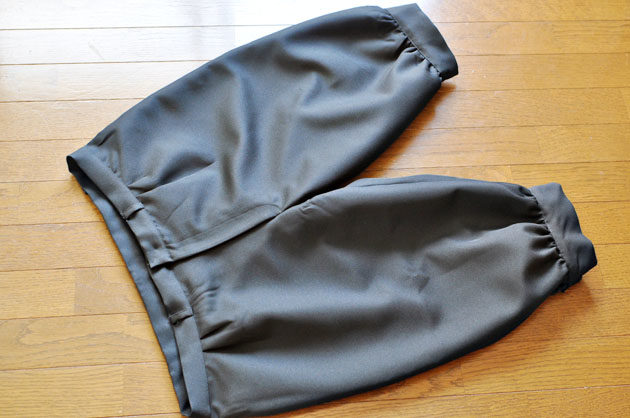
 Here are some close up photos of the pants. I used men’s trouser patterns, shorten the length and added some cuffs.
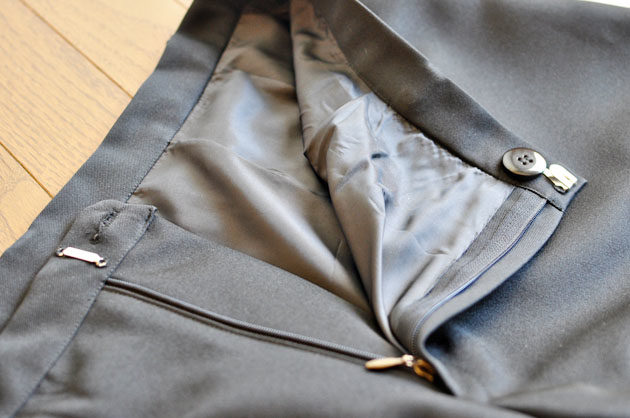
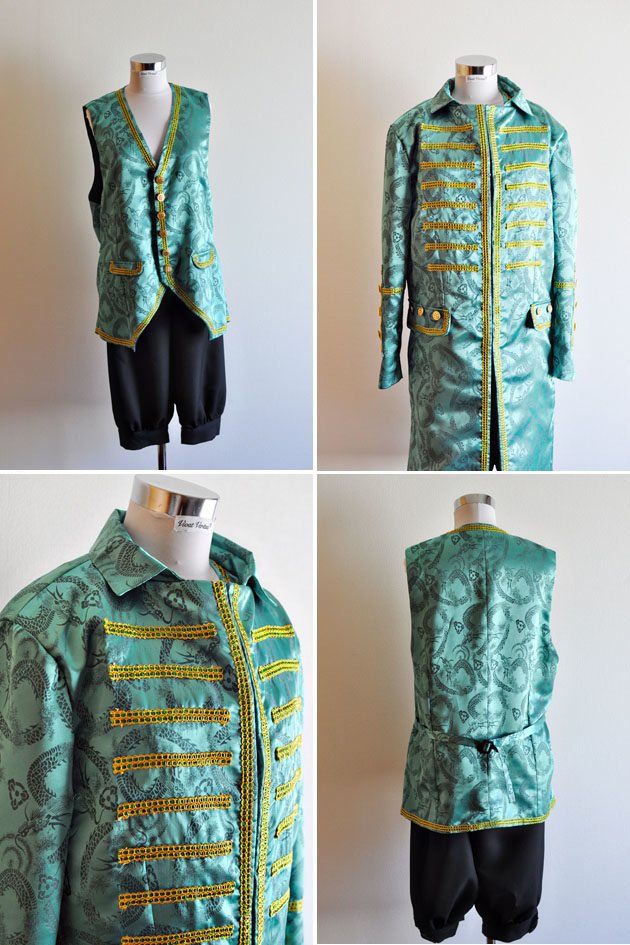 Tada! Ridiculously shinny vest and jacket set. I’m sure you can spot Cherubino from the miles away.
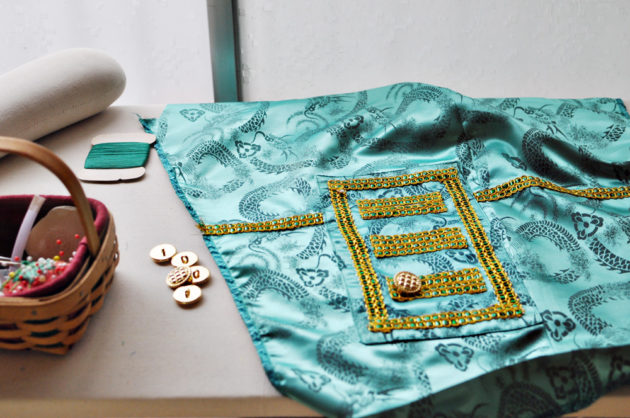
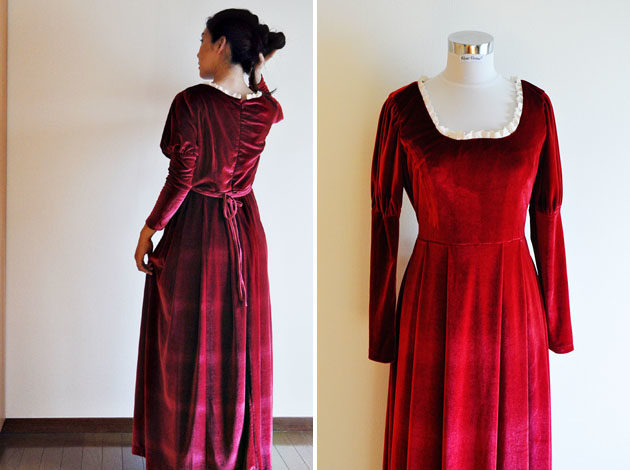
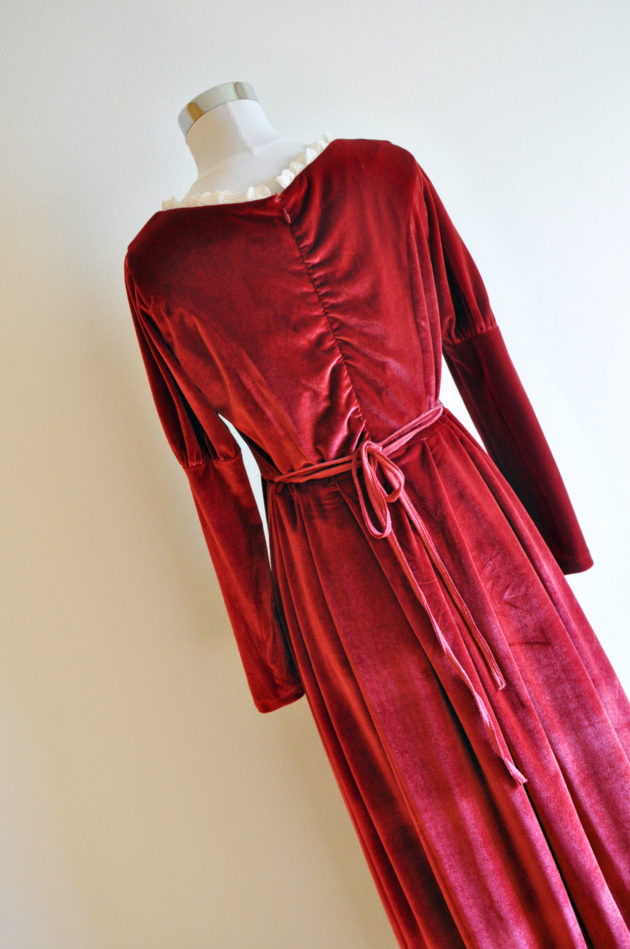
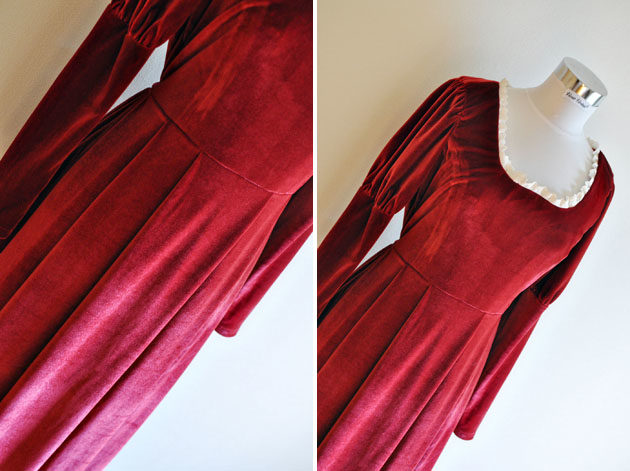
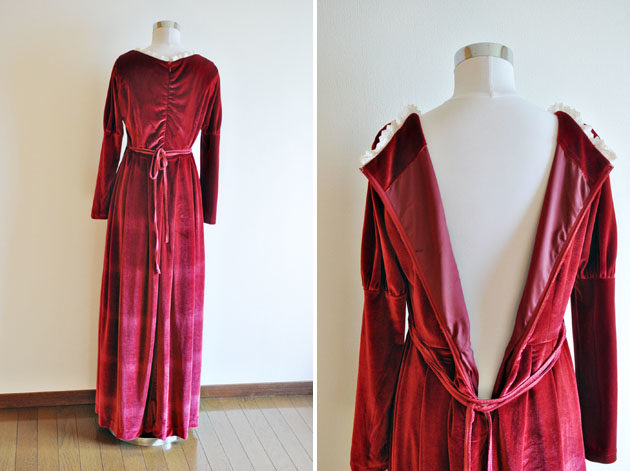
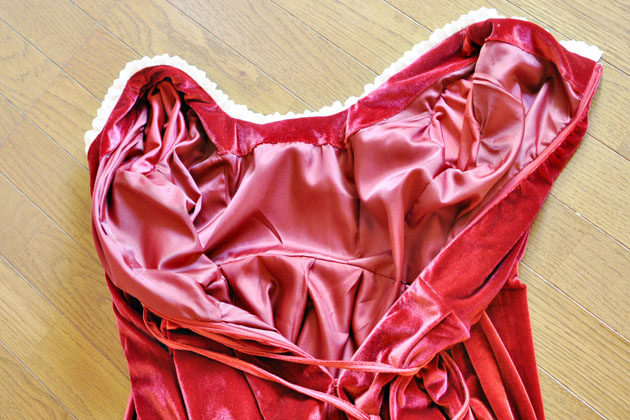
 I also made a costume for a customer who wants to do cosplay as a character from a video game, Parasite Eve. I don’t play video games and have no idea about
  It was simple to make but ended up very heavy because the fabric used was velvet. I used closed to three meters.
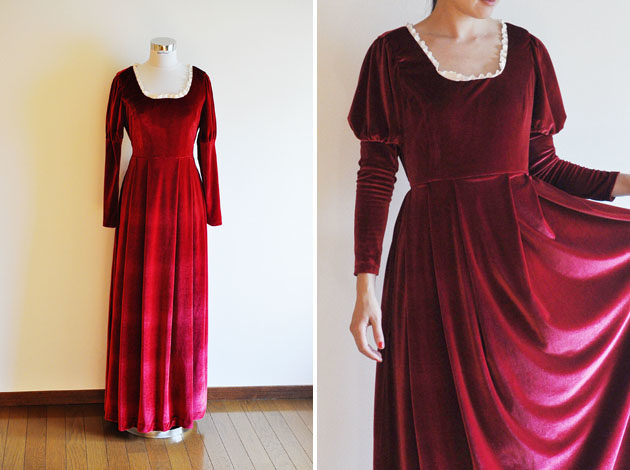

 After finishing up
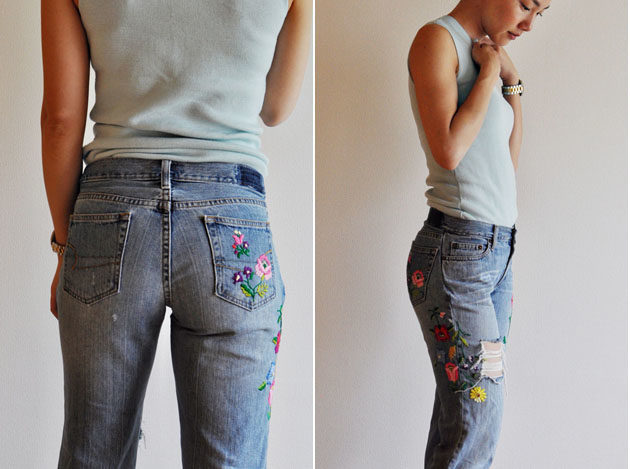
 I used this Japanese book, titled “
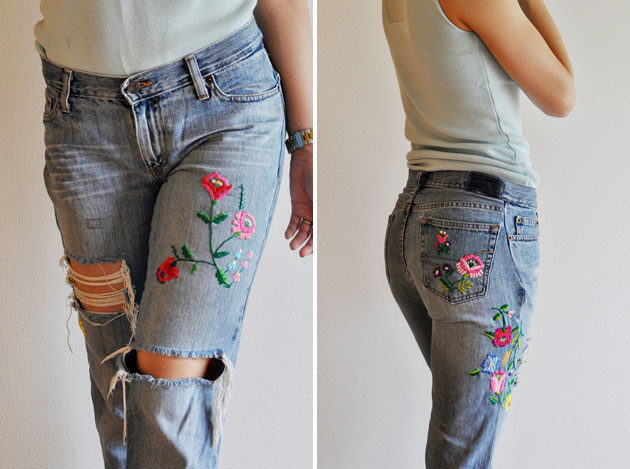
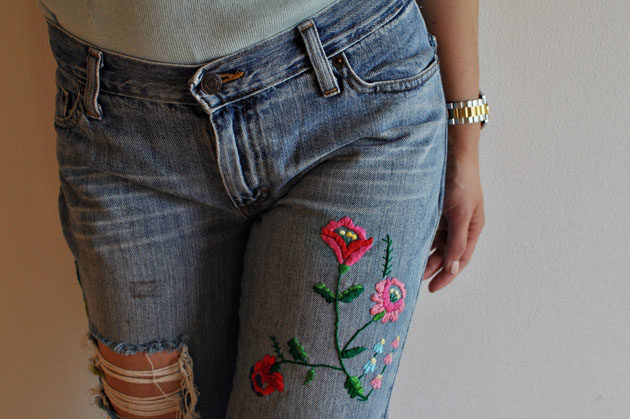
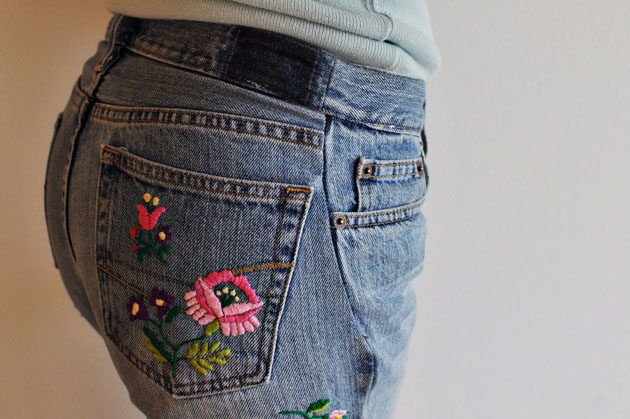
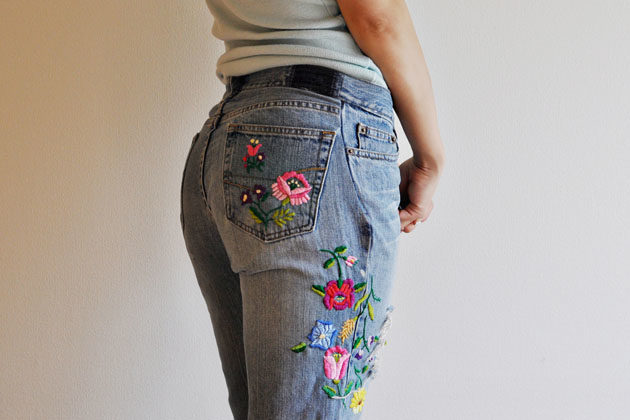
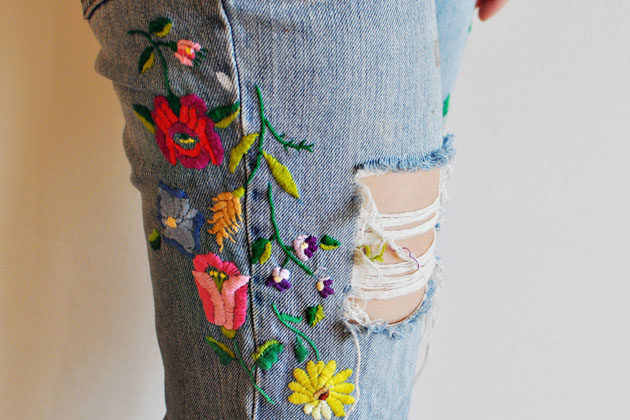
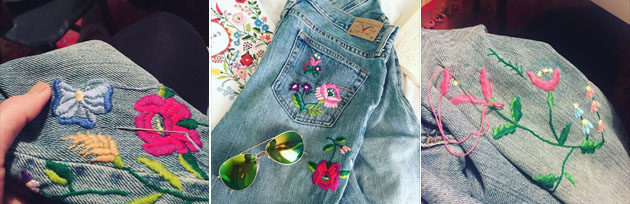 Here are some progress photos – from left,
  After I finish all the embroidery, I had to take in 12cm total of waist. I followed this
 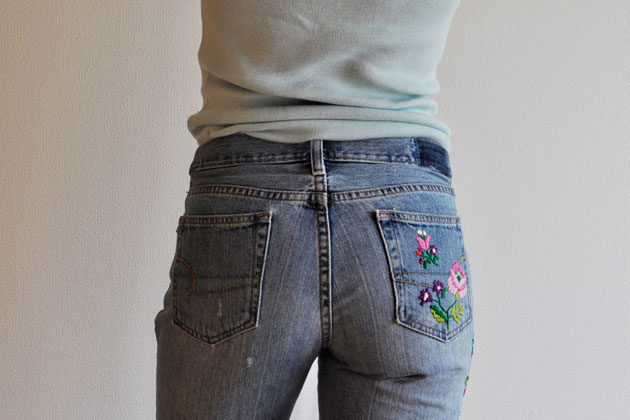 Sorry for the many butt photos! But I needed to show off the months of handy work:)