• Skip to primary navigation
  • Skip to main content
  • Skip to primary sidebar
  • Skip to footer

Looking for something?

Get in touch

  • Email
  • Facebook
  • Instagram
  • Pinterest
  • Twitter
  • YouTube

Vivat Veritas

Custom Wedding Dress & Kimono Upcycled Clothes | オーダーメイドウェディングドレス&着物ドレス

  • Home
  • About
    • Press
    • Collaborations
  • Blog
  • Bridal
    • Lovely Words
    • Price List
  • Sewing Class
  • Kimono Dress
    • MADE-TO-ORDER BUSTIERS
  • Contact
  • Location
  • 日本語
/ Blog

Blog

iCandy Guest Post – Fun in the Sun{dress}

July 3, 2008 By Chie

Hello! My name is Chie, and I blog over at Vivat Veritas about handmade clothes, sewing and my various fashion inspiration. I also sell my handmade goodies at my etsy shop. I’m so excited to be able to participate in iCandy handmade’s “Fun in the Sun” {dress} series! Summer is my favorite season. During the summer months I am always wearing light weight sun dresses. I live in Japan, and the summer months here can get quite steamy!

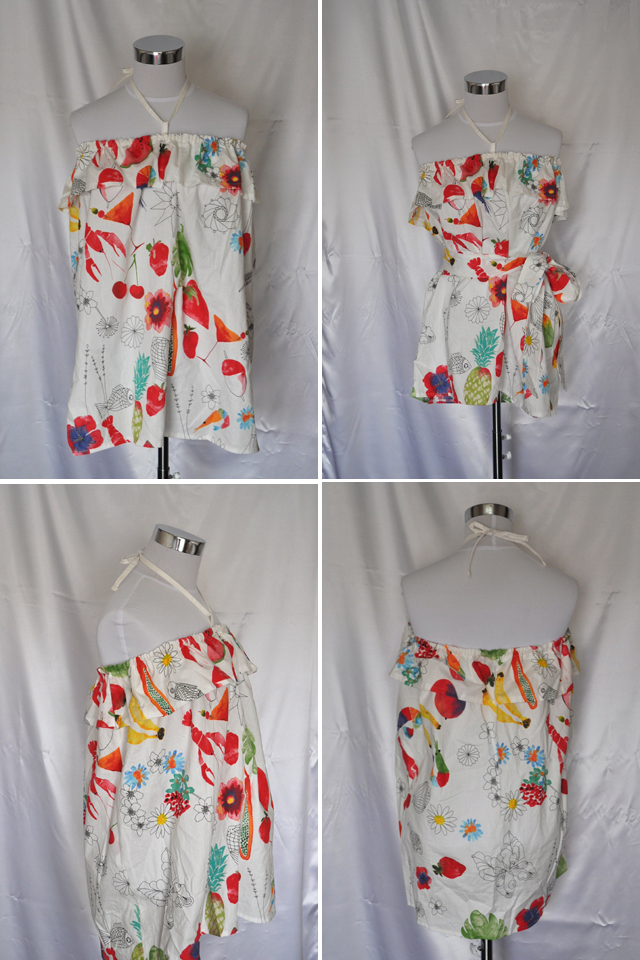
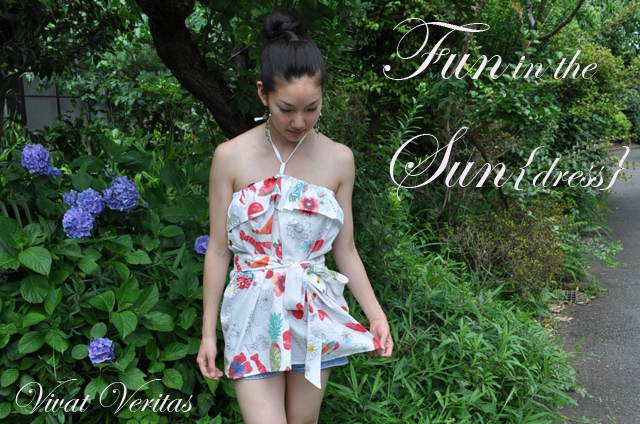
Today I’m sharing how to make this easy sundress/tunic.  This is great as a beach cover-up, something to throw on top of a bathing suit.
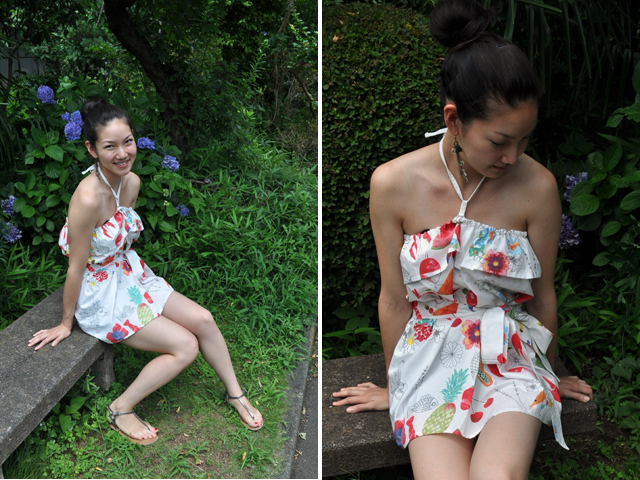
I found this cute fabric at Ikea the other day. It was 499 yen (about 6USD) per meter, and I just had to grab it! The fabric has pineapples, fish, lobsters, cherries and other fun sea animals all over the white background. It’s 100% cotton, which is great for hot weather, it both breathes and absorbs moisture!

This dress is really easy as you can make it out of two rectangle fabrics. I love easy projects using rectangles, and if you are interested, check out my other tutorials for reversible paper bag skirt and poncho top🙂

I can think of many different variations of this dress: use two different color fabrics for dress and ruffle, add lace at the hemline, make a sash in contrasting color…etc.

❤Materials needed❤
– Fabric: I used 1 meter to make this tunic. If you want it to be longer, you would want 1.5 meter to 2 meters.
– Thread
– Elastic band

❤Measurements needed❤
– Your hip measurement
– Your high bust measurement

❤Instruction❤

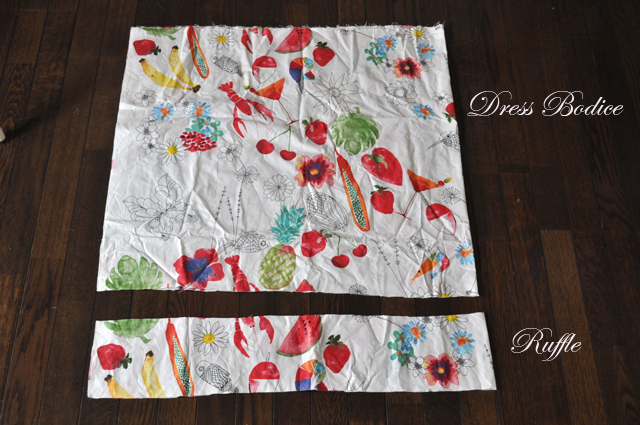
1) Cut fabric – You need two rectangles, one for the dress portion, and the other for ruffle portion.
Dress: The width will be your hip multiplied by 1.5. The length should be whatever length you want the dress to be. I made mine 24″.
Ruffle: The width should the same as the dress width (your hip multiplied by 1.5). The length should be 5″.
2) Hem the ruffle bottom line.
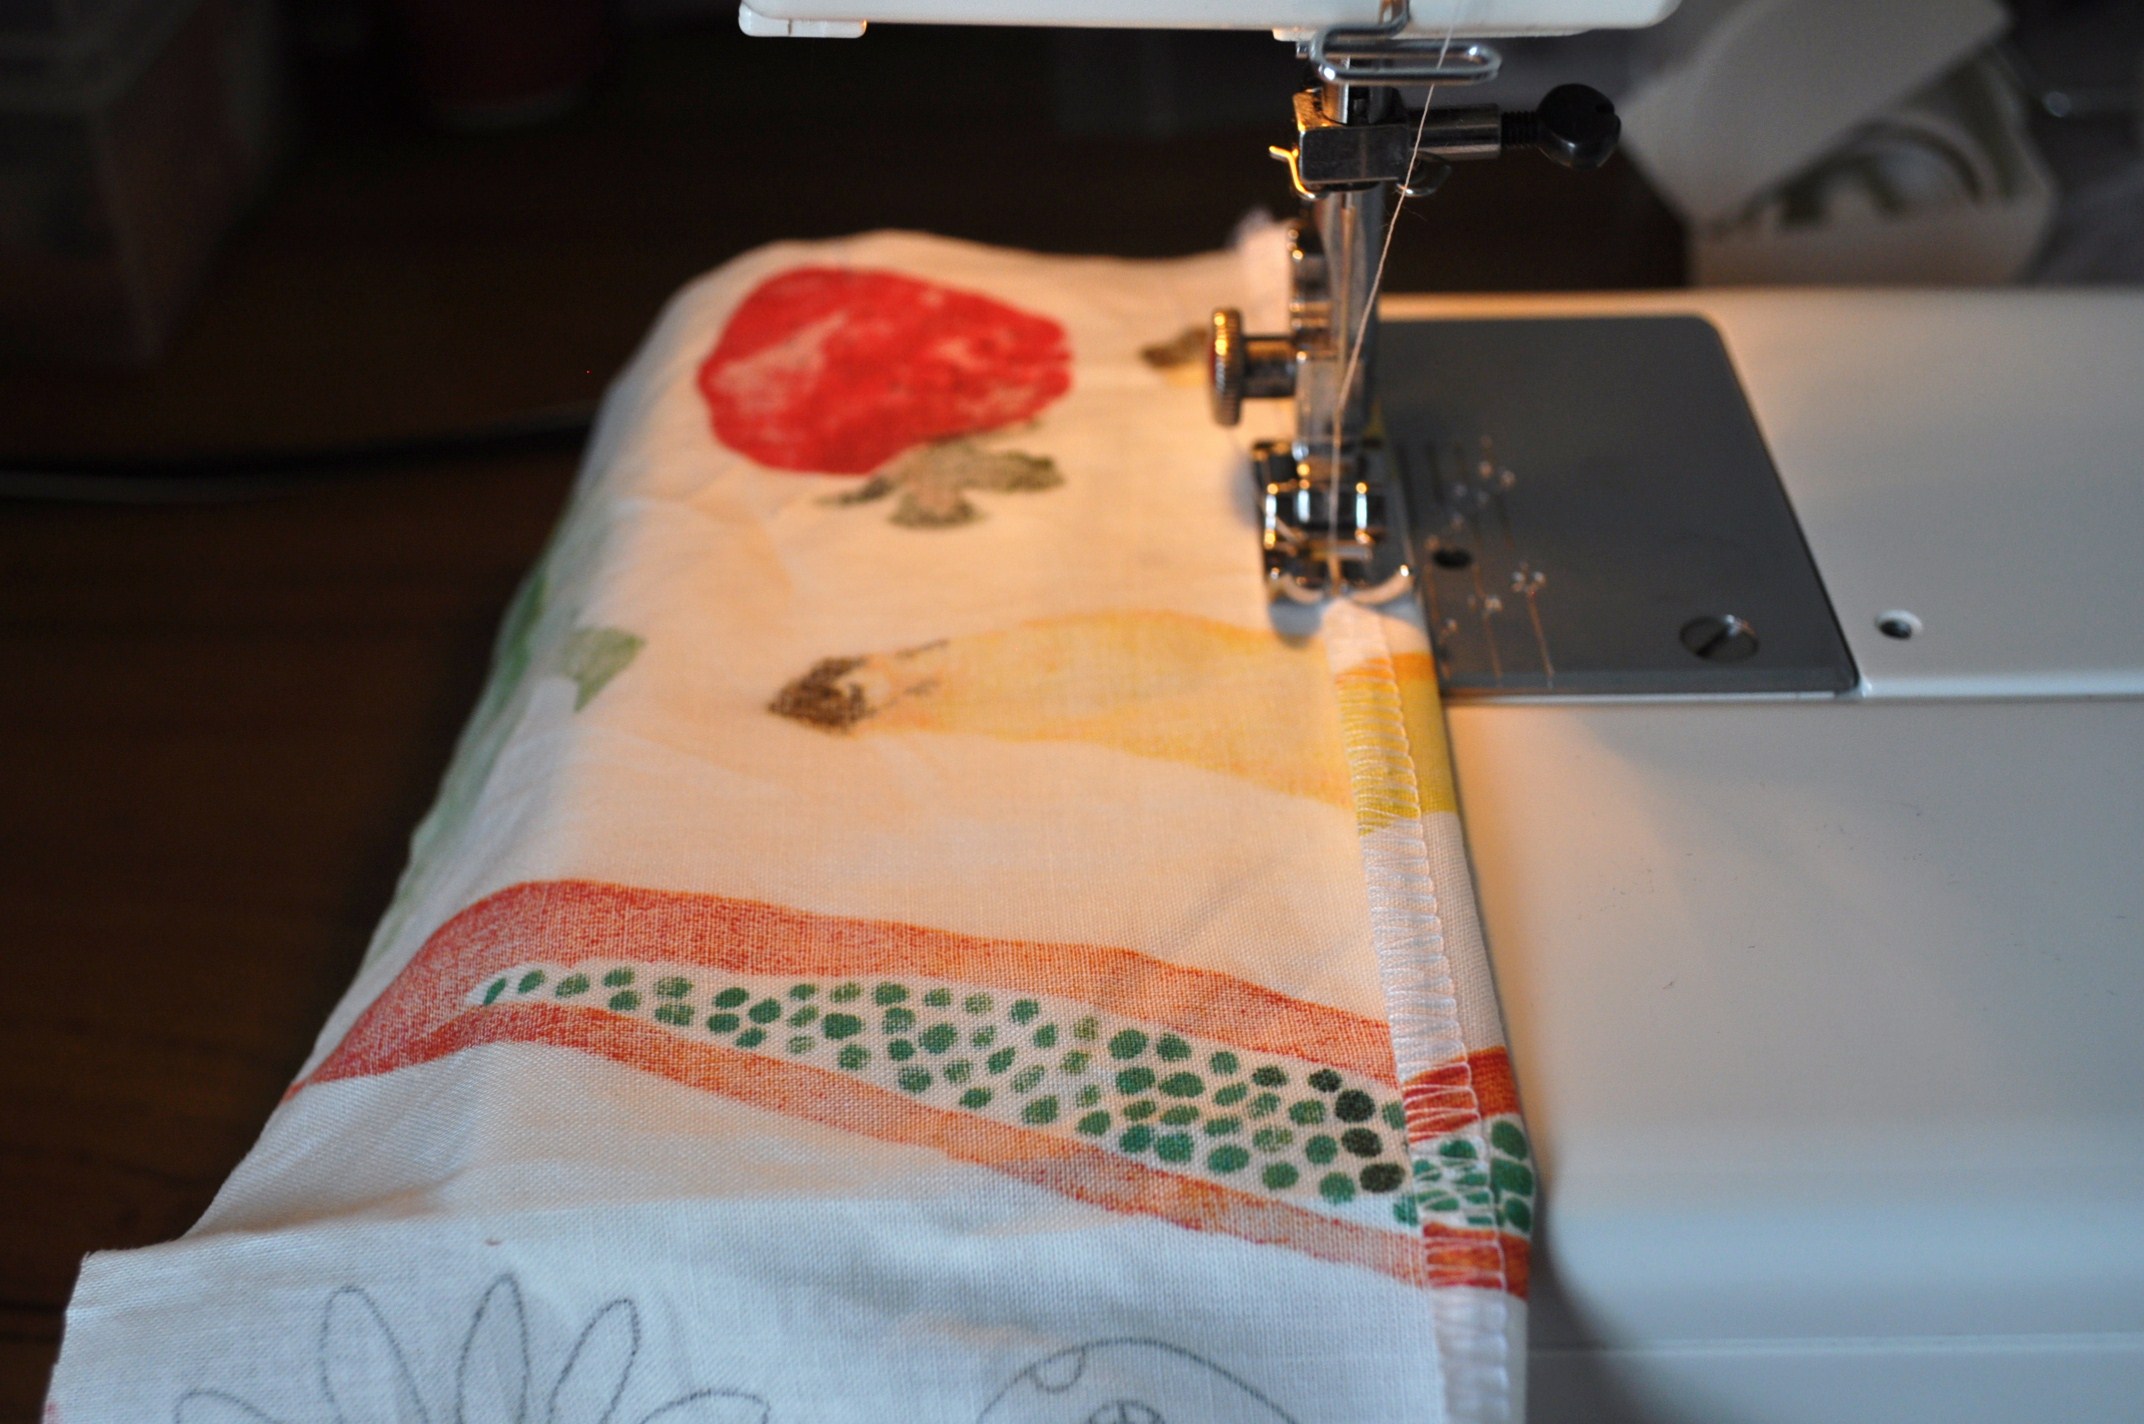
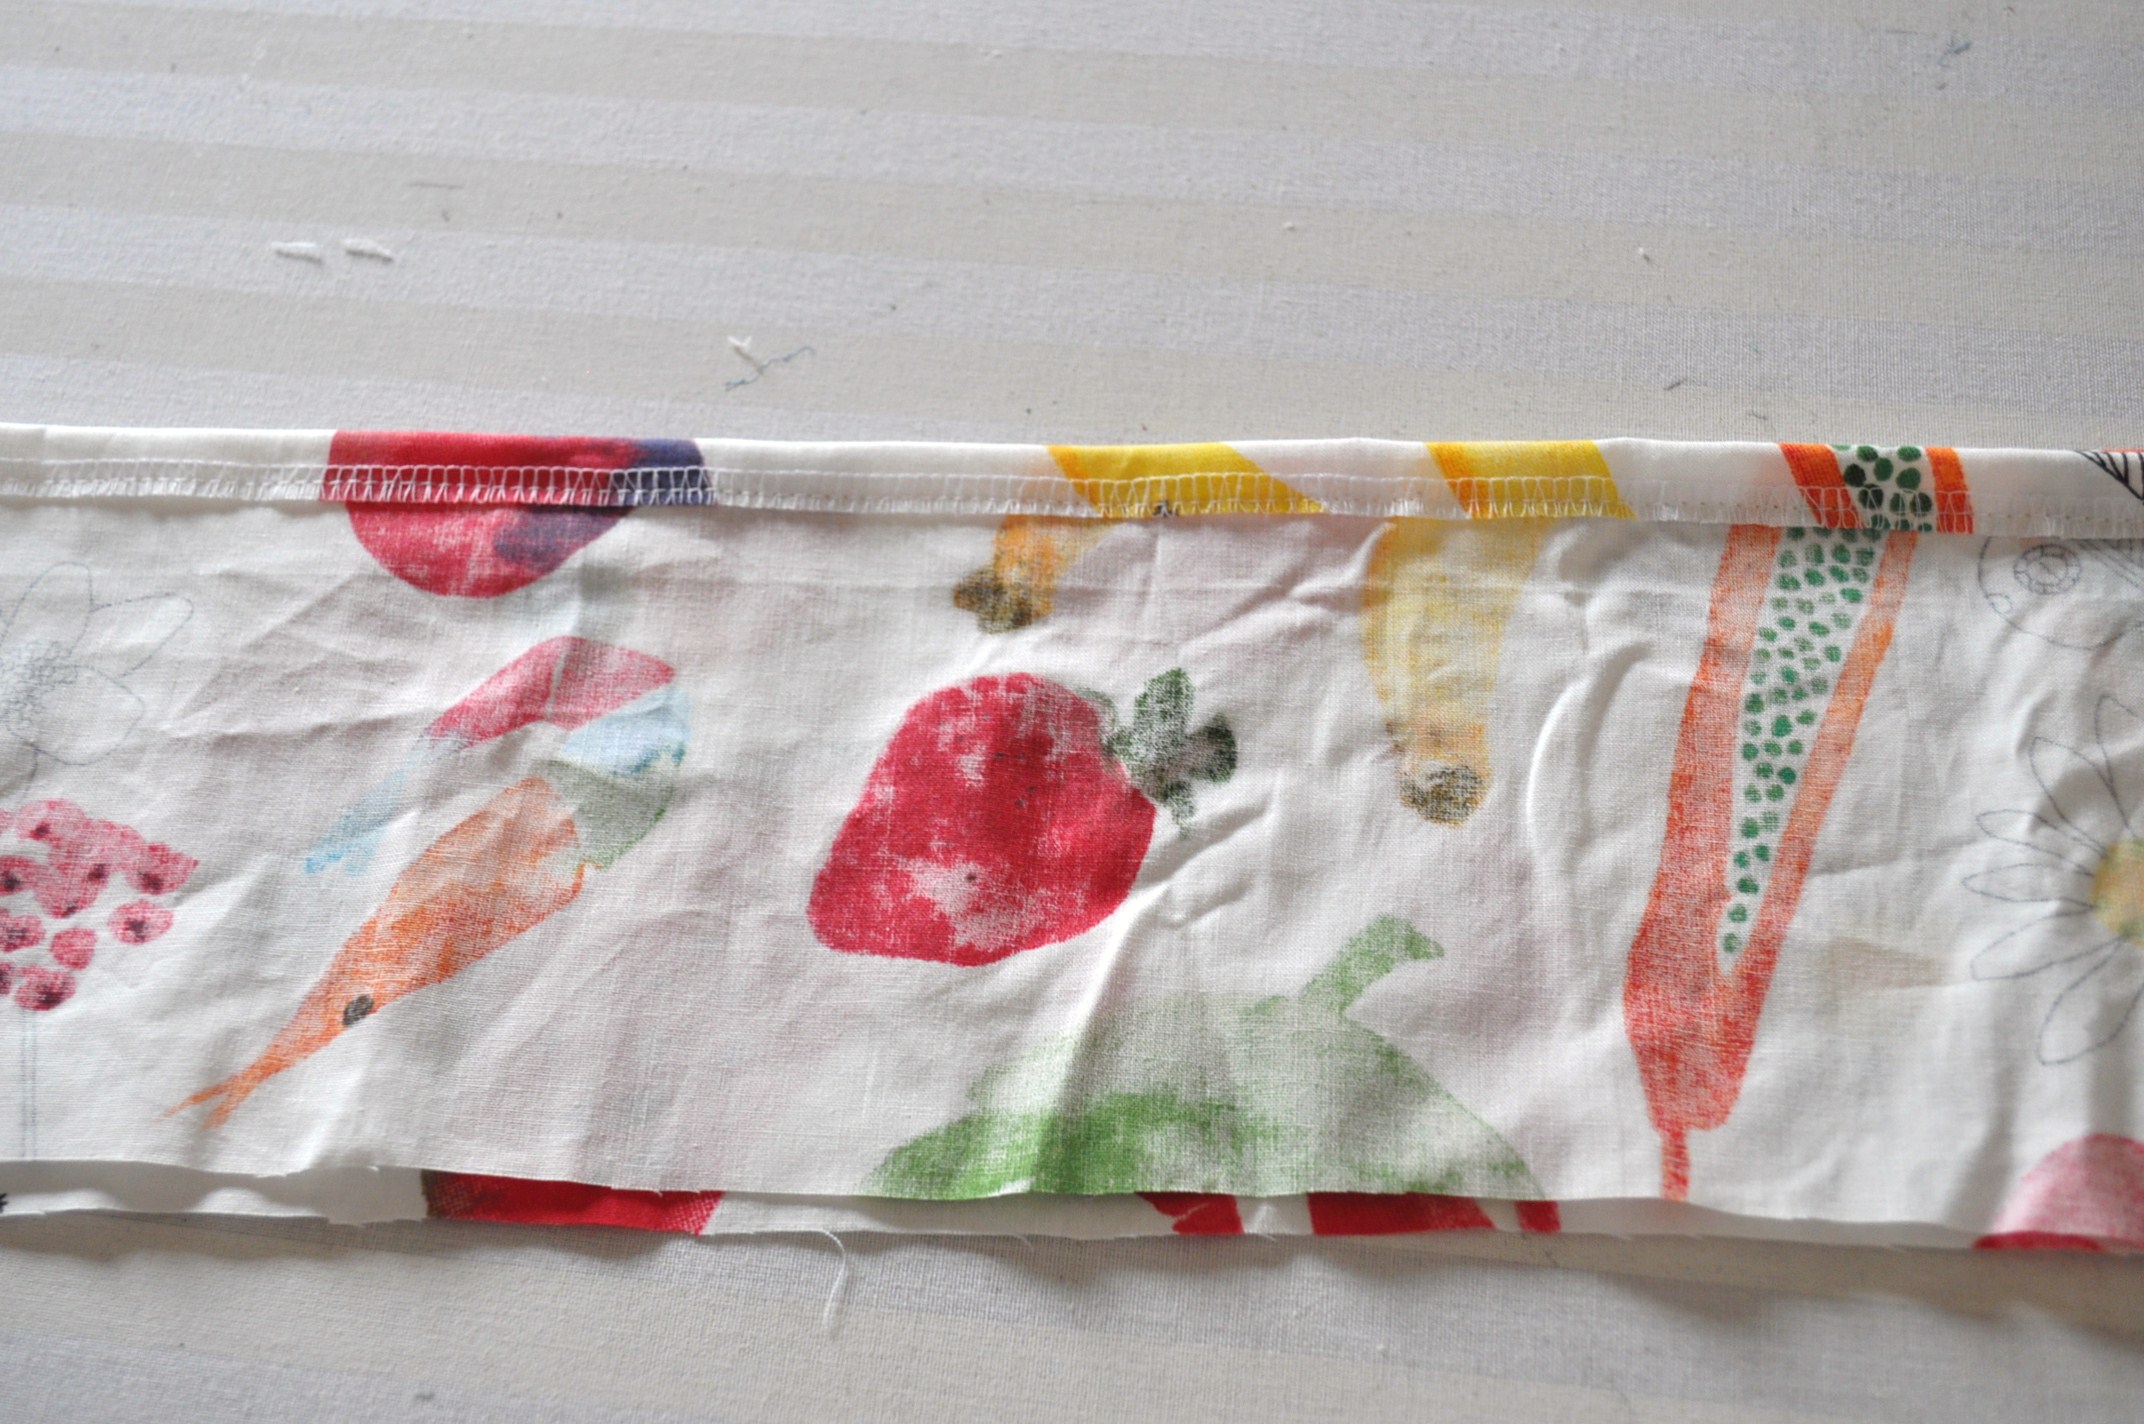
3) Place the right side of the ruffle on top of wrong side of the dress, and pin. Sew two parts together.
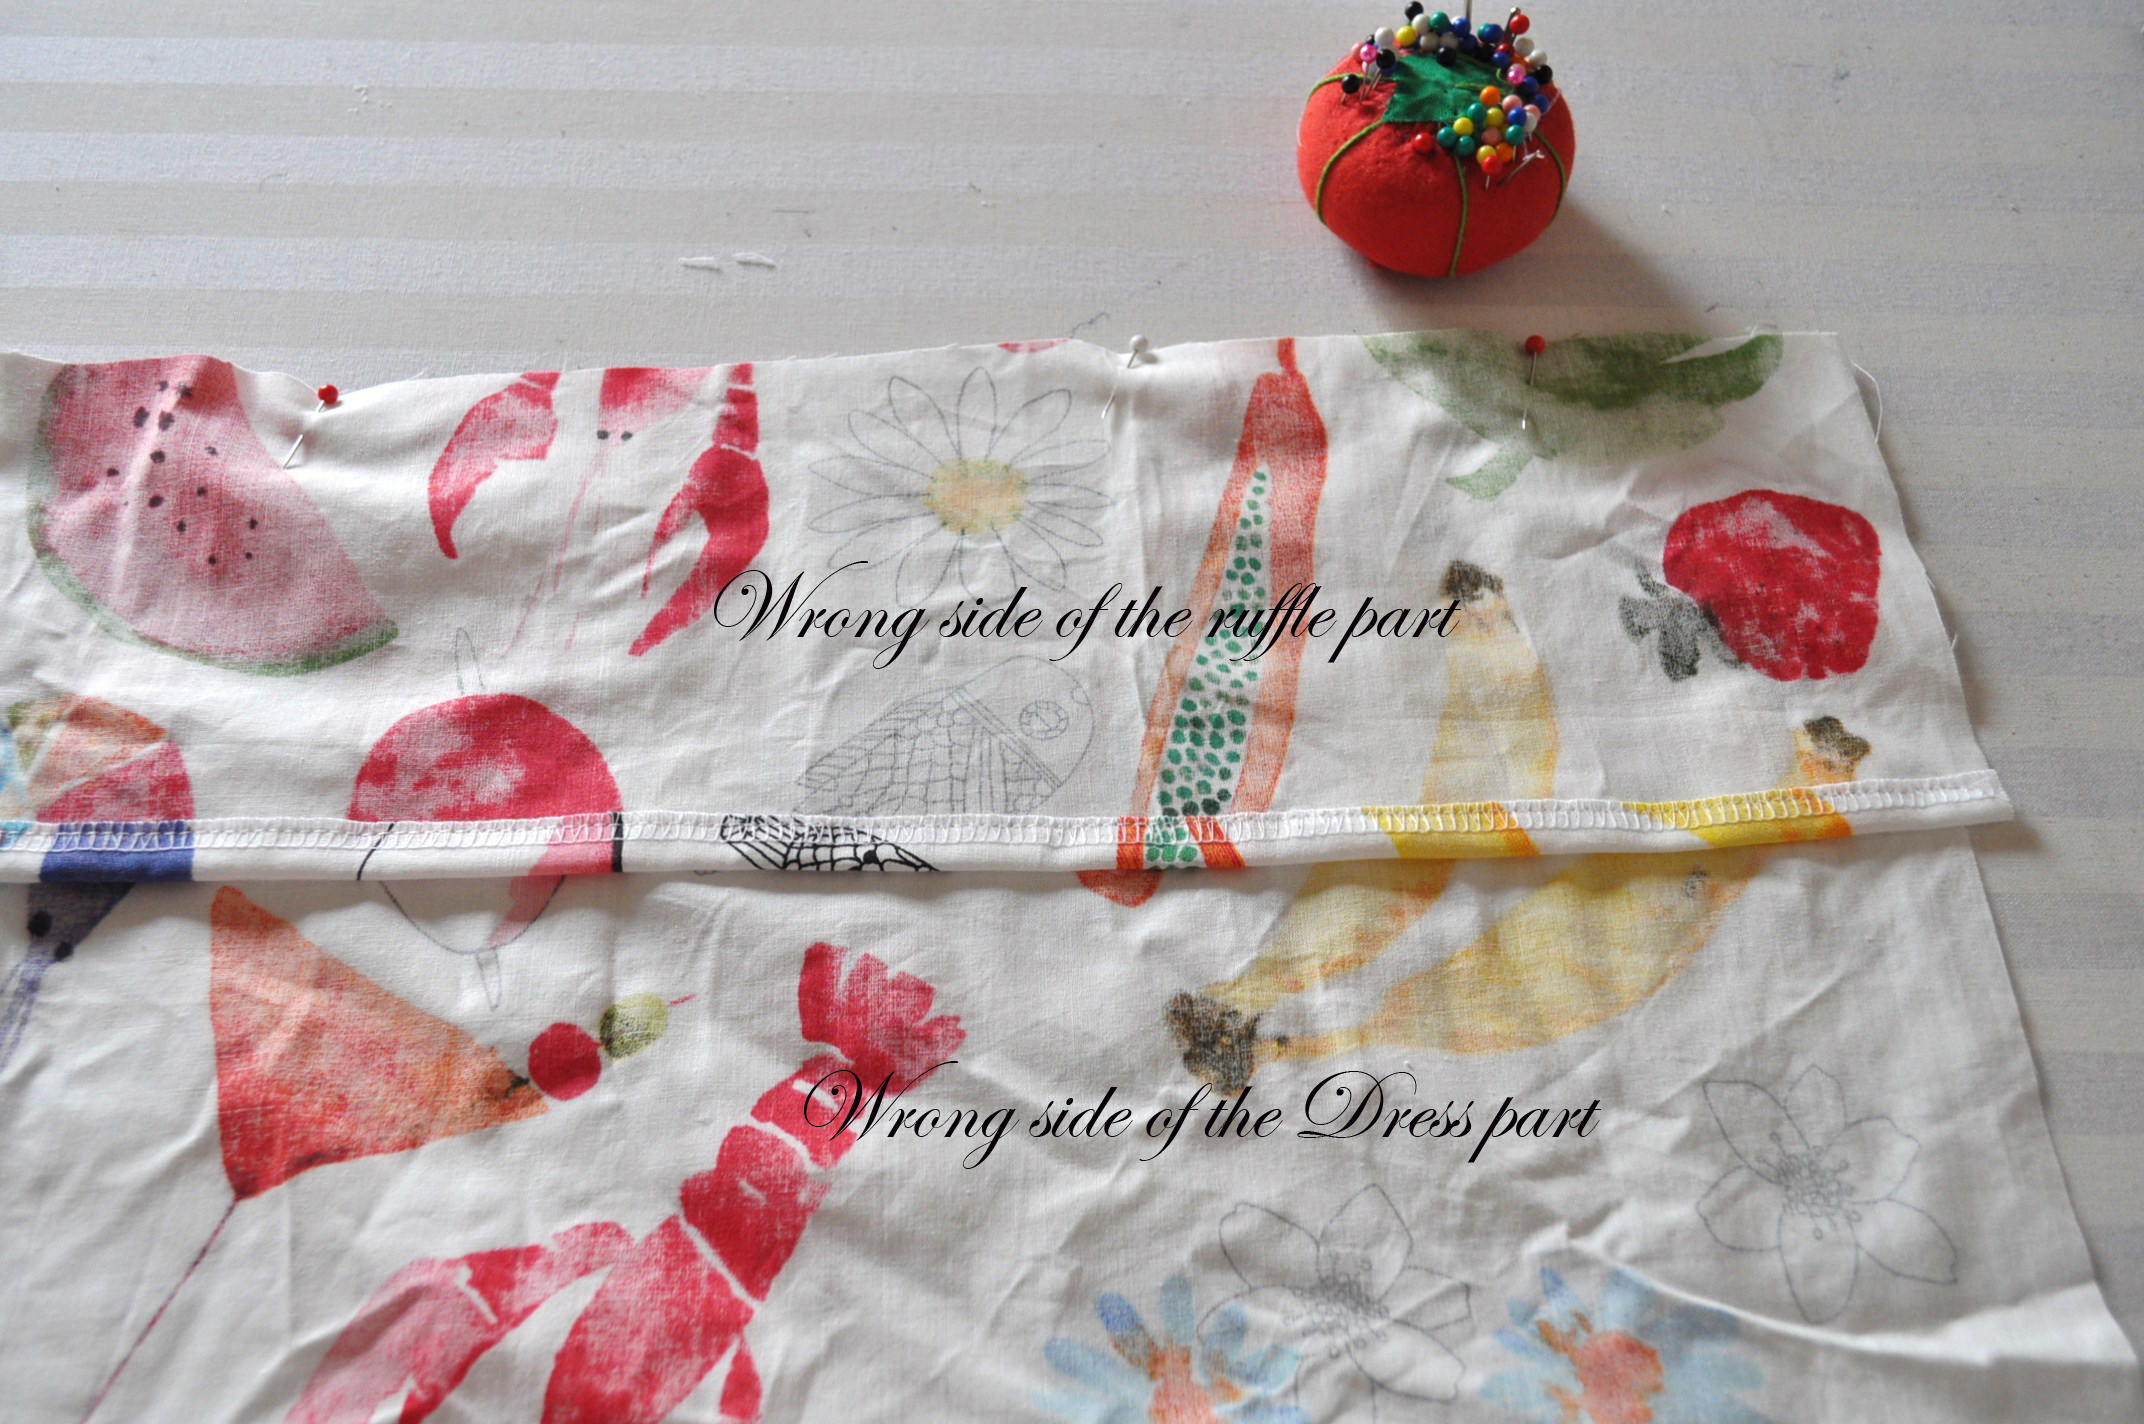

4) Turn so you see the right side of the ruffle on top of the right side of dress. Iron.
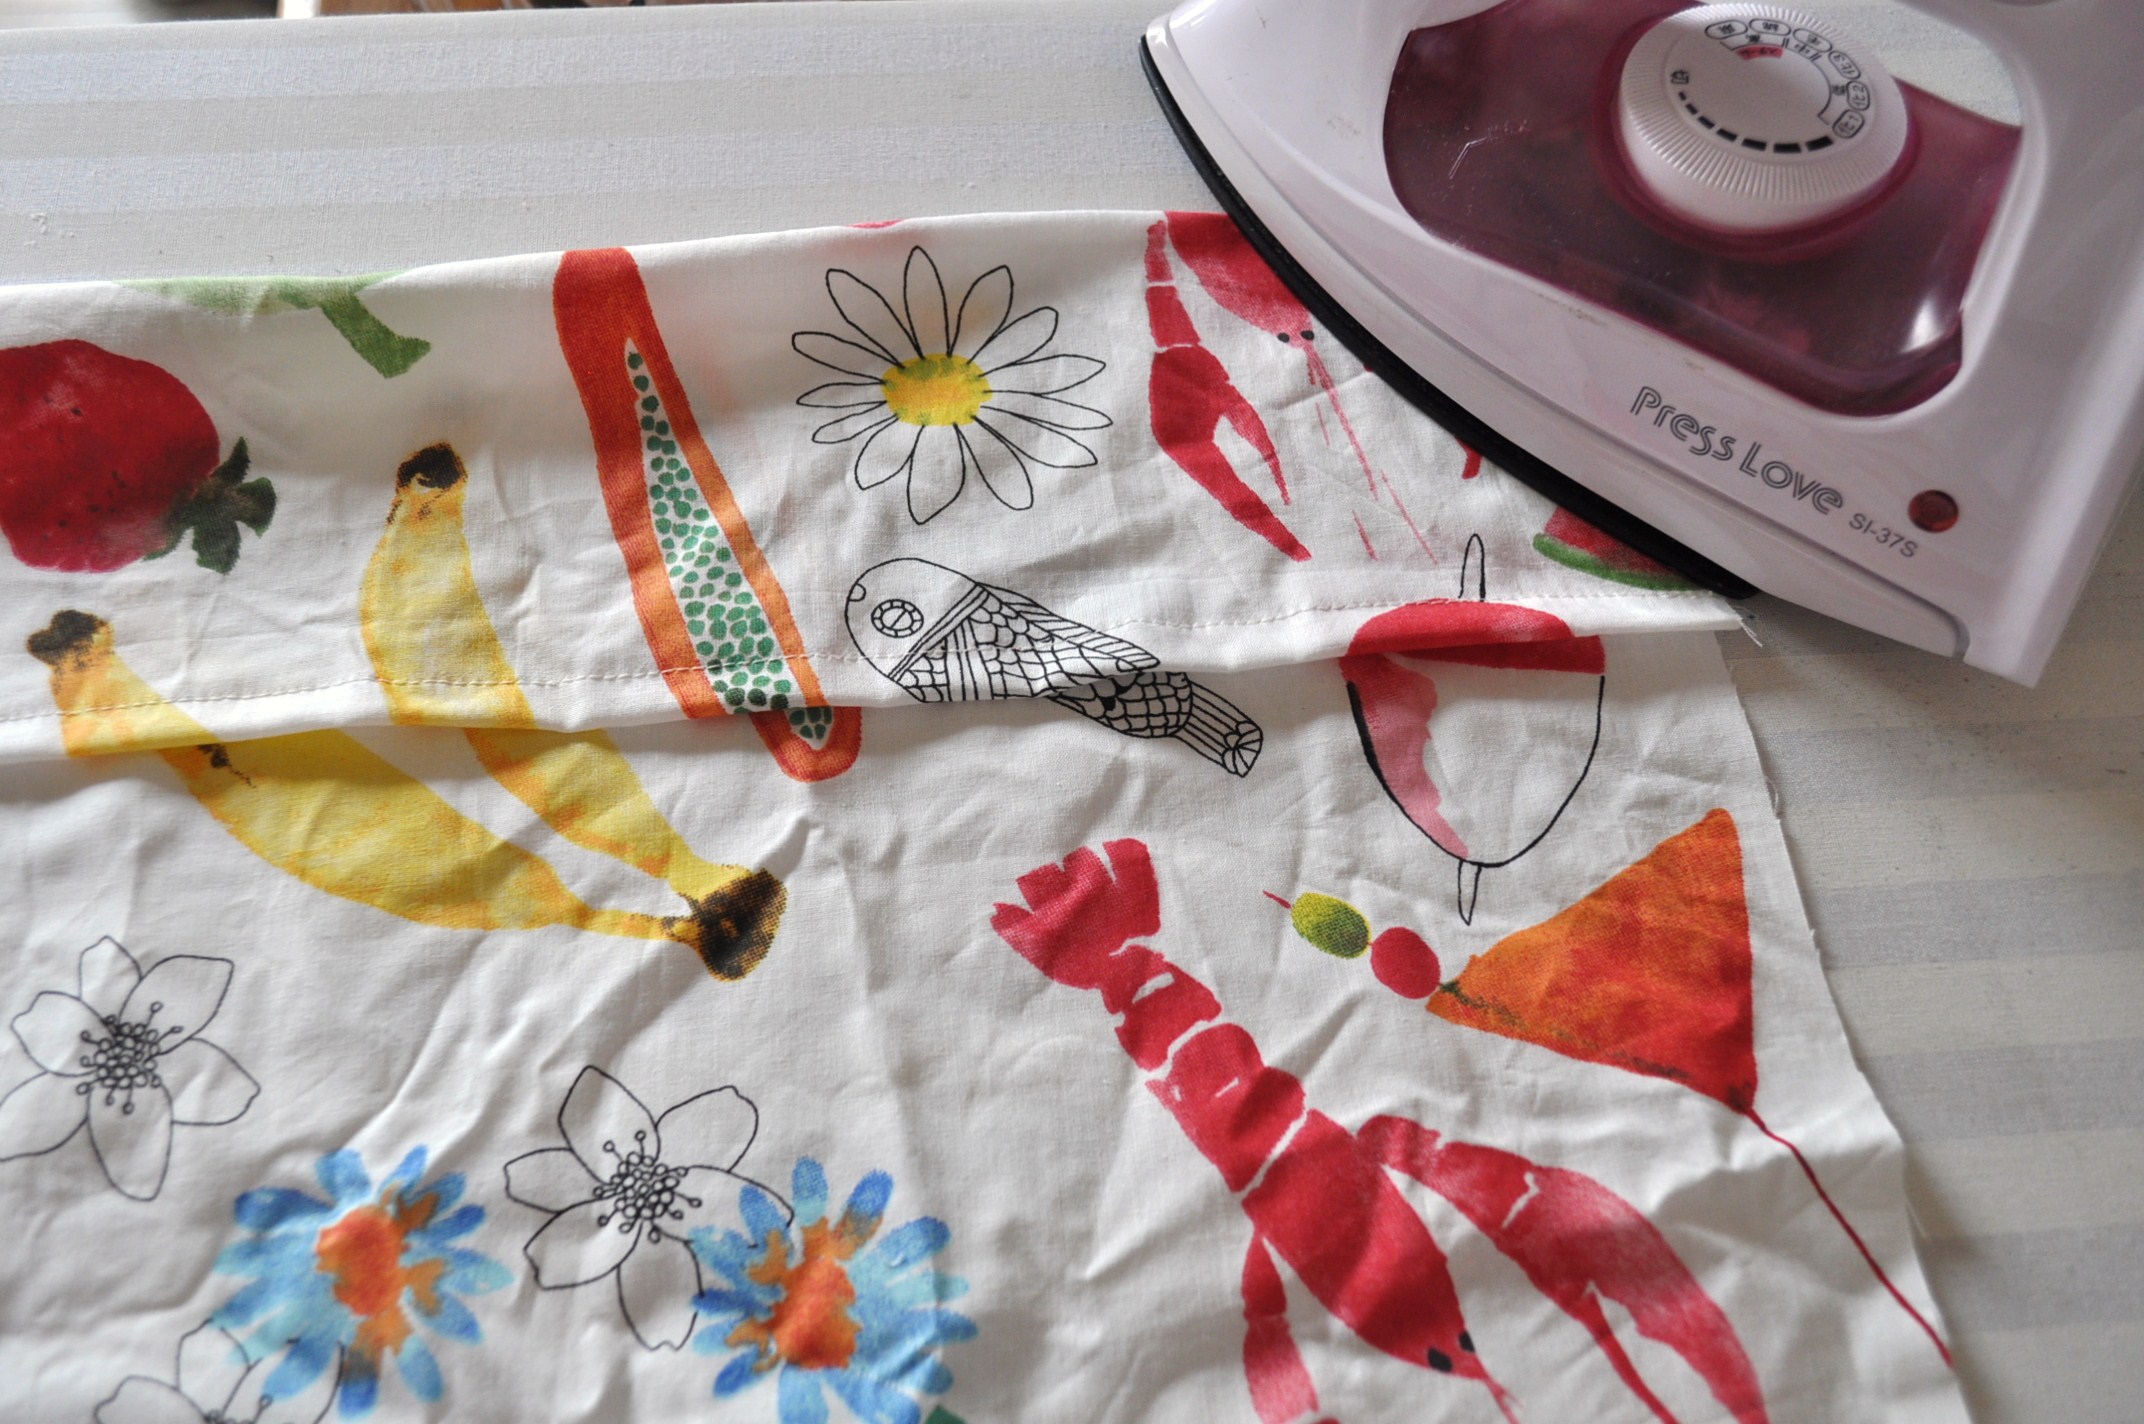
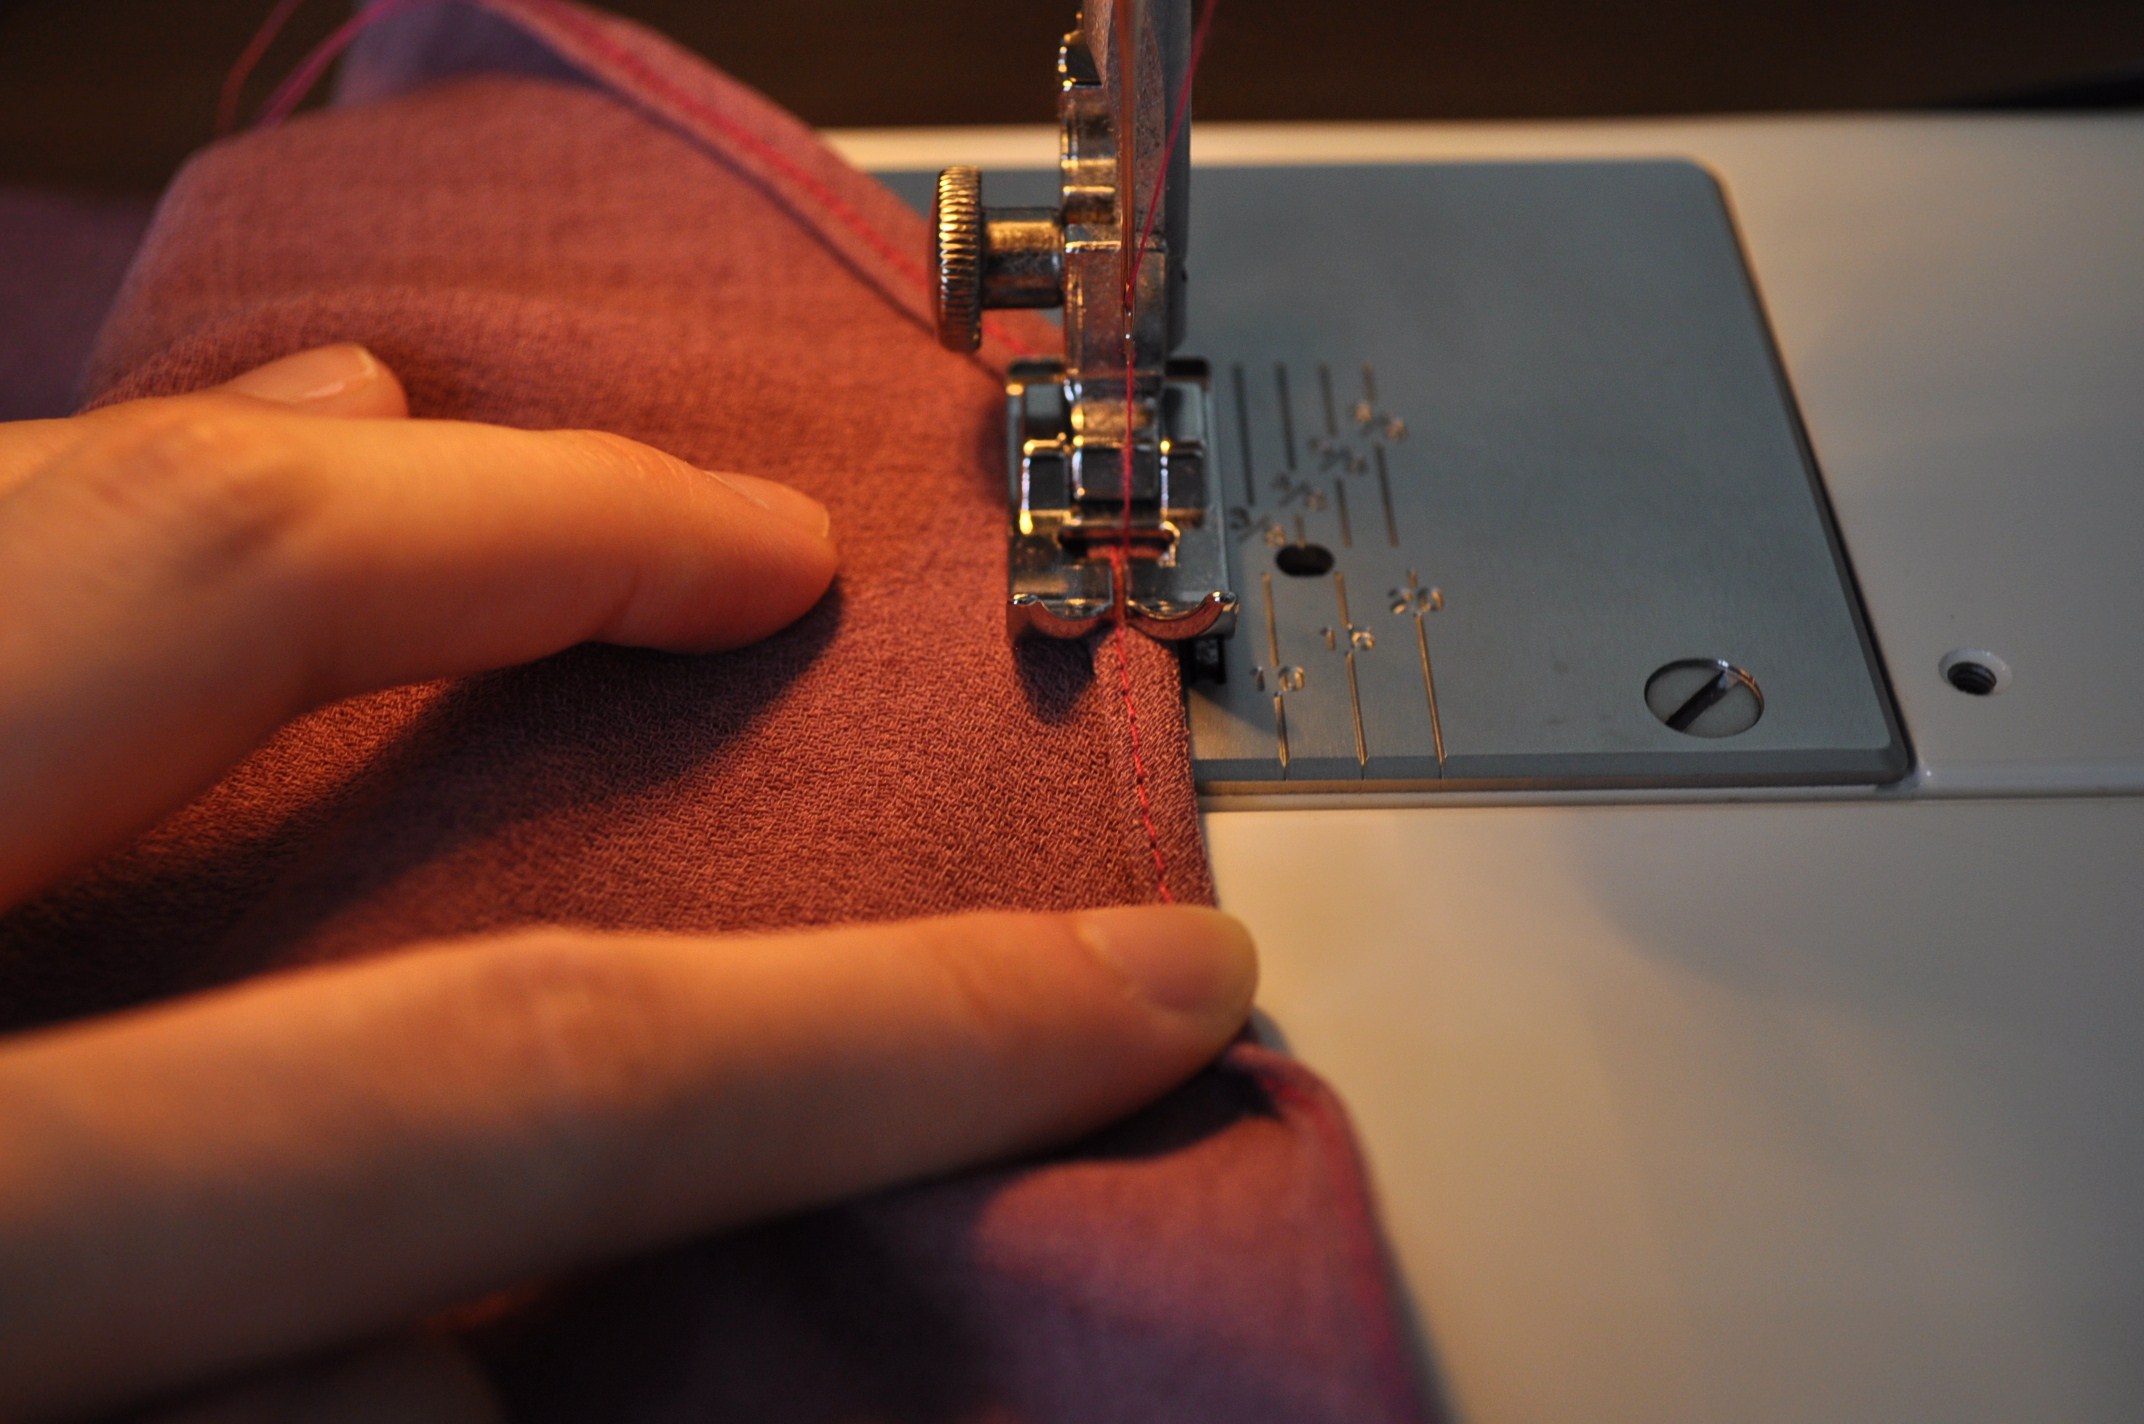
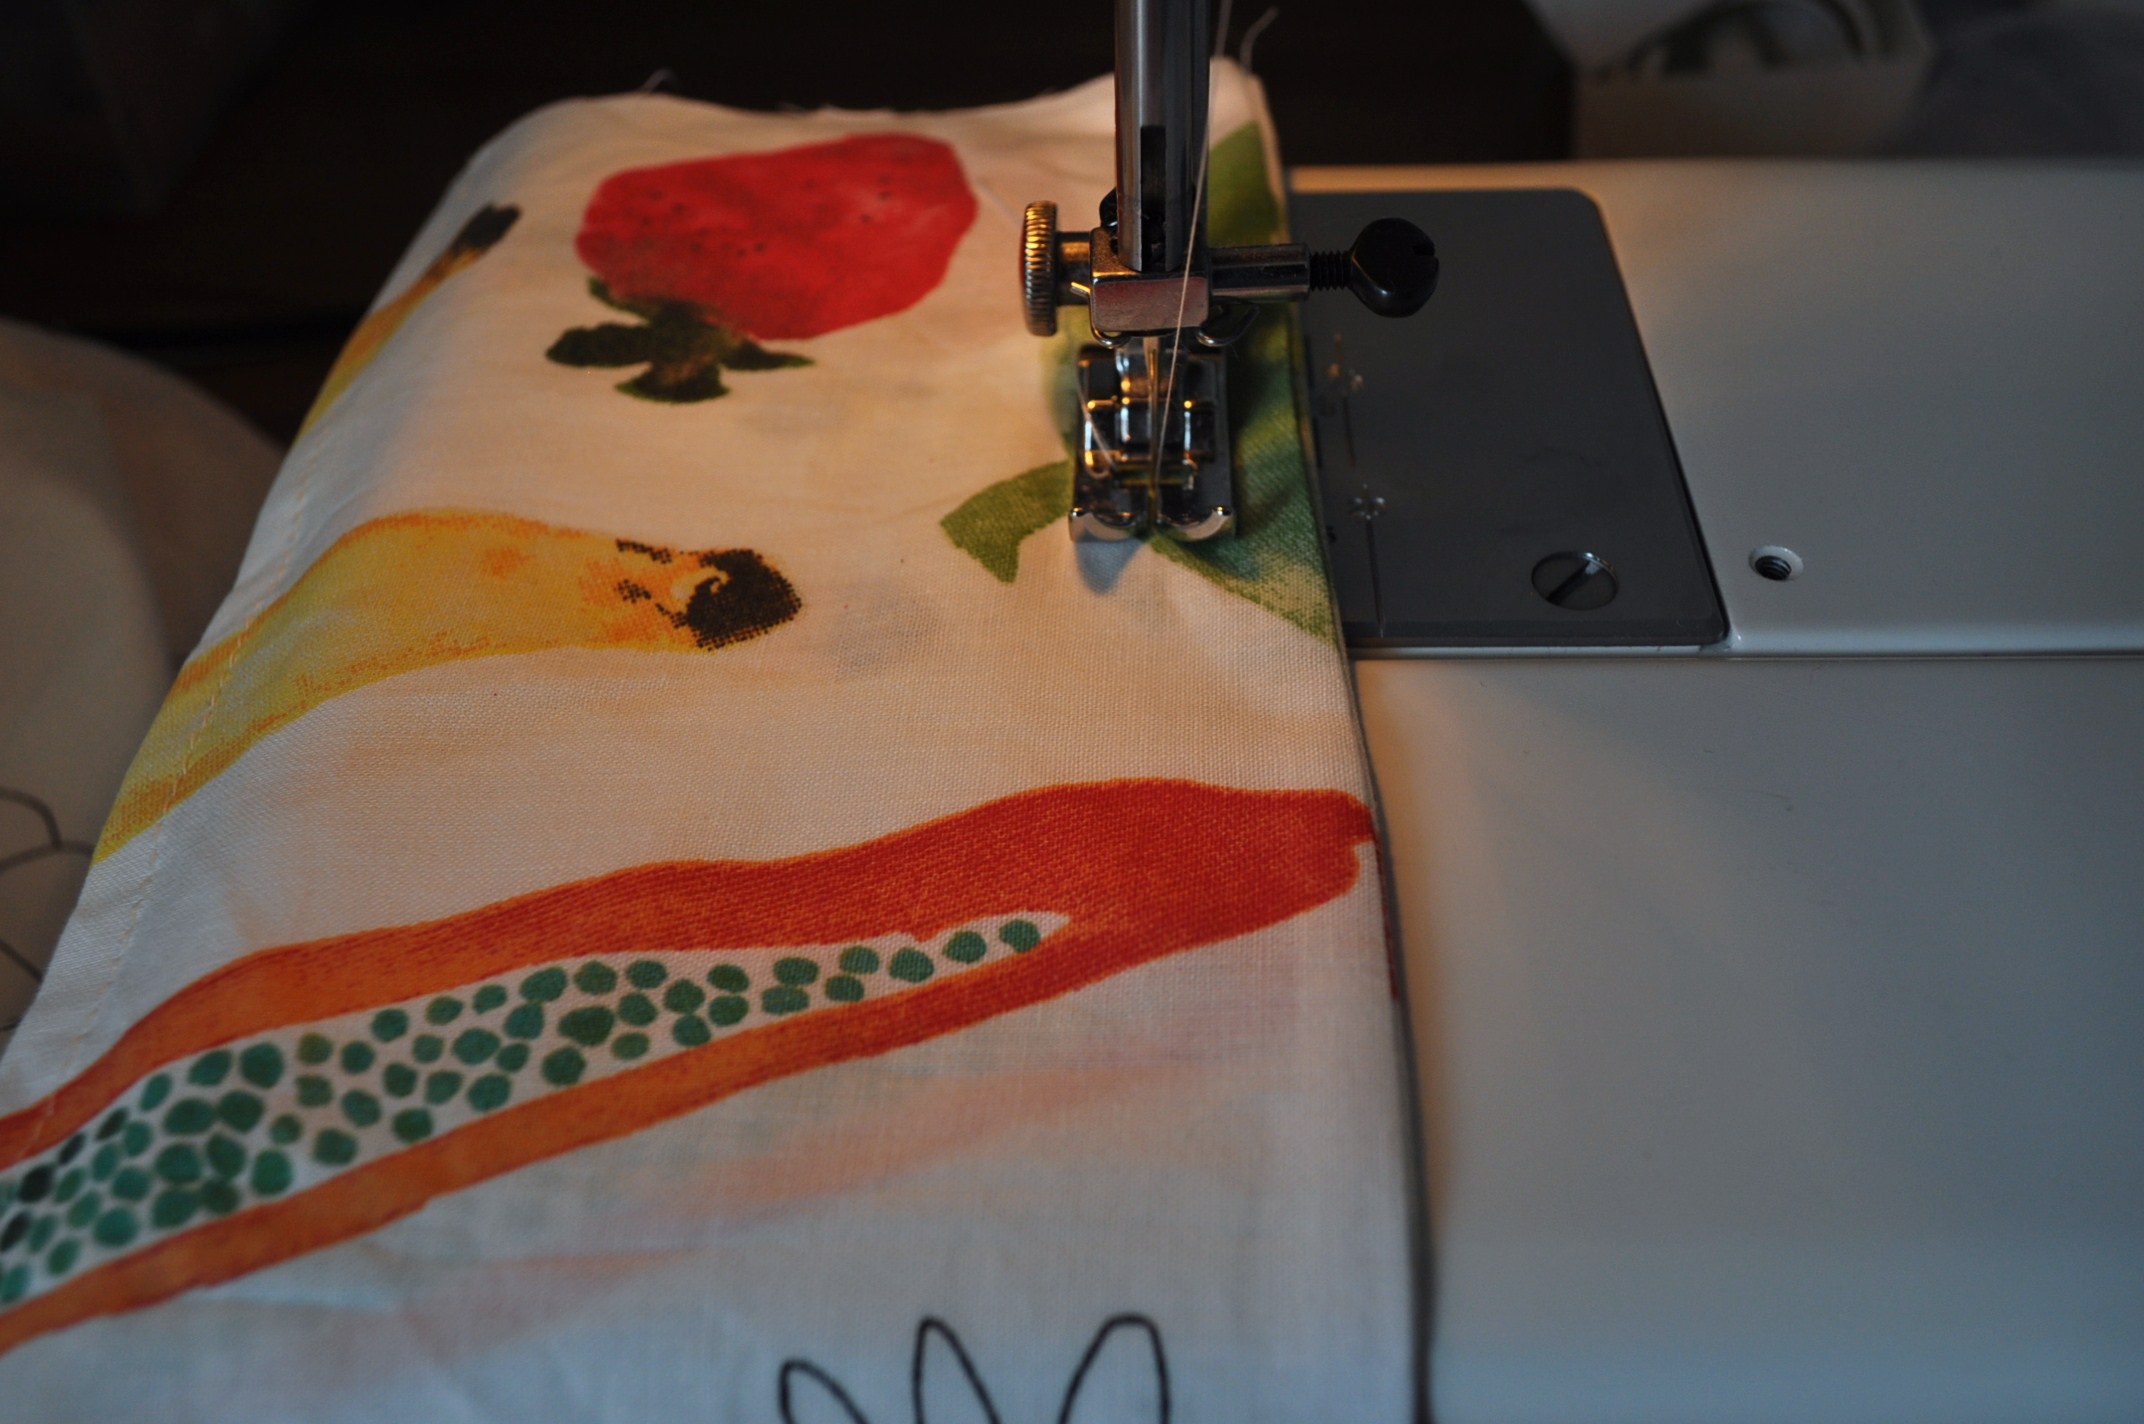
5) Sew a straight line from 0.5″ from the top to create a loop for elastic band to go in.
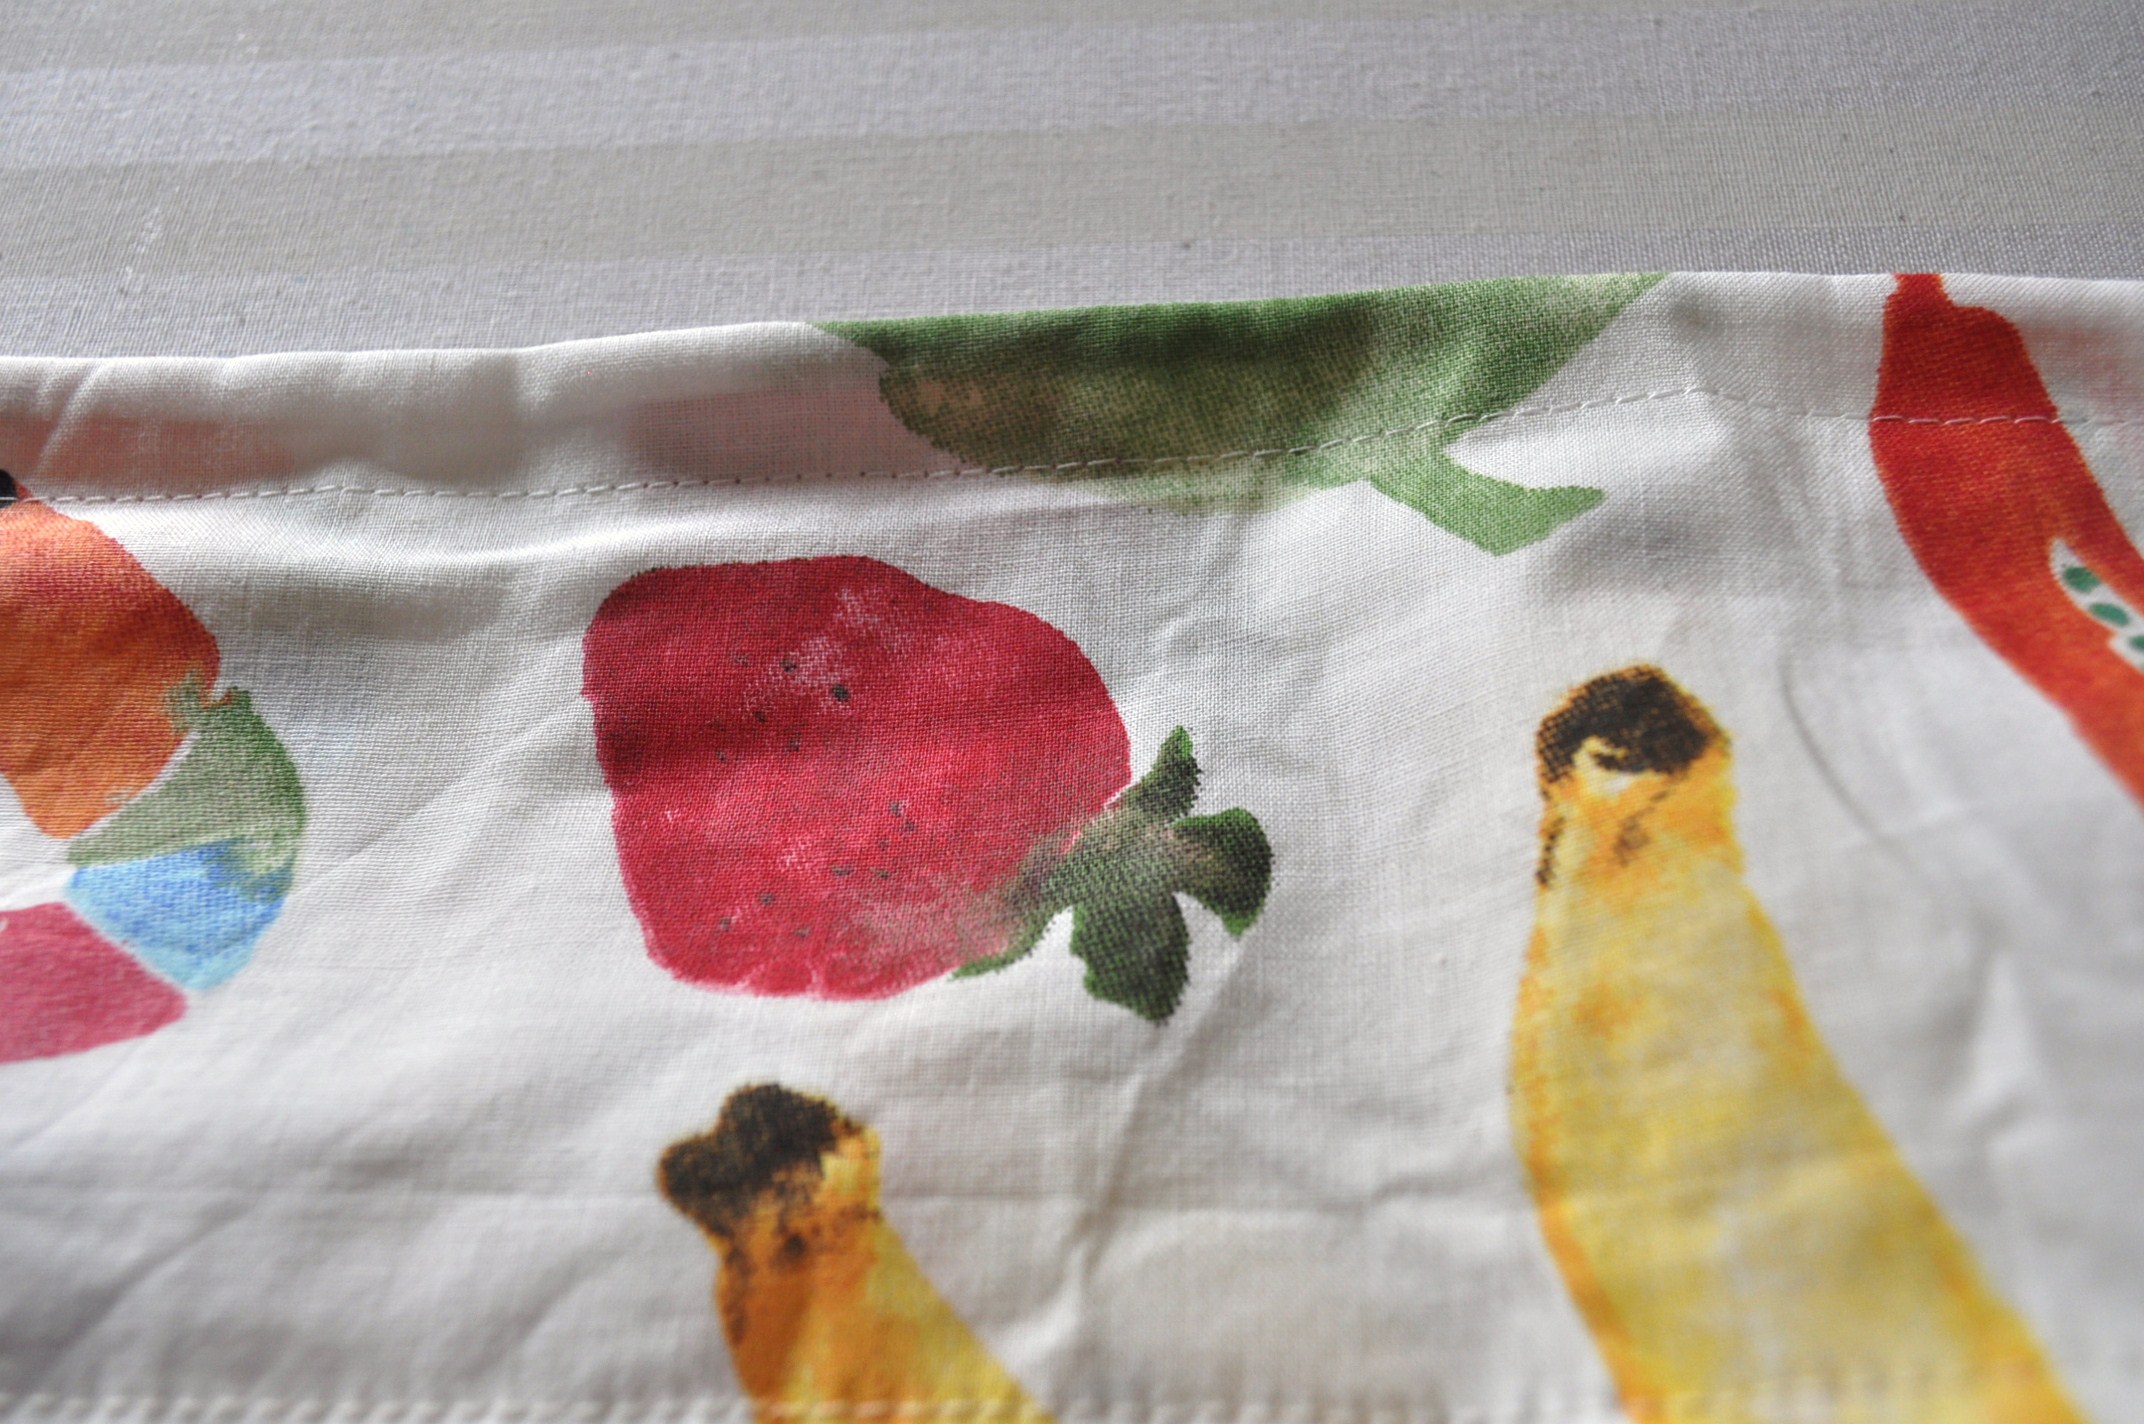
6) Cut an elastic band for your high bust measurement.
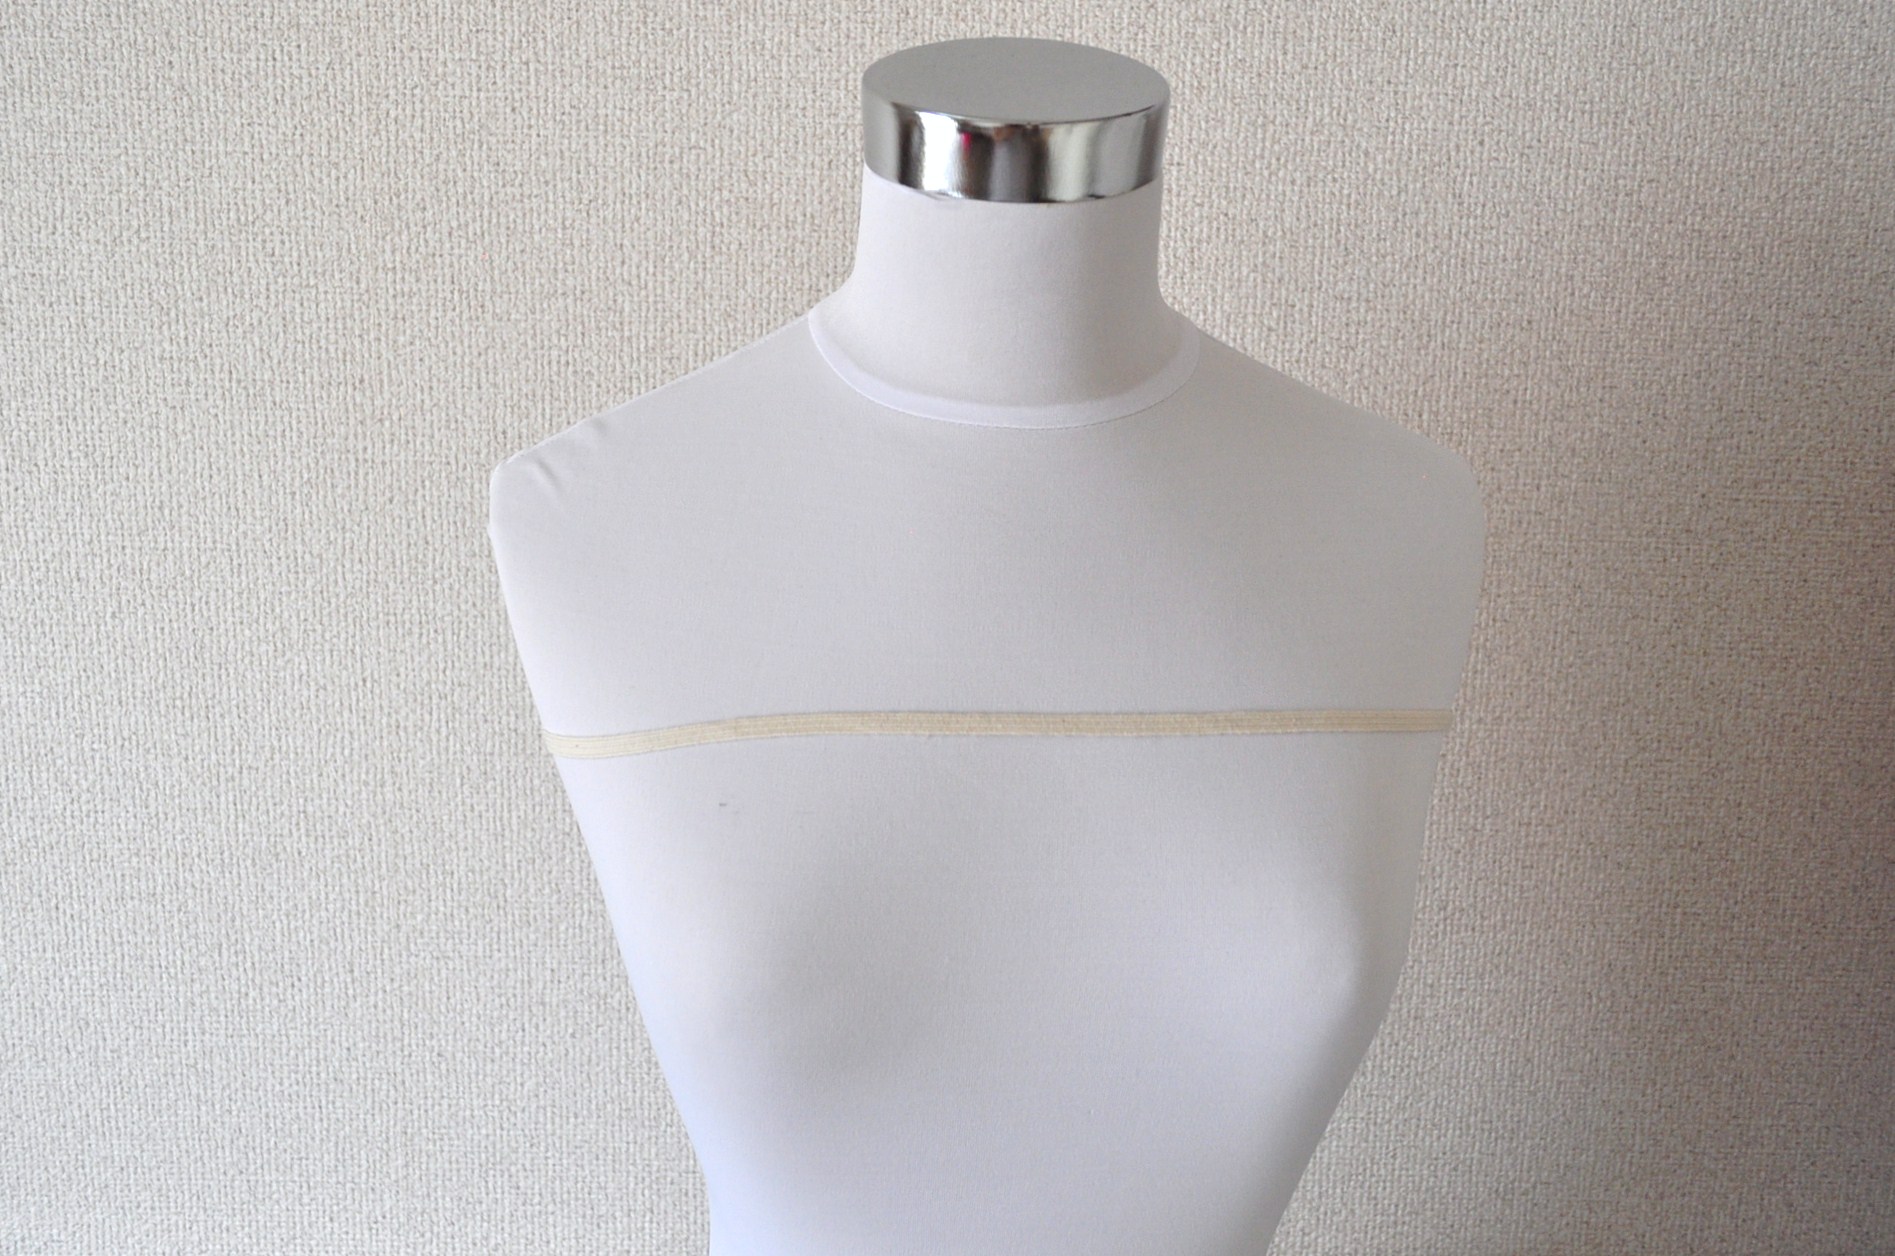
7) Insert an elastic band into the loop you created in step 5), using a bodkin.
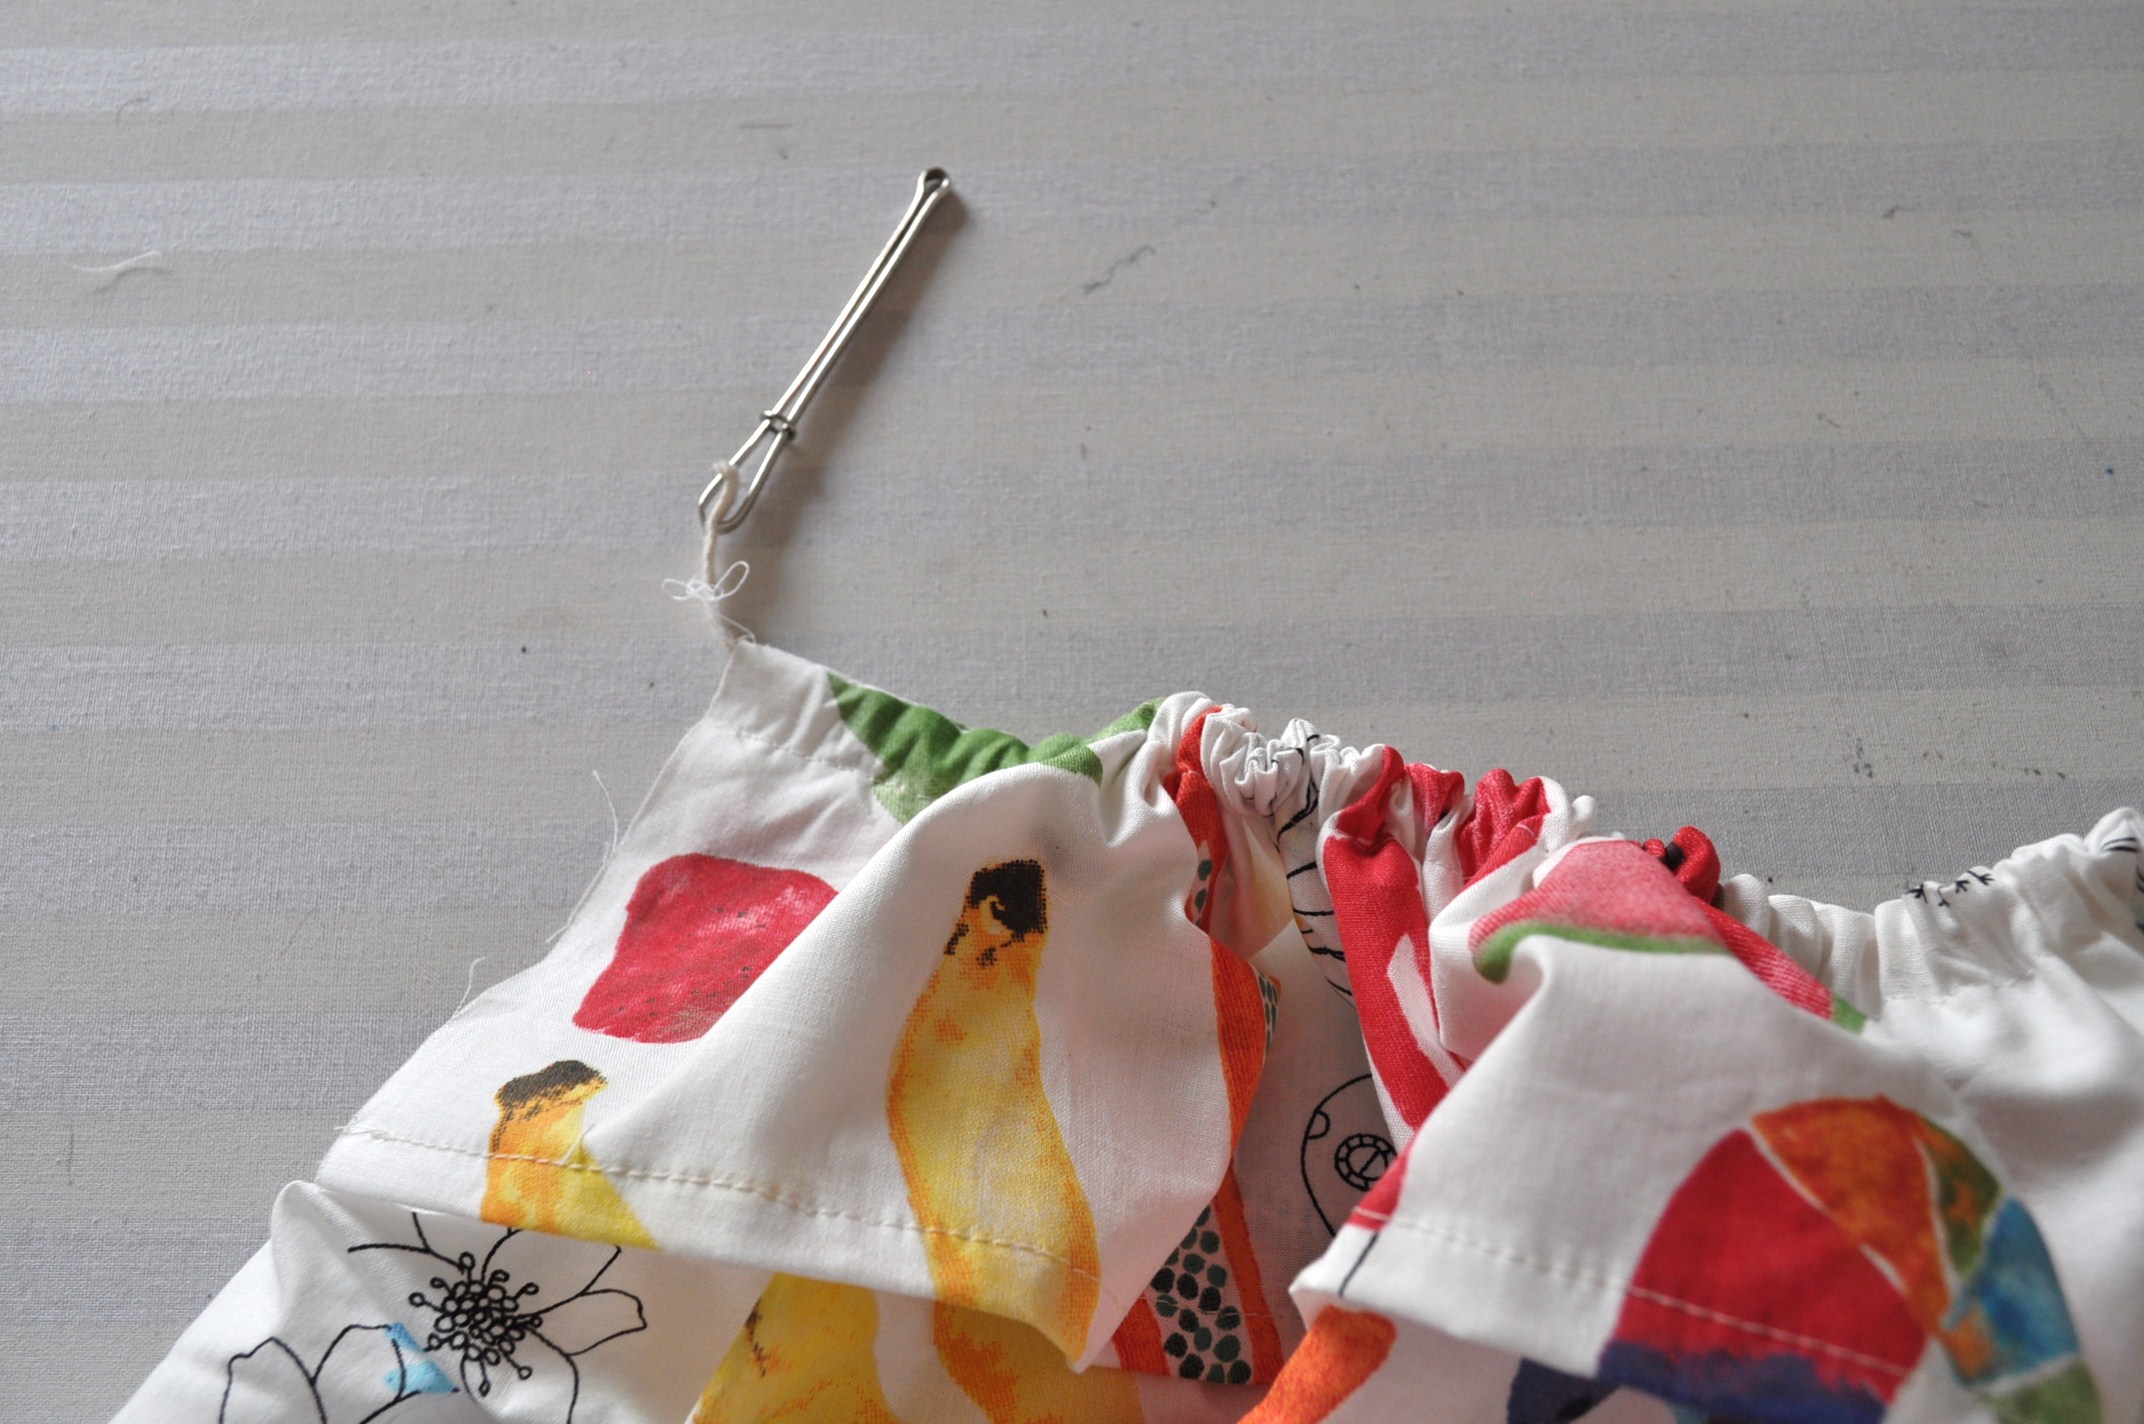
8) Sew both ends of the loop openings to hold the elastic band.
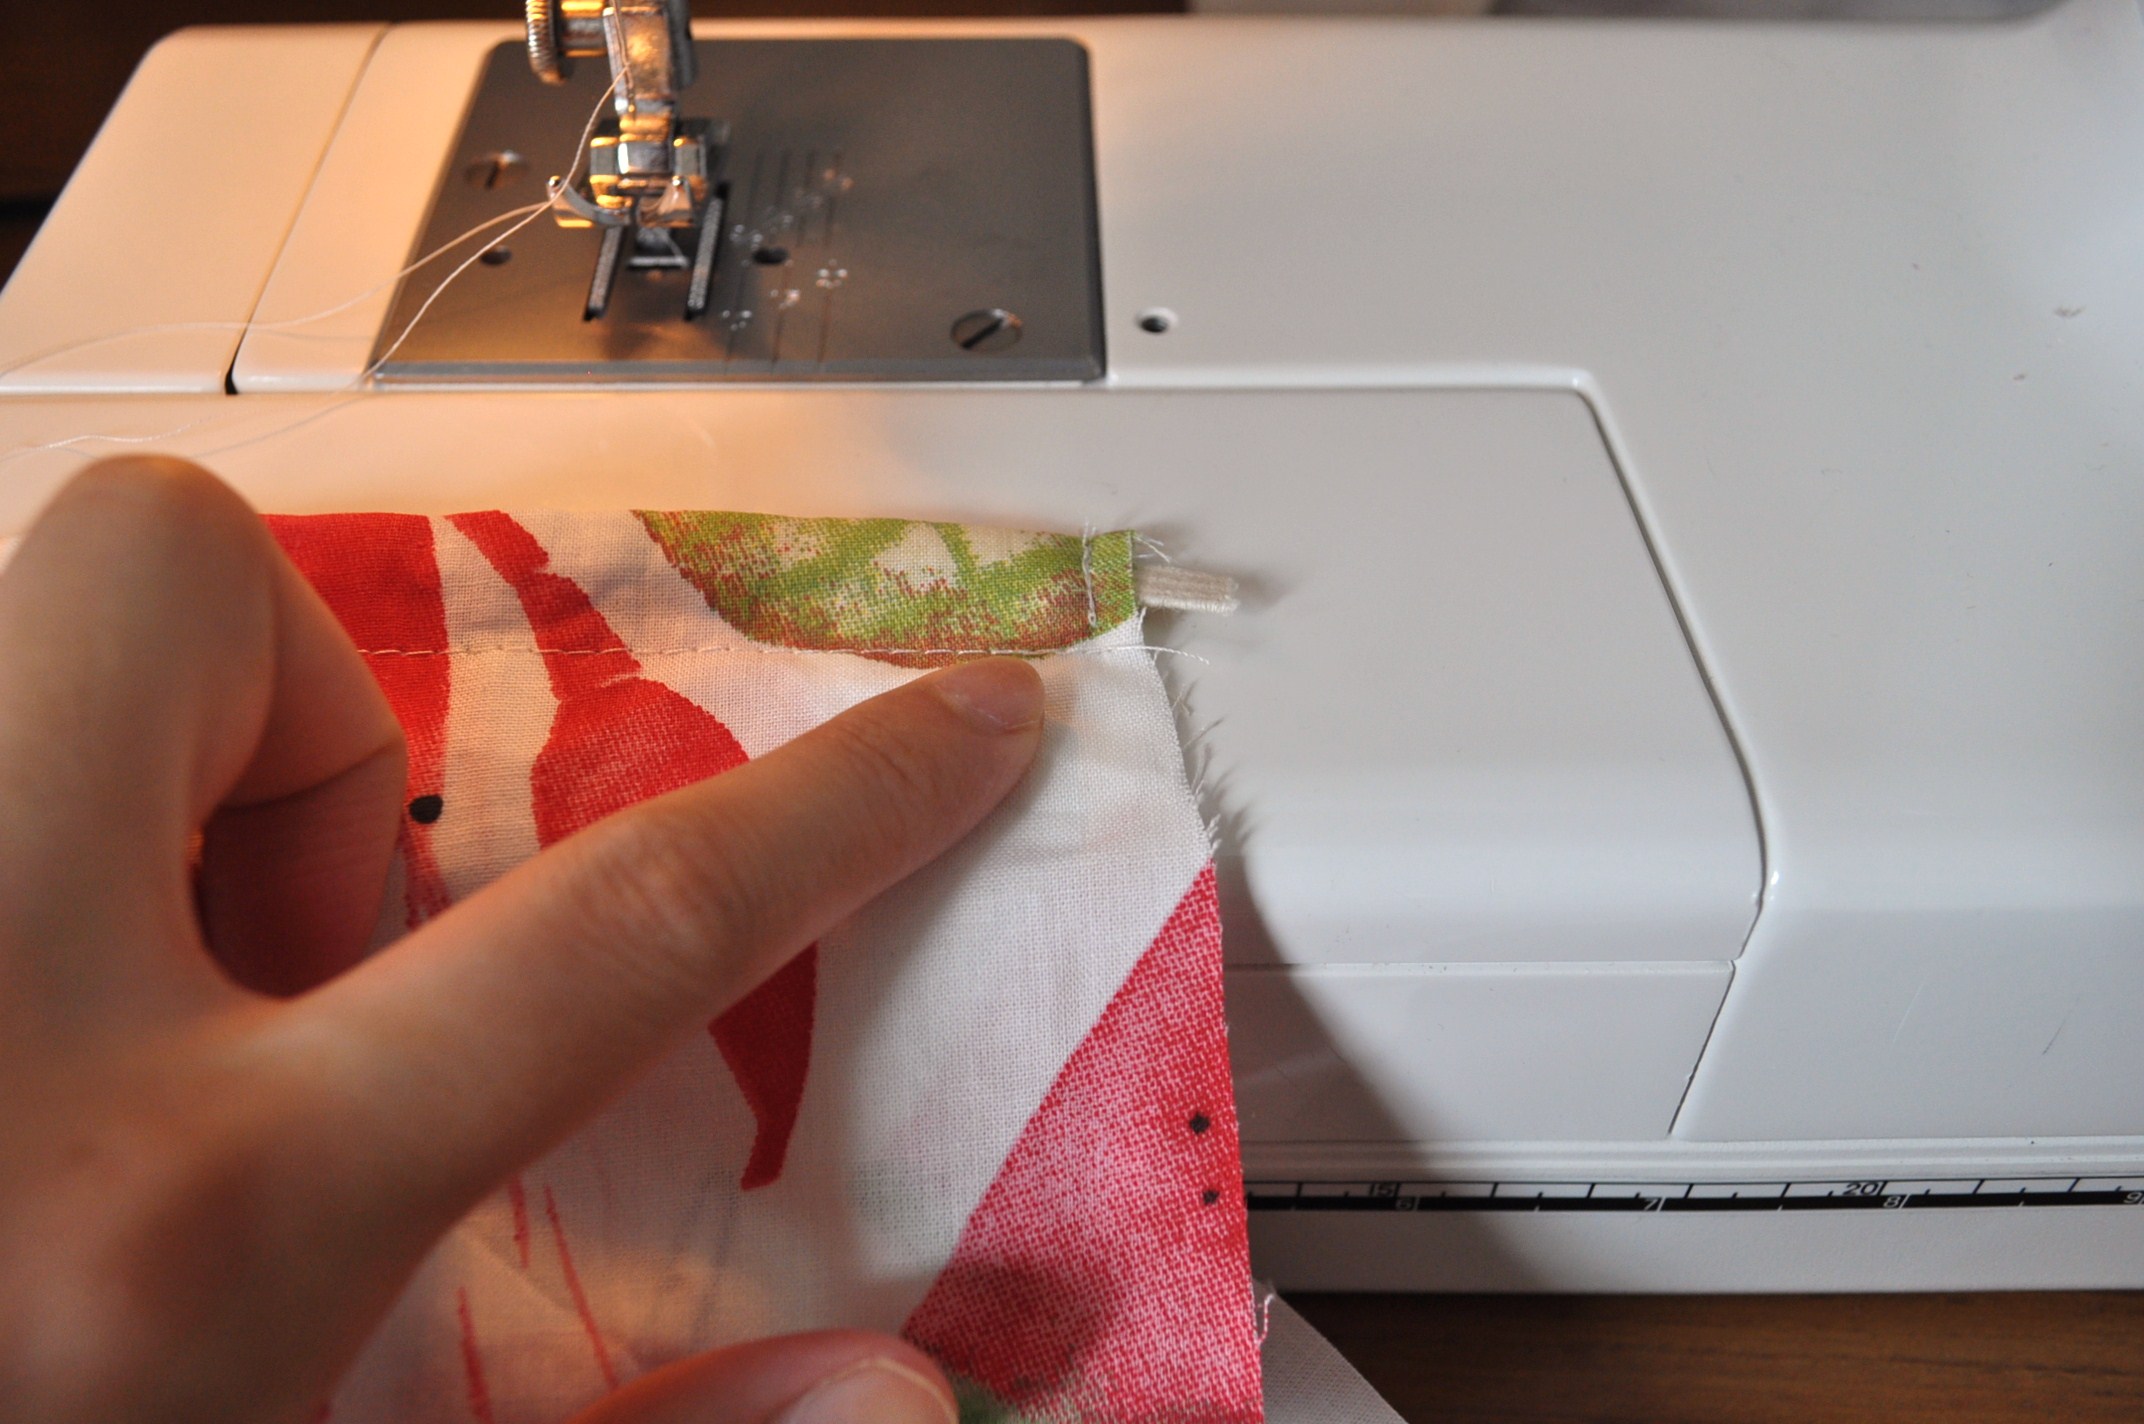
9) Fold the dress with right sides facing in, so the side seams meet. Sew the side.
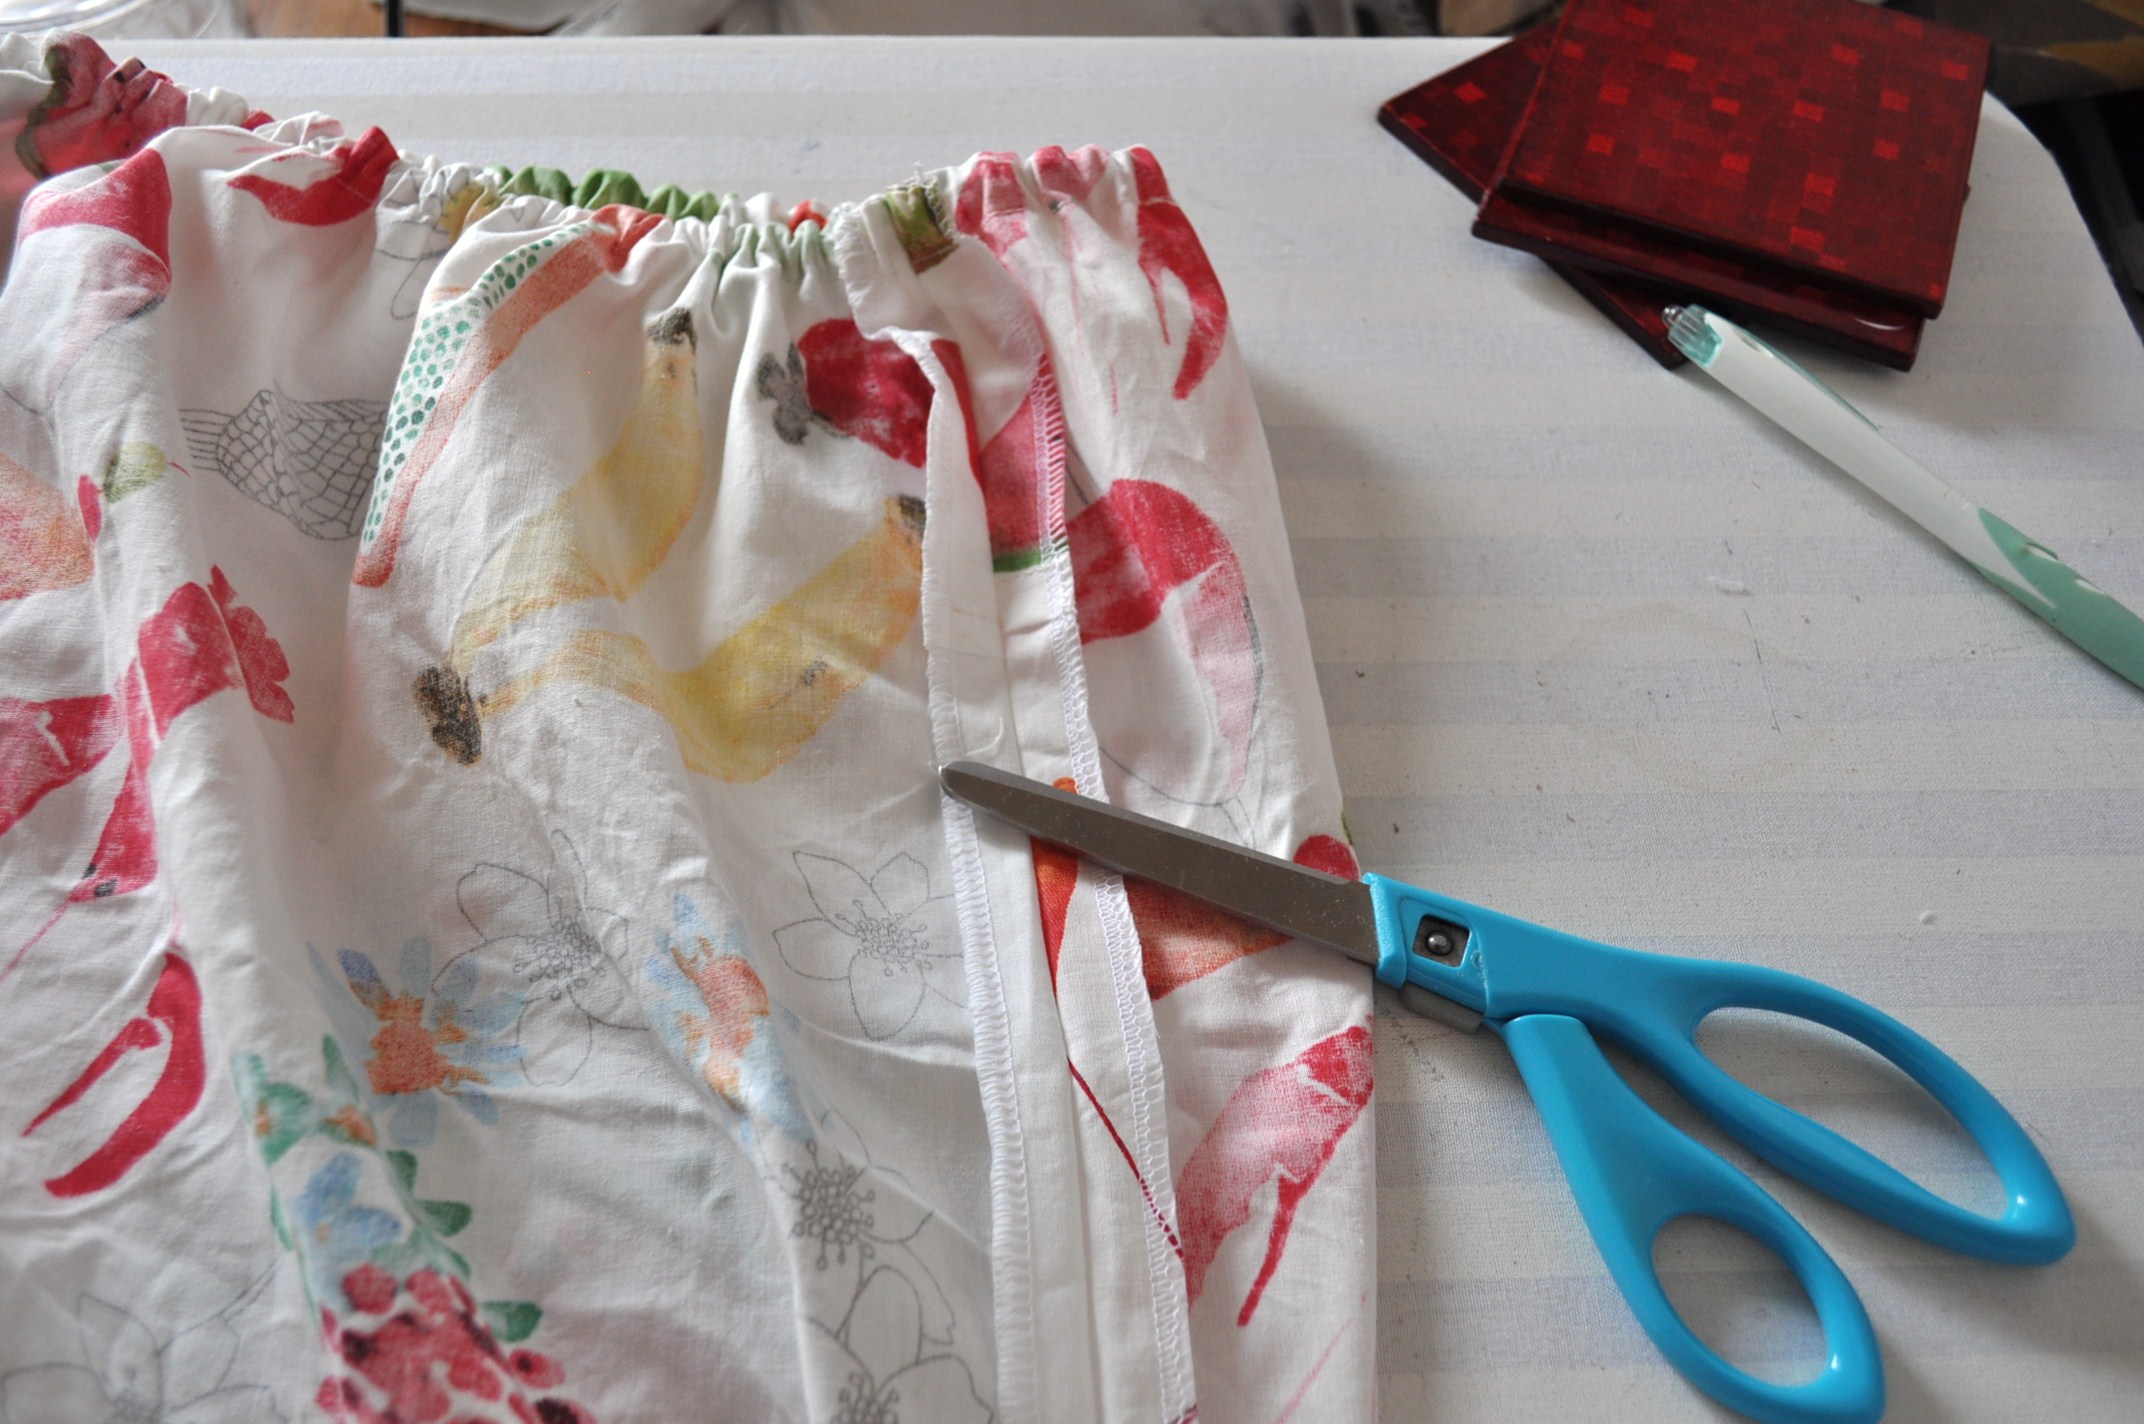
10) Hem the dress.
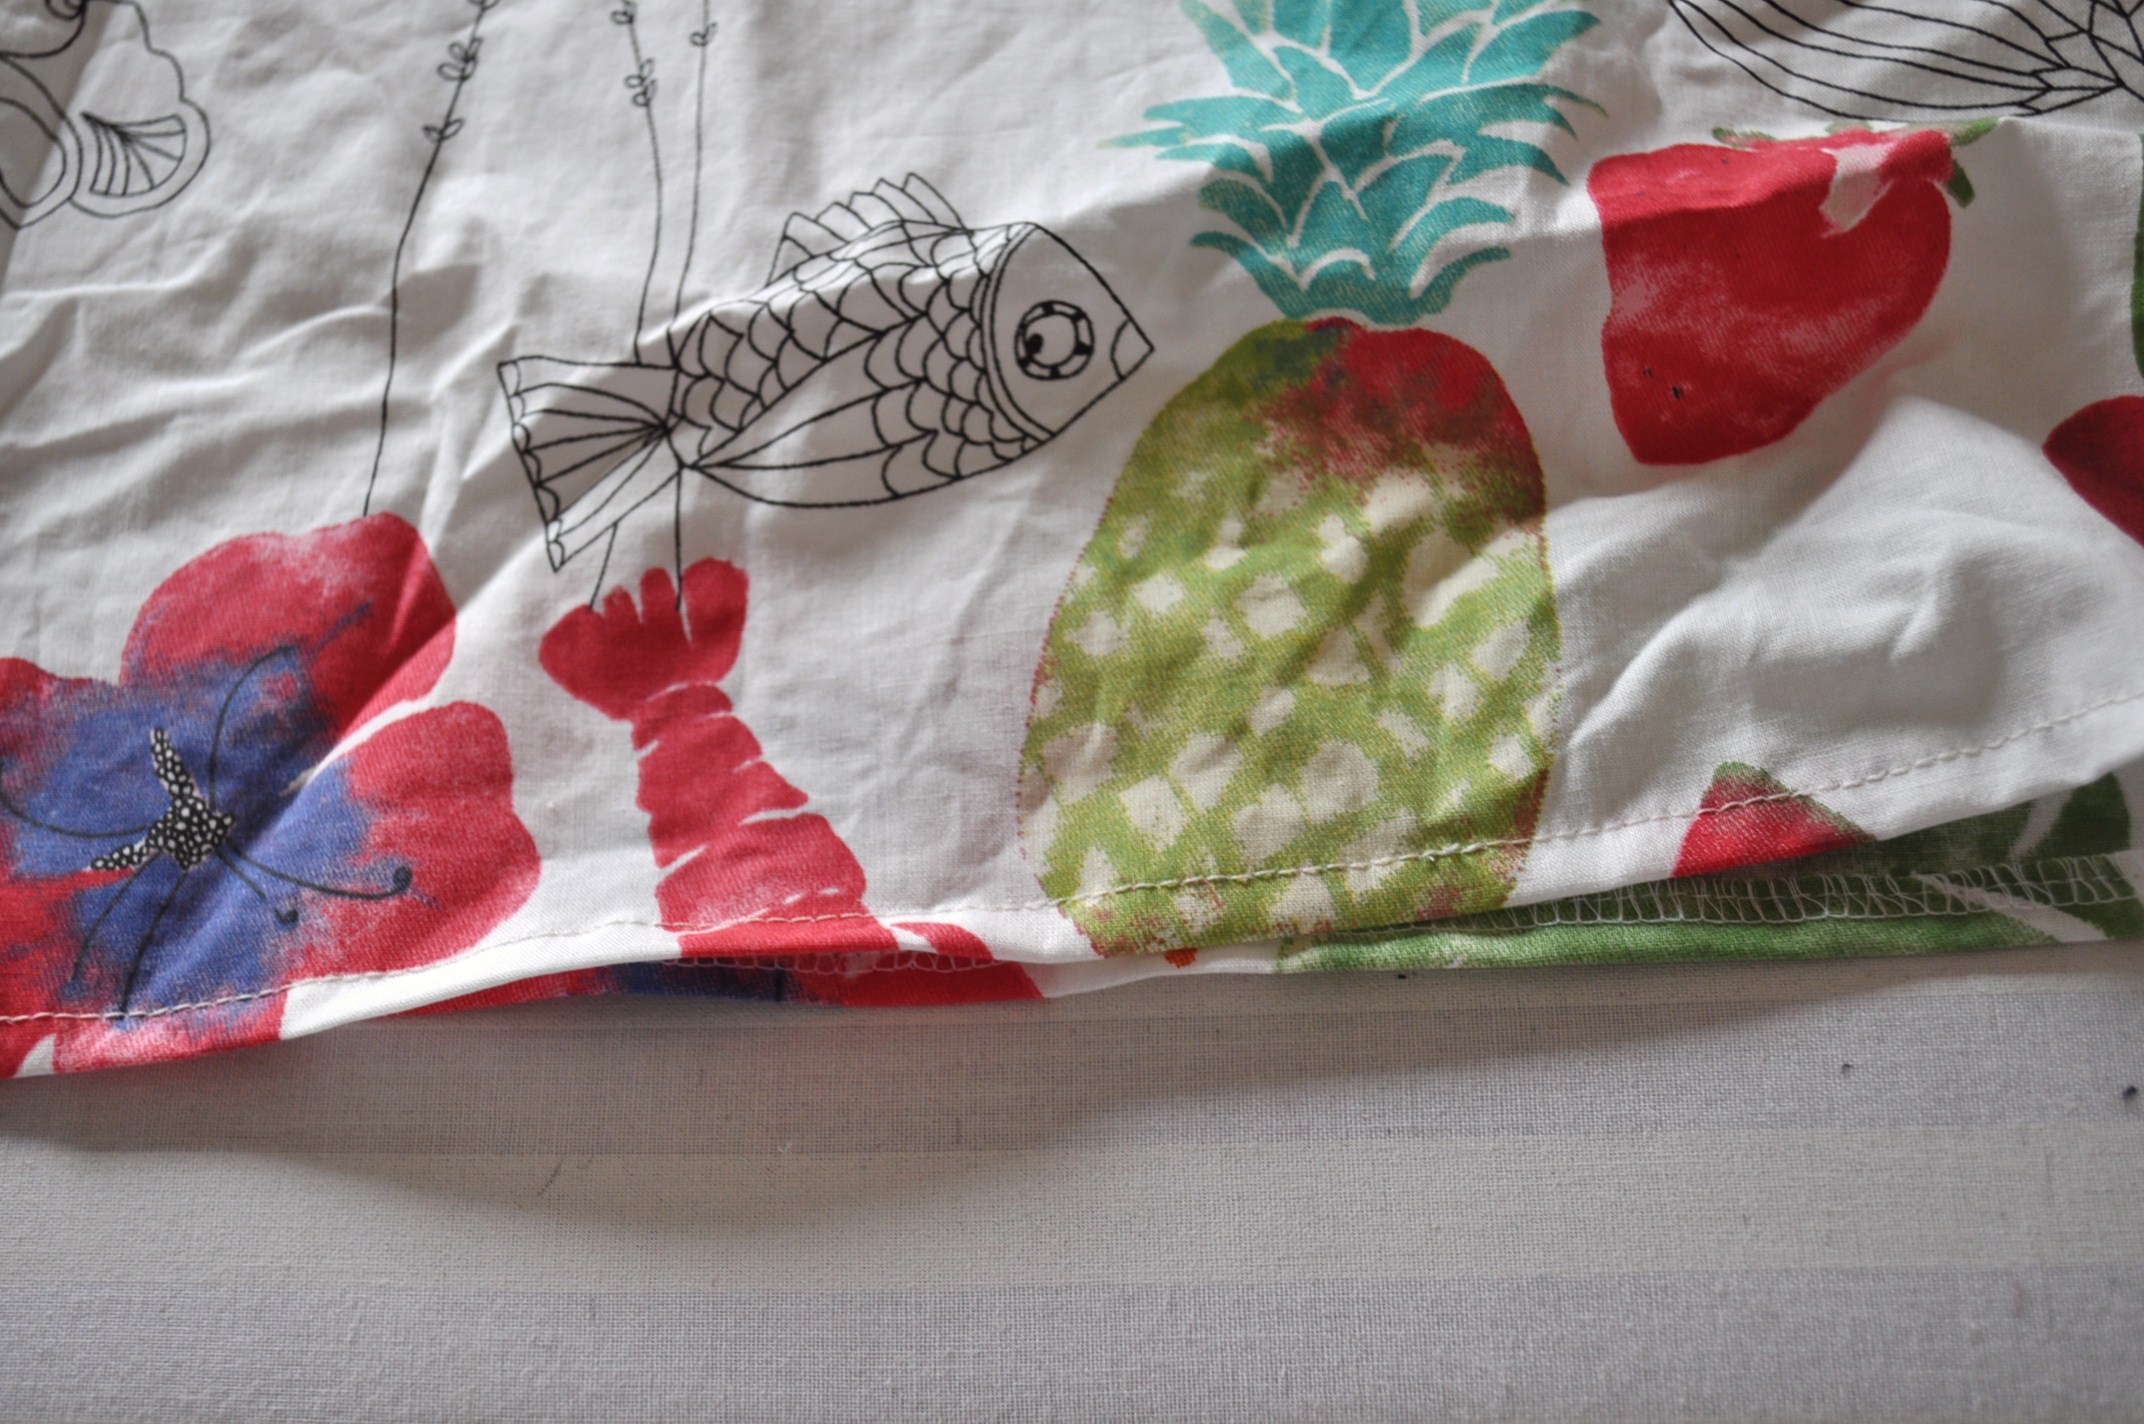
❤Optional 1❤
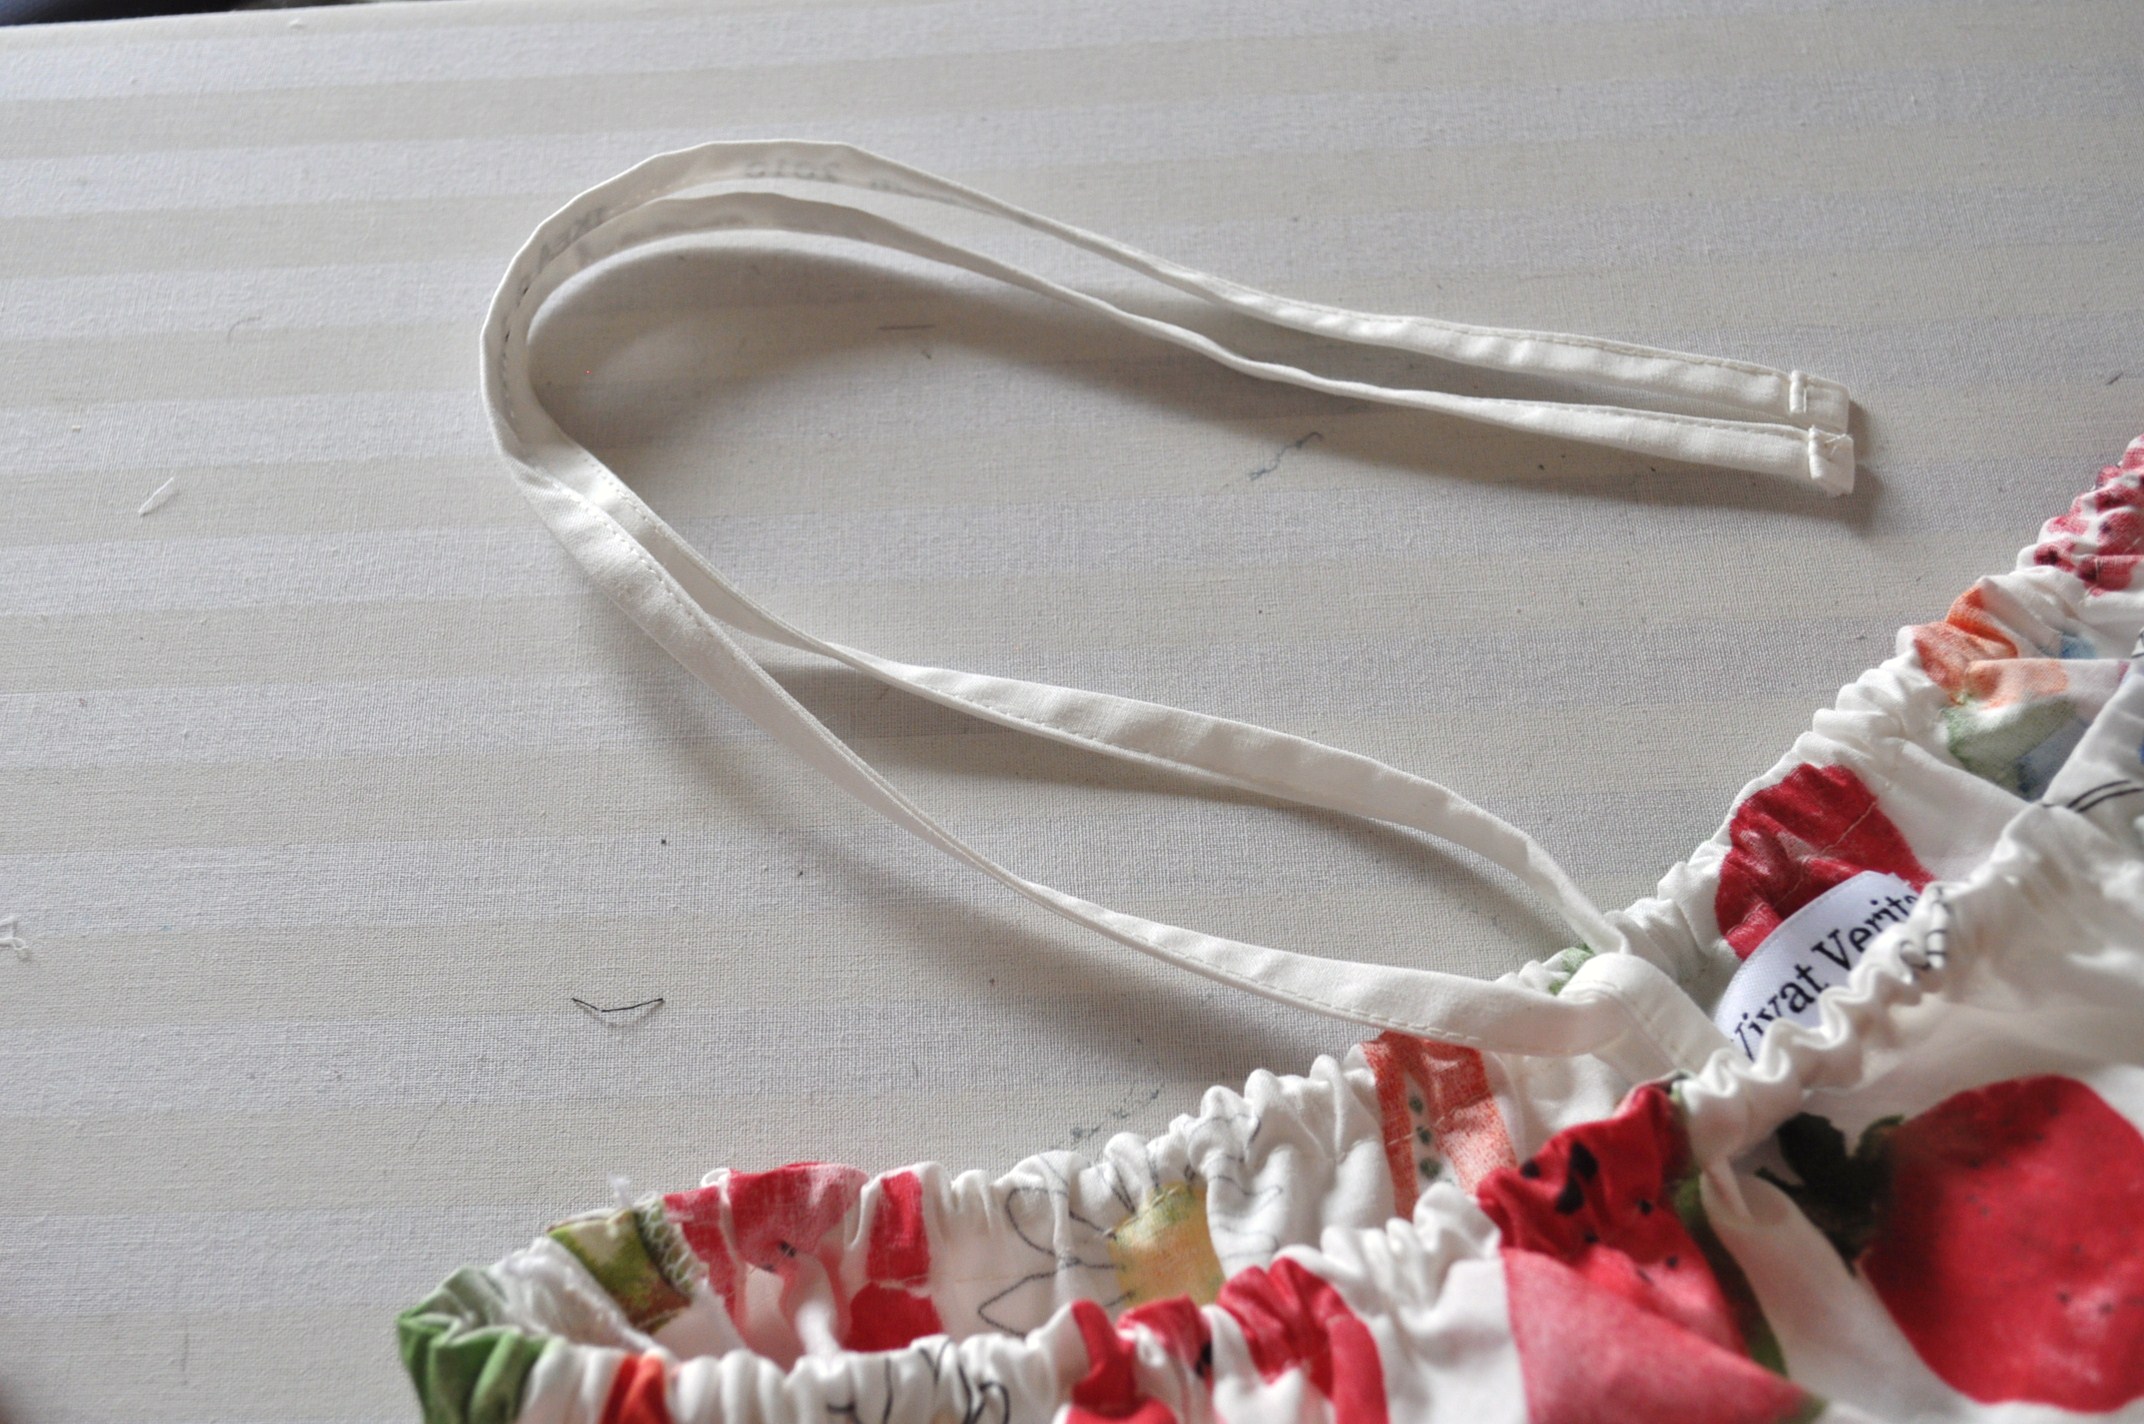
You can make a small loop and sew it on the middle of the top front so you can insert a neck strap.
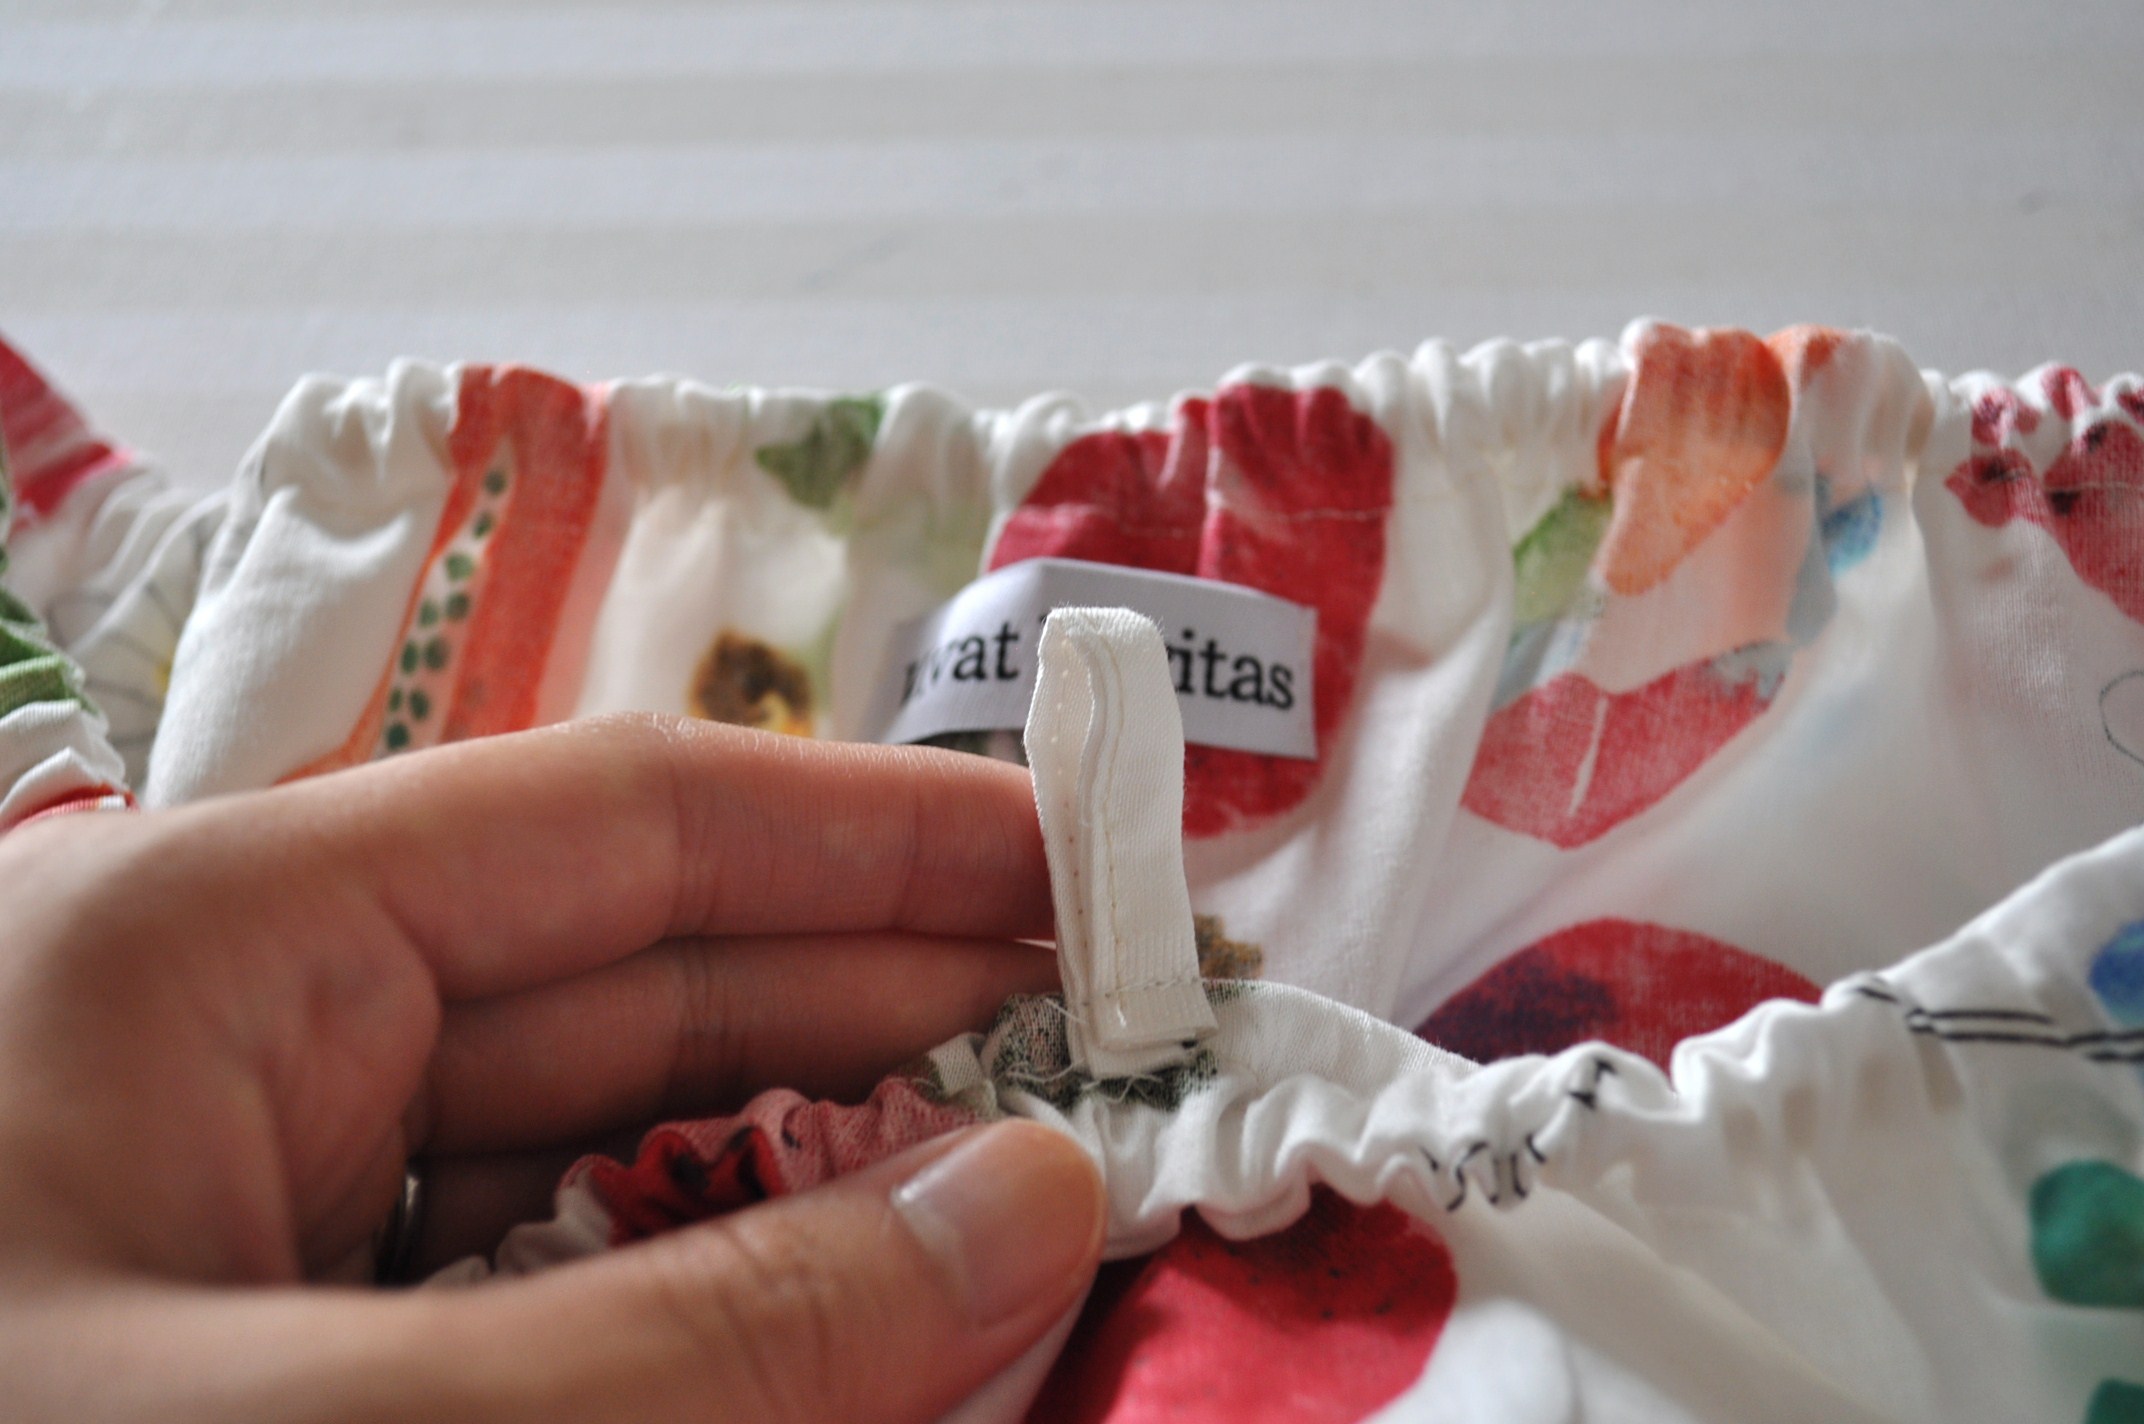
❤Optional 2❤
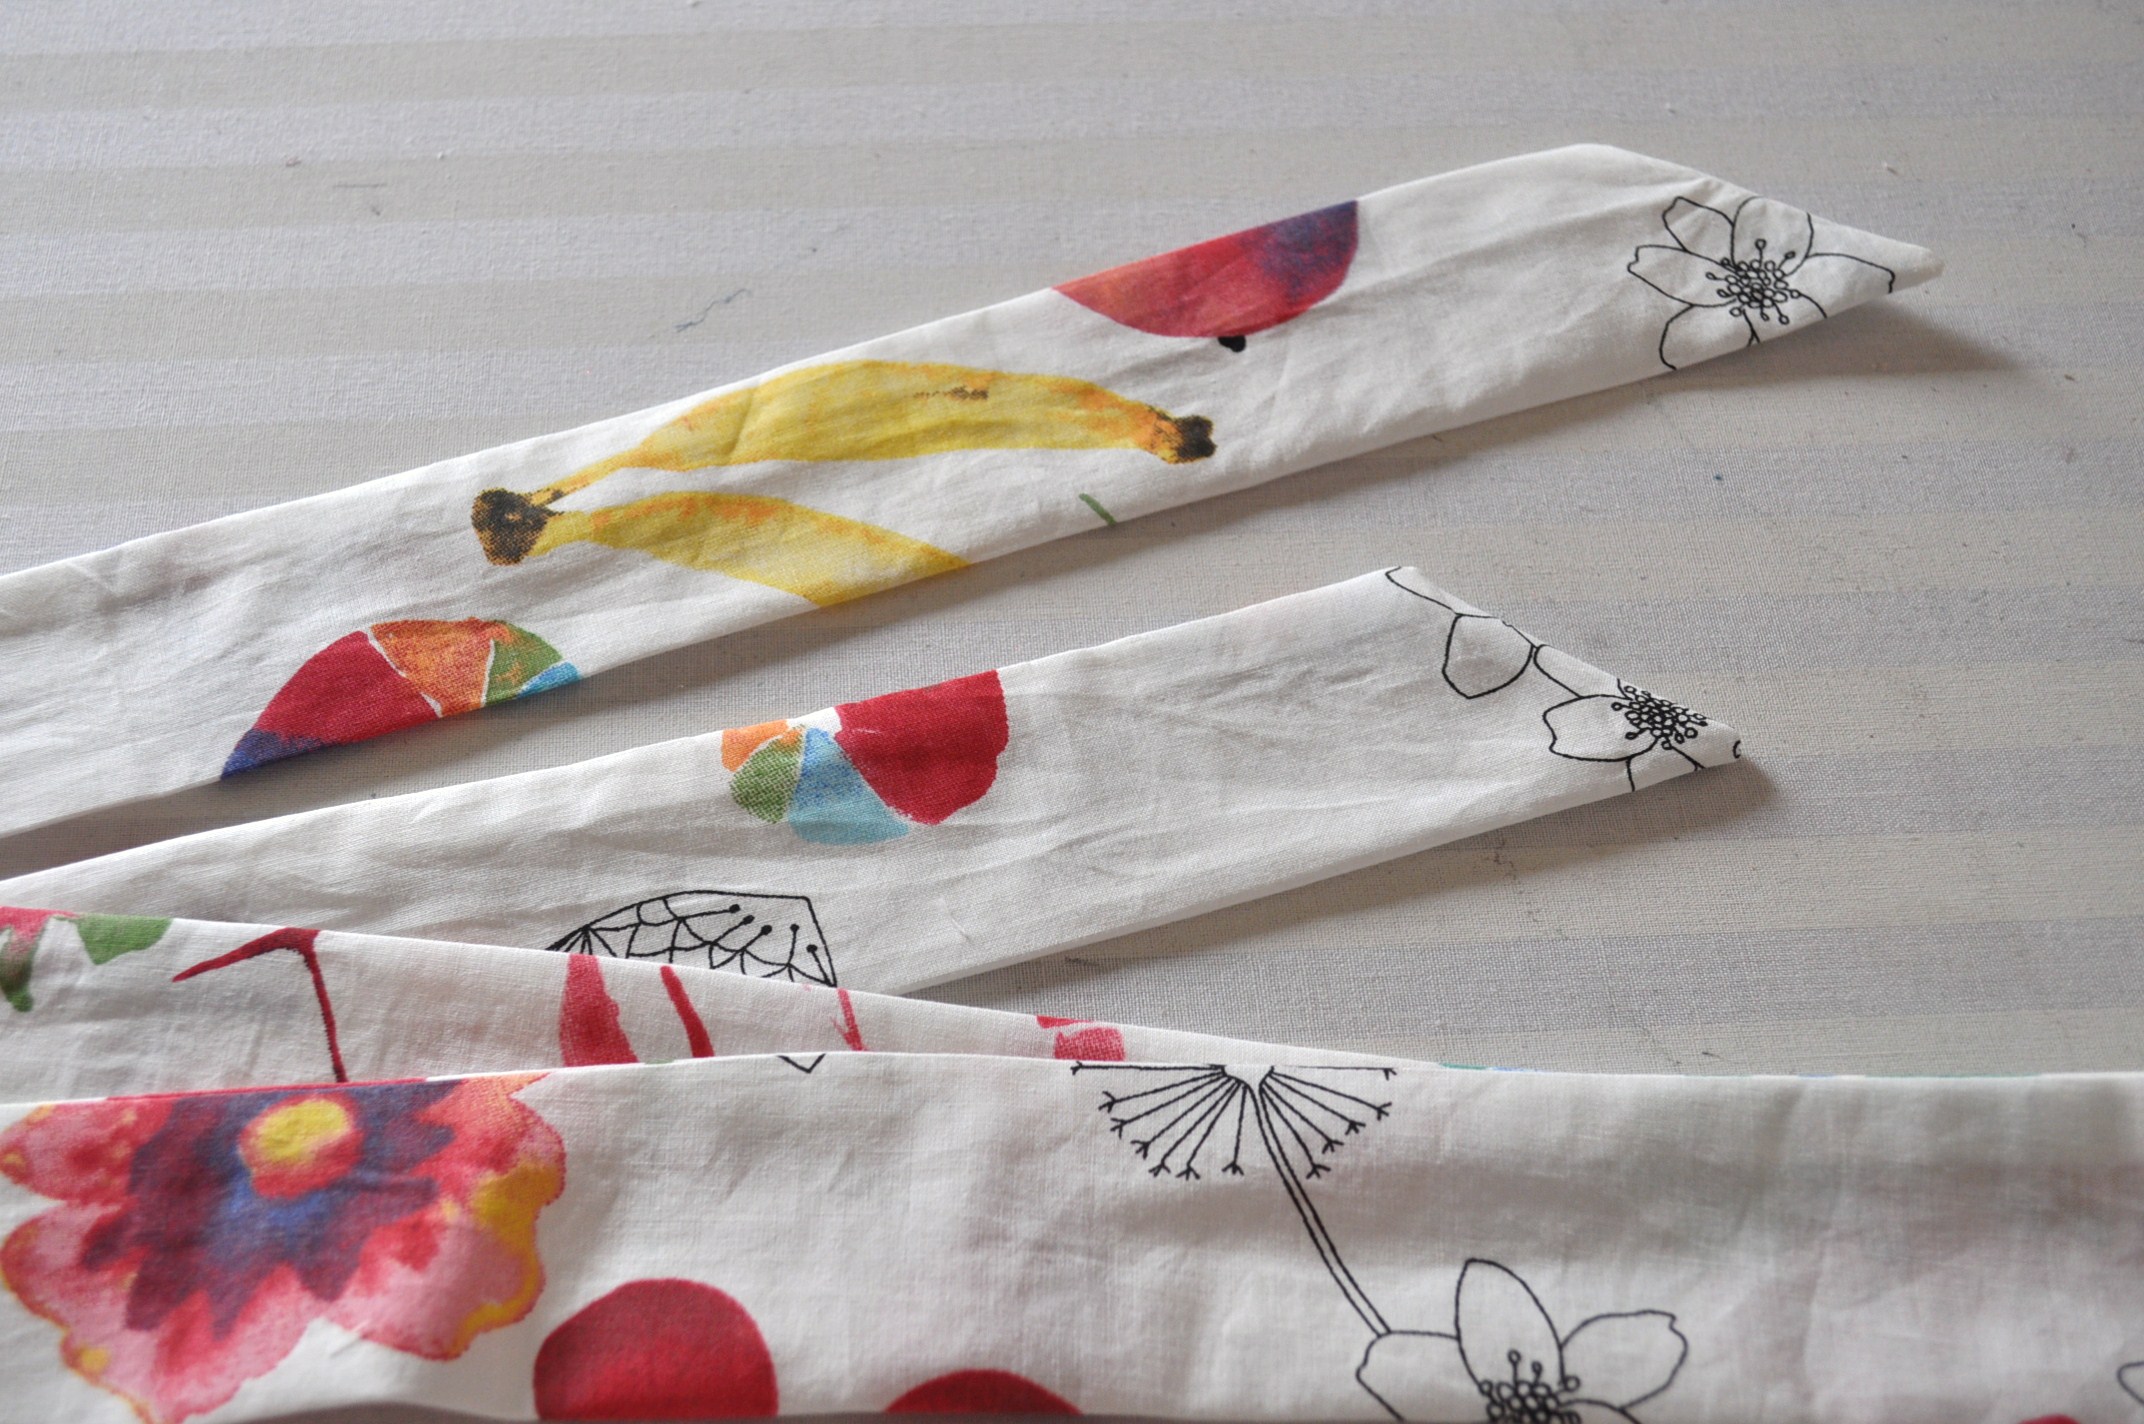
Make a sash to tie around waist.
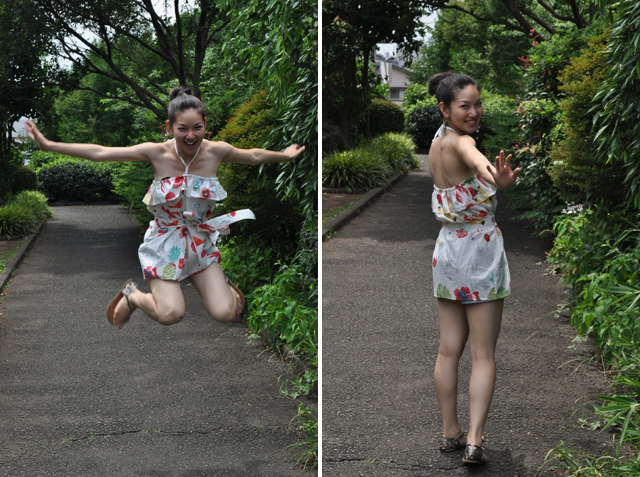
And you are done! Happy sewing!
xoxo

Chie
Guest Post at Jojoebi: Headband Tutorial

August 21, 2007 By Chie

Hello! My name is Chie. I’m thrilled to be able to participate in Jo’s new skills carnival!
I’ve been sewing since I was little, but it was not until 3 years ago that I really got into sewing clothes, especially woman’s clothes. When my friend lent me a basic sewing machine and I made a pillow case. With a little practice the next thing I knew, I was selling my creations on etsy.

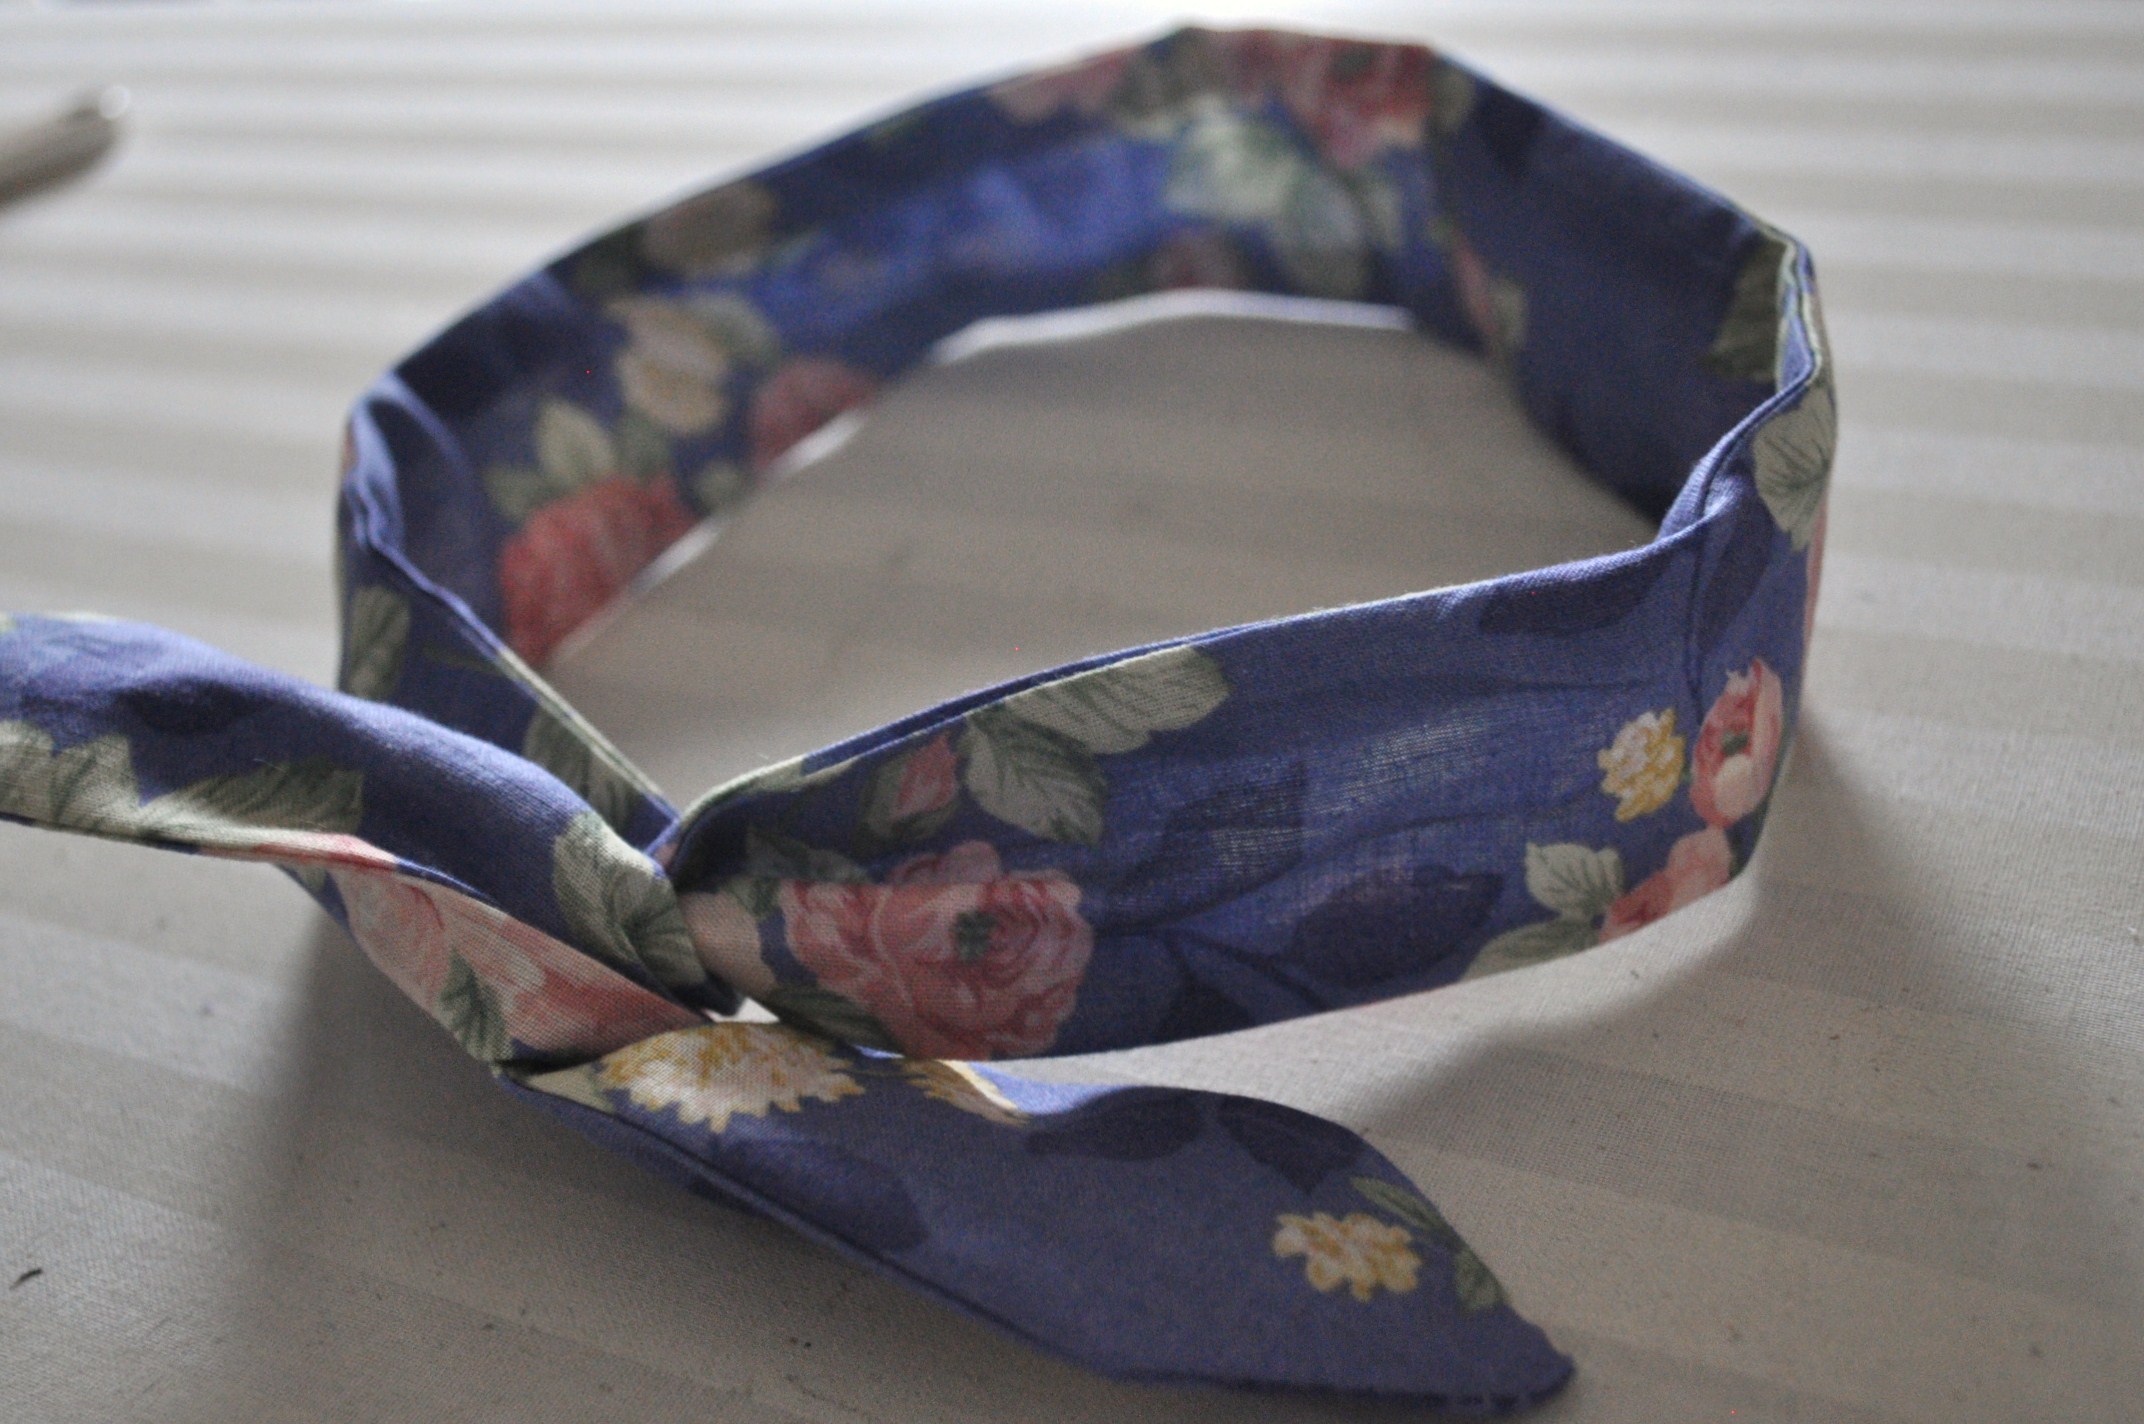
Sewing clothes creates a lot of left over fabric. Those leftover pieces are usually so small that they can’t even be used to make a camisole or shorts. They are however, big enough that I don’t want to throw them out. I serendipitously came to find that those scraps are the perfect size with which to make headbands. This headband is super easy to make, and a great way to reduce your left over fabric stash! Once you get used to it, it takes less than half an hour to make one. The headband has a wire inside, so it stays on your head, and you can twist the end however you like.

Here is a tutorial on how to make this headband:

I hope you enjoy making the headband. Stop over at my blog to see my sewing journey and take a look at my etsy shop to find some really cute dresses 🙂

xo

Chie

Grosgrain Free Pattern Month – Scallop Waist Skirt

May 16, 2004 By Chie

Hello Grosgrain readers! I’m Chie from Vivat Veritas, and I am happy to be able to share my creation for Grosgrain’s free pattern month. Grosgrain is one of my favorite blogs for sewing inspiration and I’m so excited to be part of it!

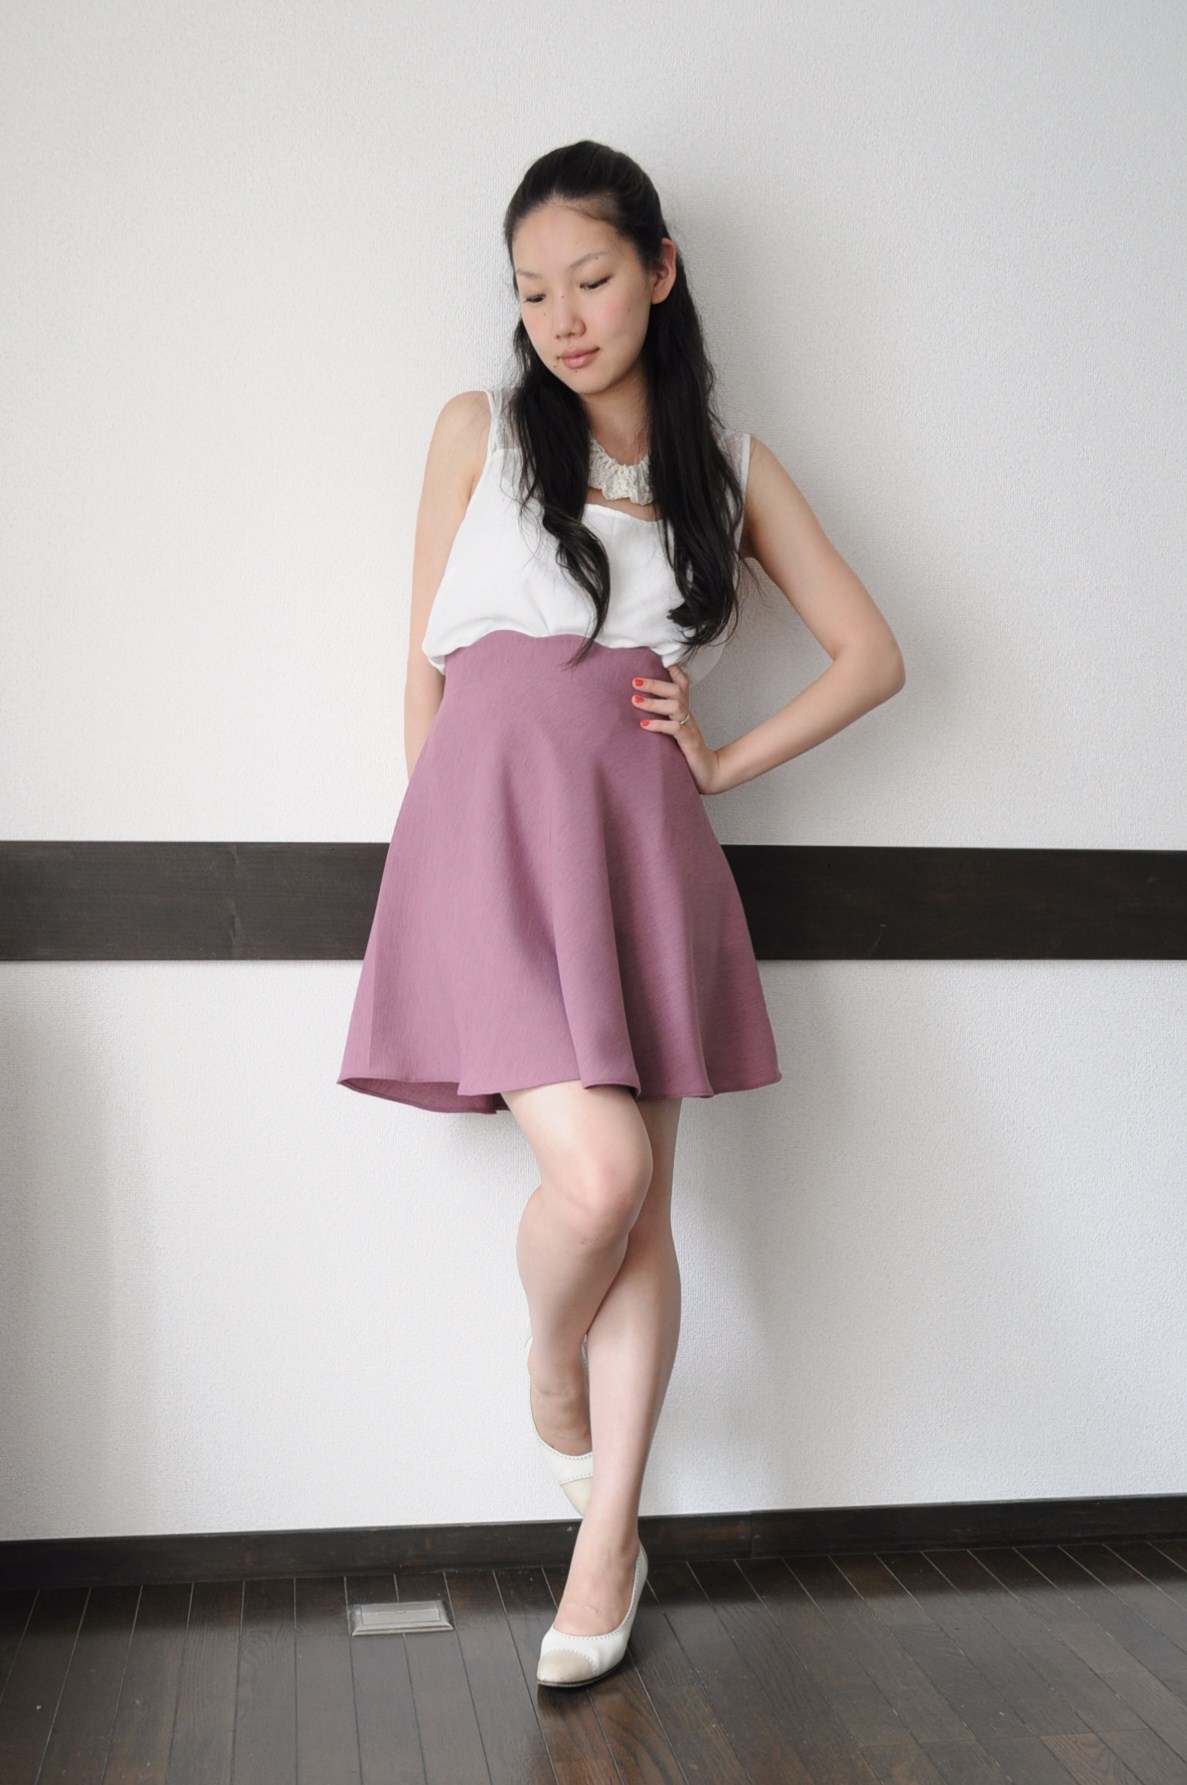
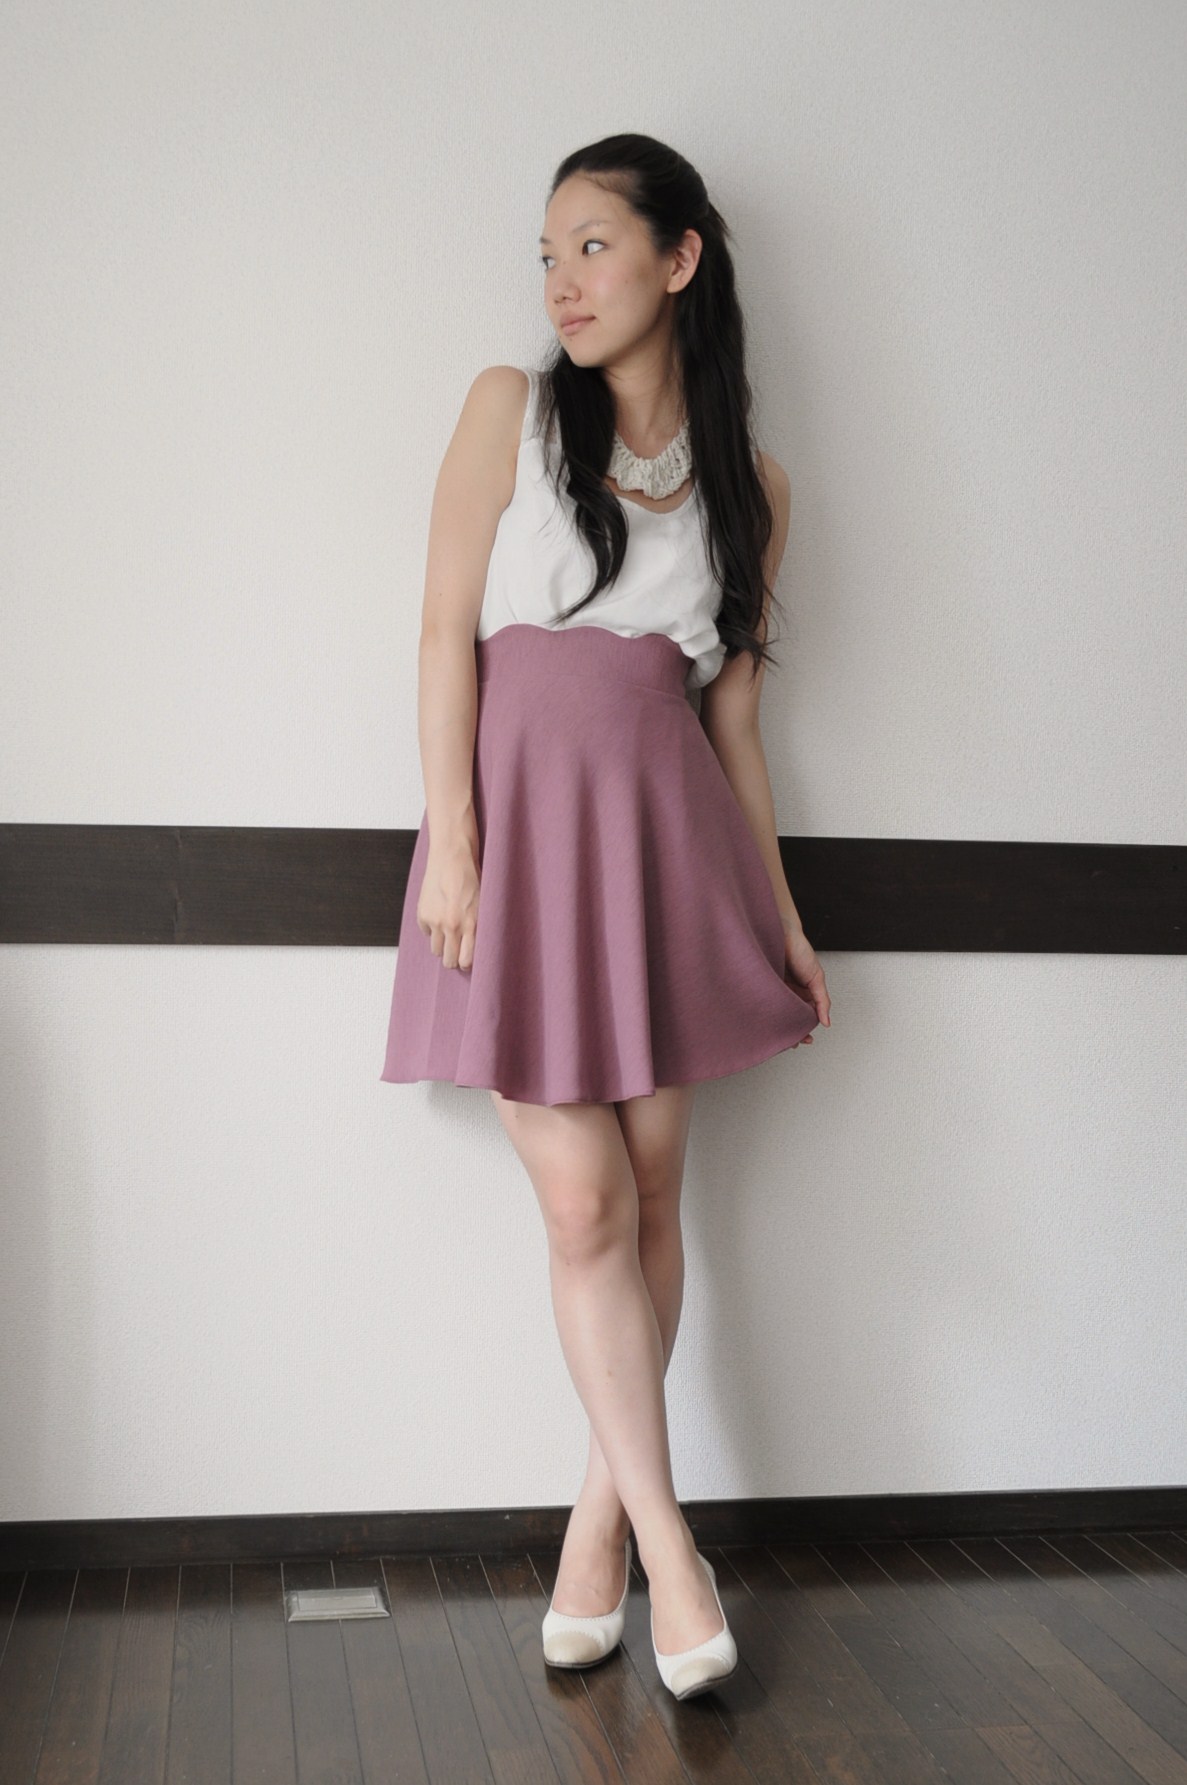
For my part this month, I am writing up a tutorial for a scallop waist skirt. I’m a big fan of scalloped edges in clothing.  I was greatly influenced by 2010 Marc Jacob’s resort collection, seen here. The skirt is high waisted, and the upper part of the waist band is scalloped. I just had my daughter in April, and while I was pregnant, I wore a lot of jersey dresses and baby doll style dresses. I love dresses, so it was fun, but I did miss wearing some separates. Now my bump is gone, I’m all about wearing clothes that mark the waistline!

This was my first time making a PDF pattern, so if anything is unclear or if you have any suggestions, please contact me through my blog🙂

Pattern printing instructions:

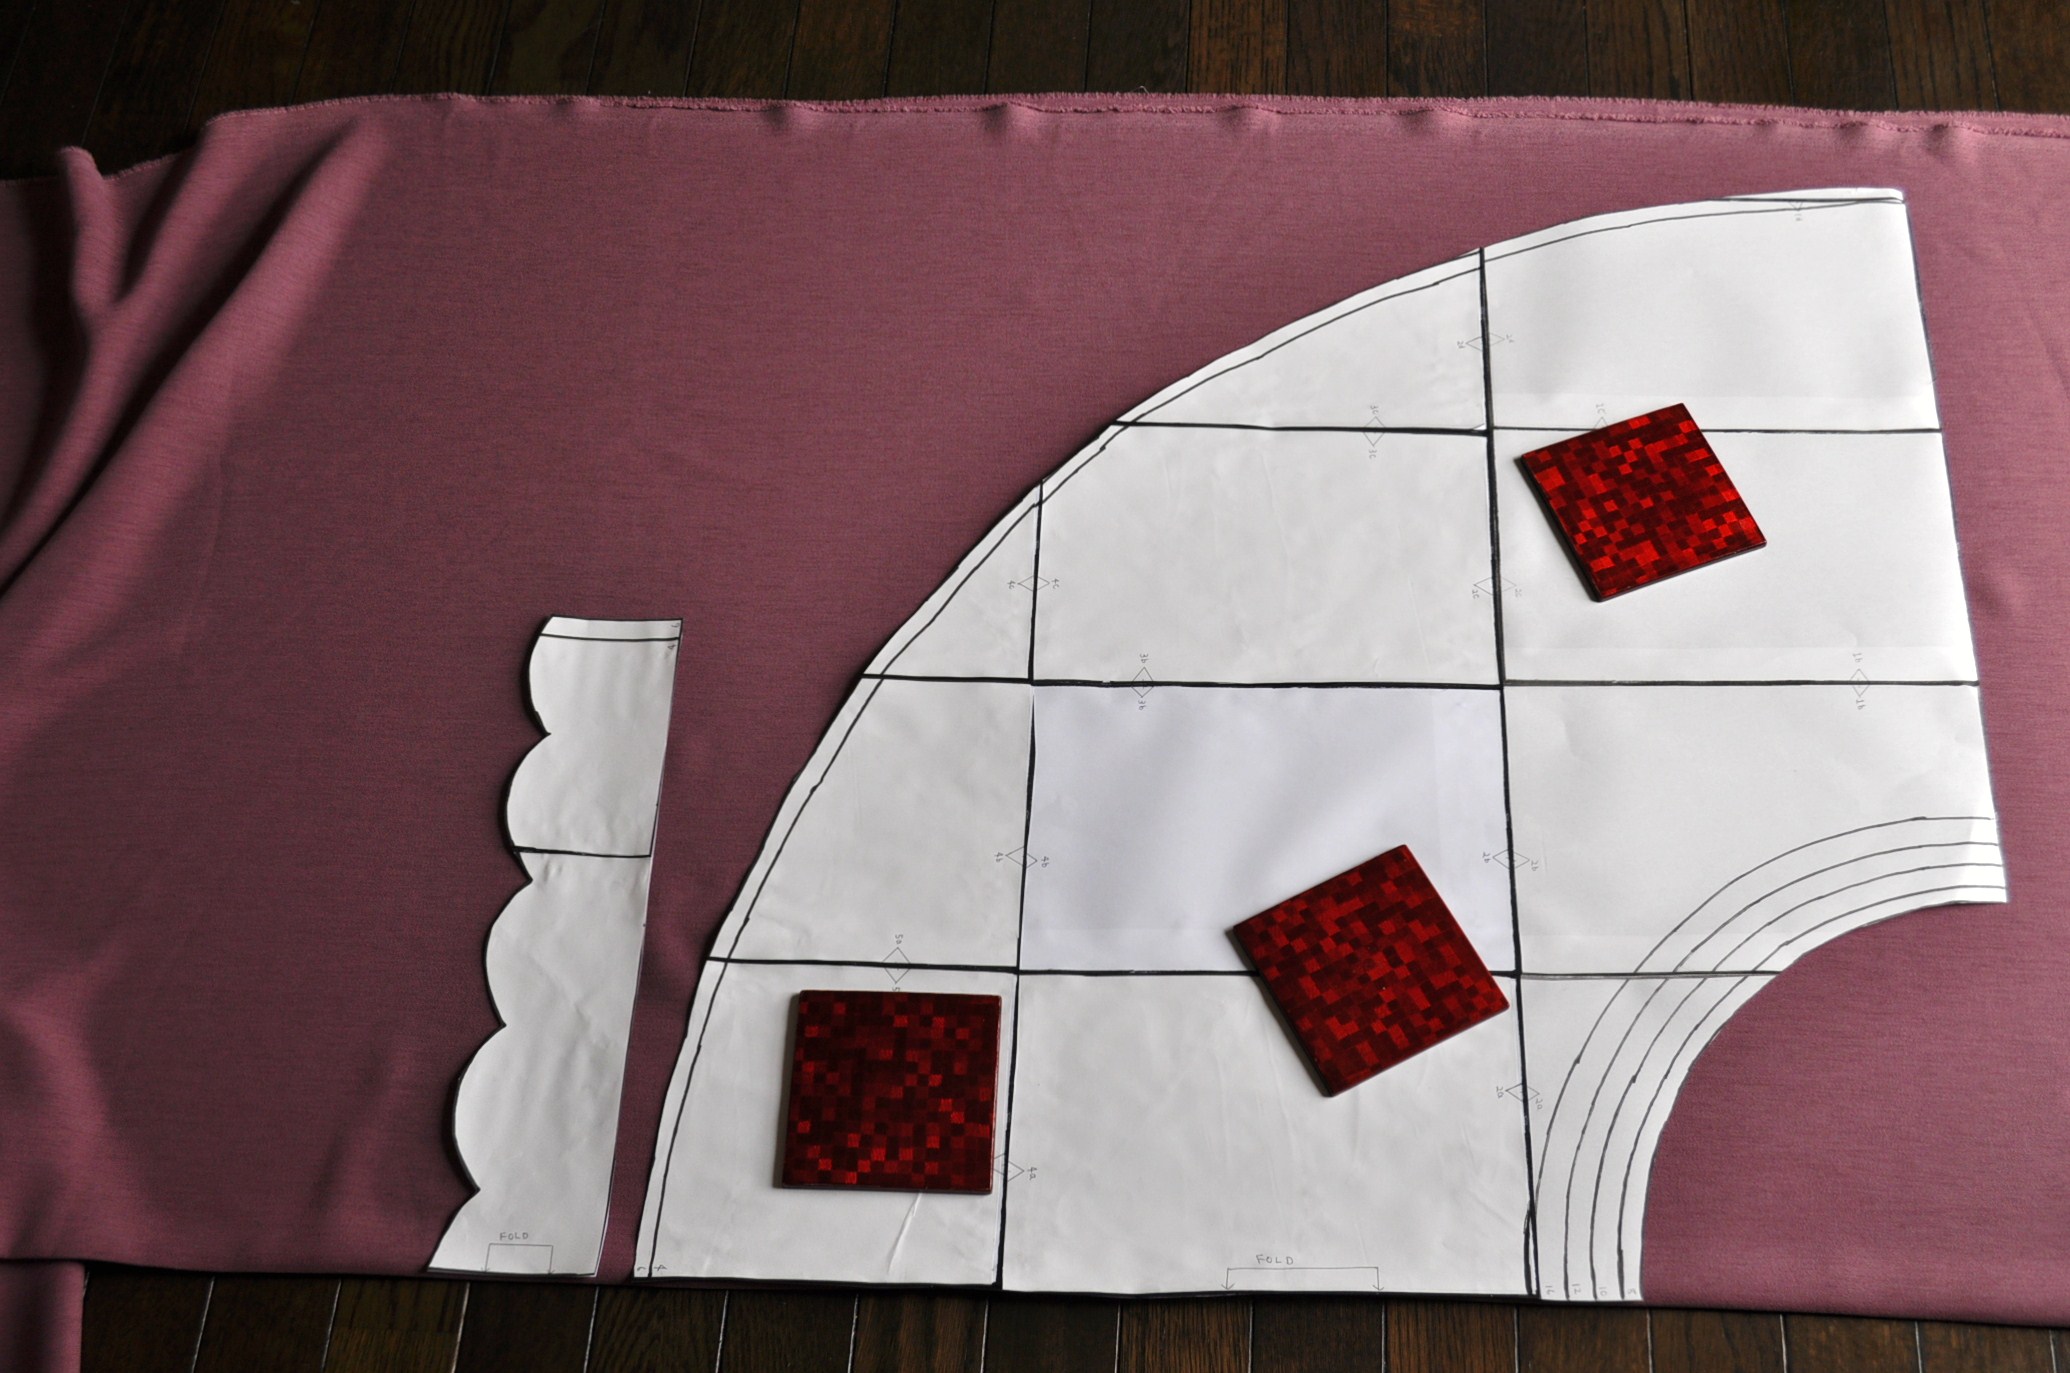
Download the pattern here (vv scallop waist skirt pattern)
The pattern should be out on 15 sheets with a thin frame. The pattern is set for printing on A size4 paper.   The 15 pieces will fit together and can be glued or taped together according to the triangle signs (1a, 1b, 2c…etc). ½”.   Seam allowances are included, except for the top of the waist band (scalloped edge part) which has ¼” seam allowance.

Materials:

❤ 1-2 yards of fabric. I recommend using a fabric that is a medium weight polyester or rayon mix. I would avoid fabrics that are easily wrinkled (such as 100% cotton), very light and/or very heavy weight materials and jersey type fabrics that have significant stretch.
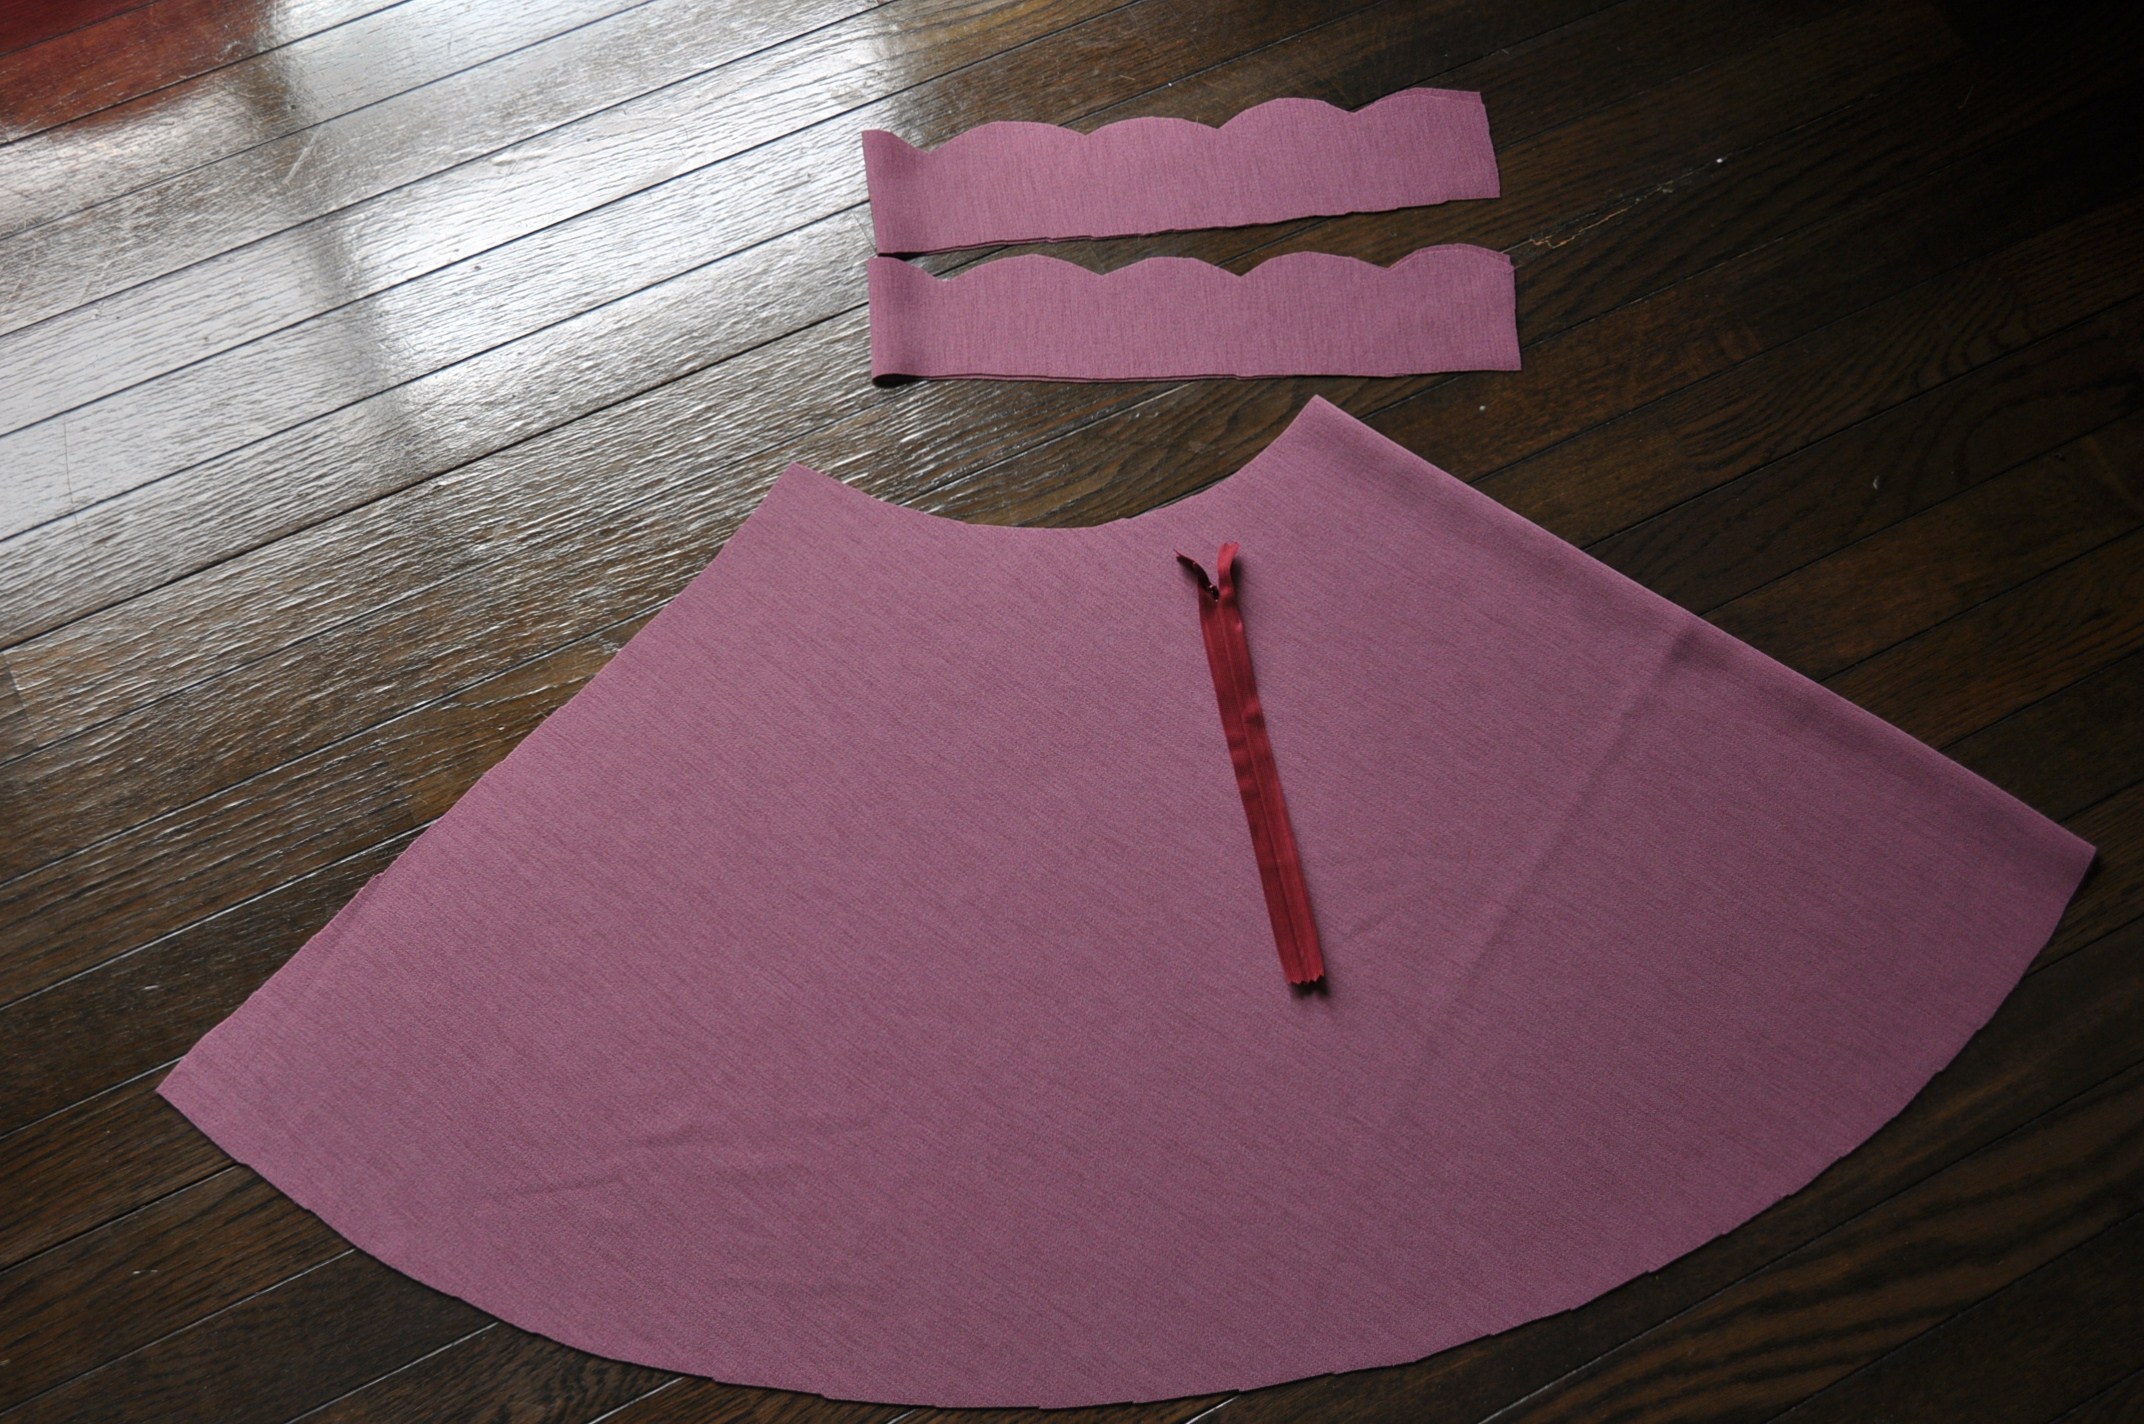
❤ 9” invisible zipper
❤ Thread
❤ Fusible (iron-on) interface for waist band

Cutting Instruction:

❤ Waist band – Cut 2 with center folded
❤ Skirt piece – Cut 1 with center folded

Sewing Instructions:

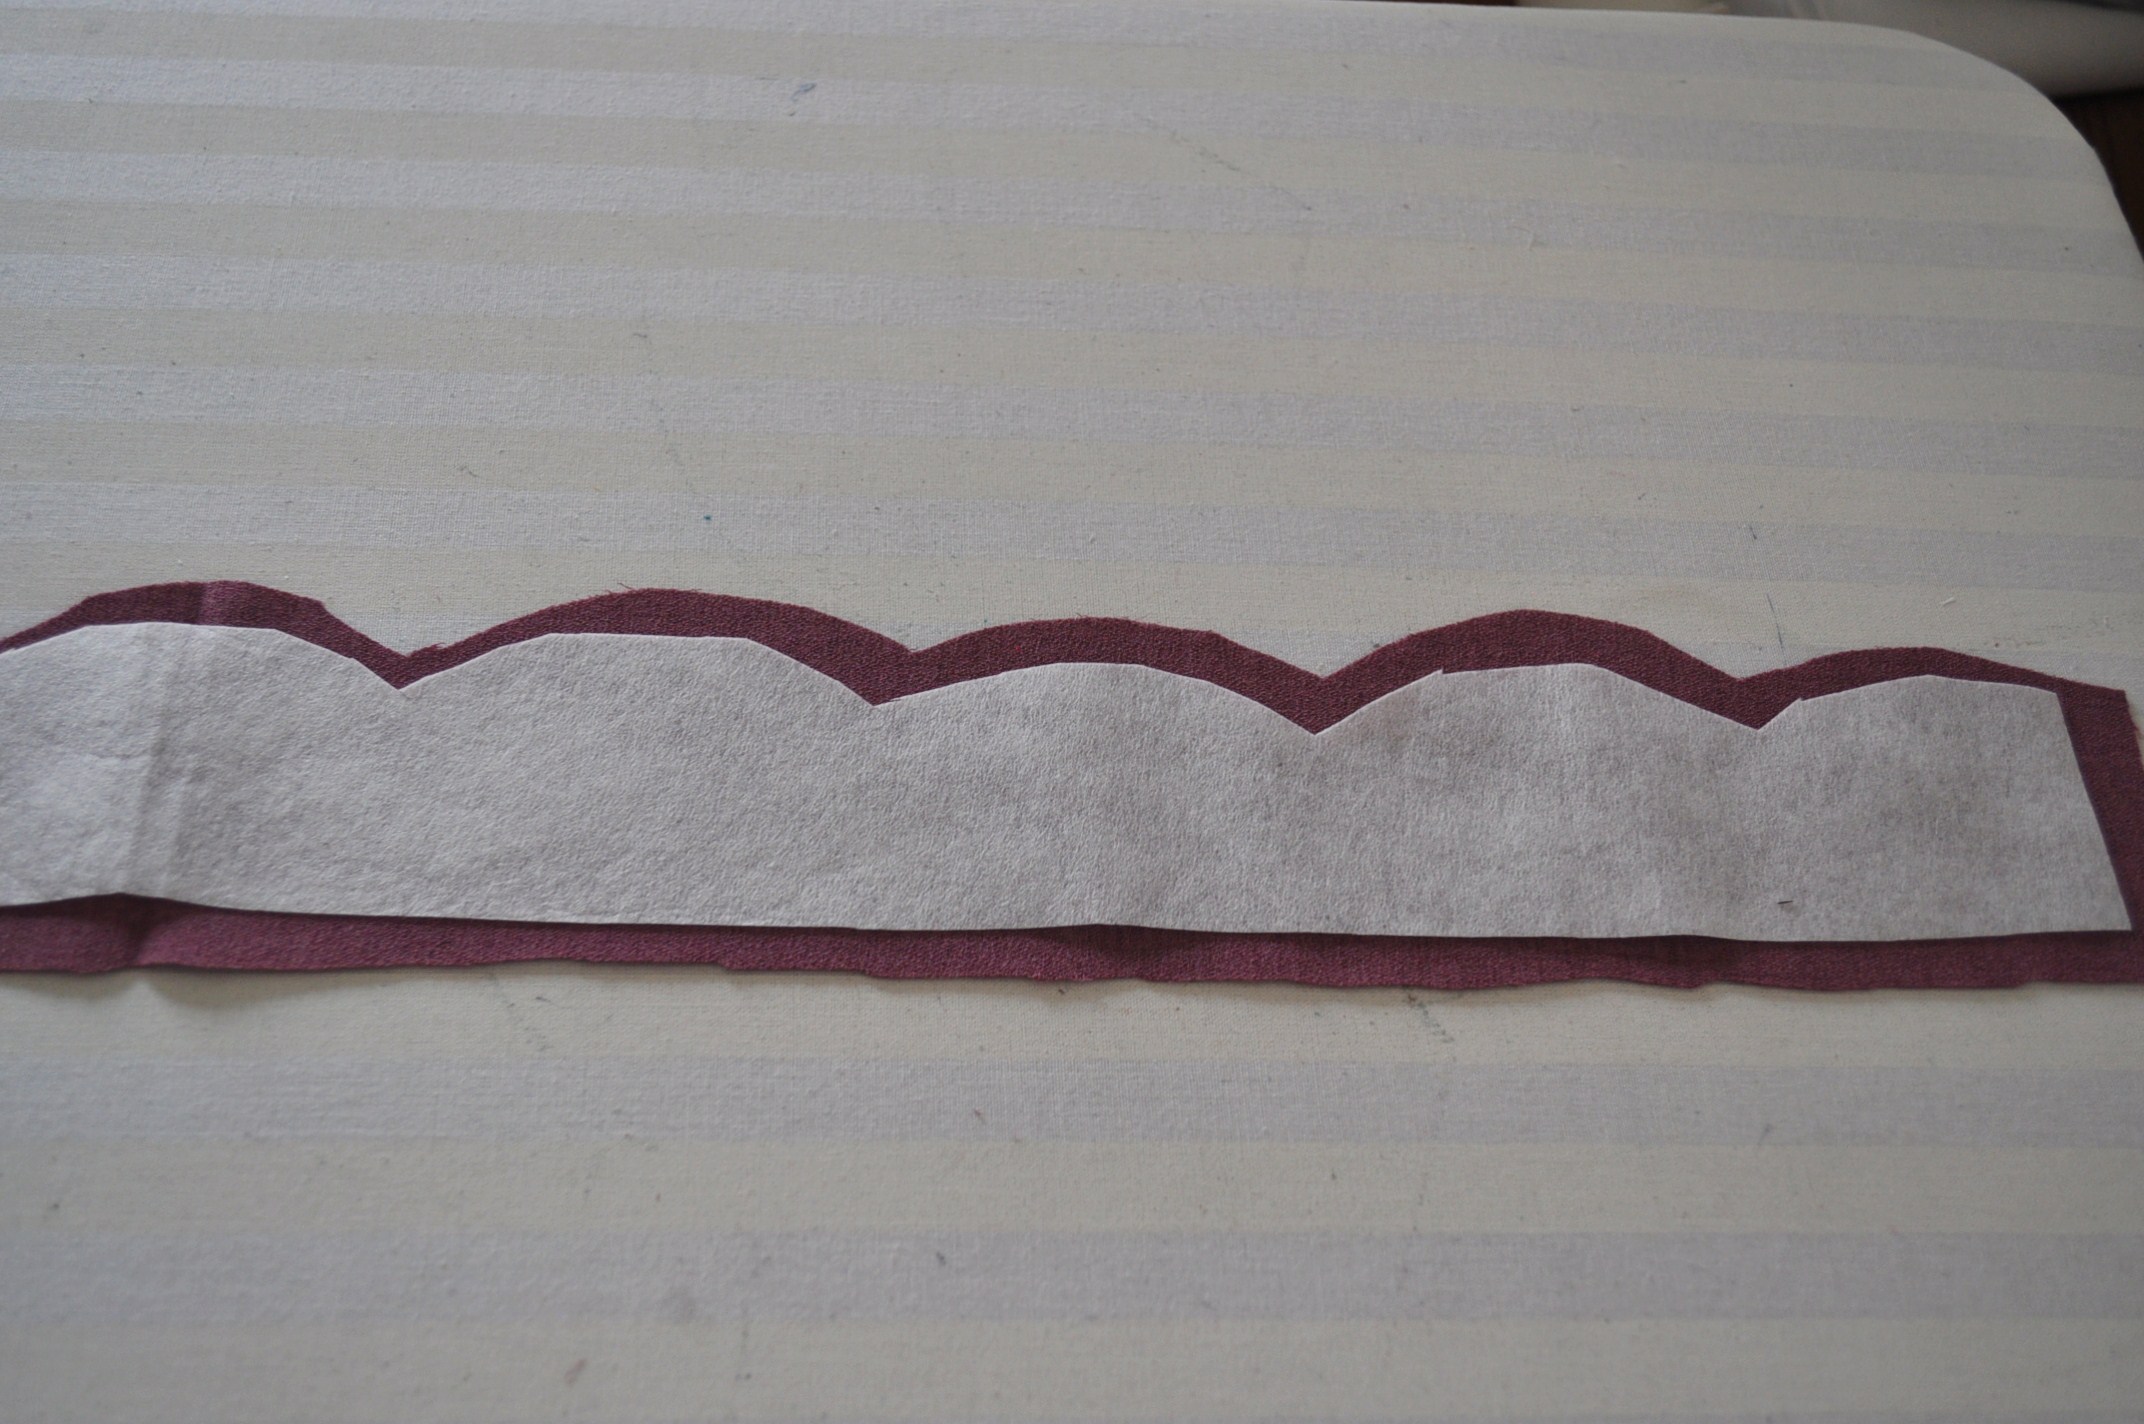
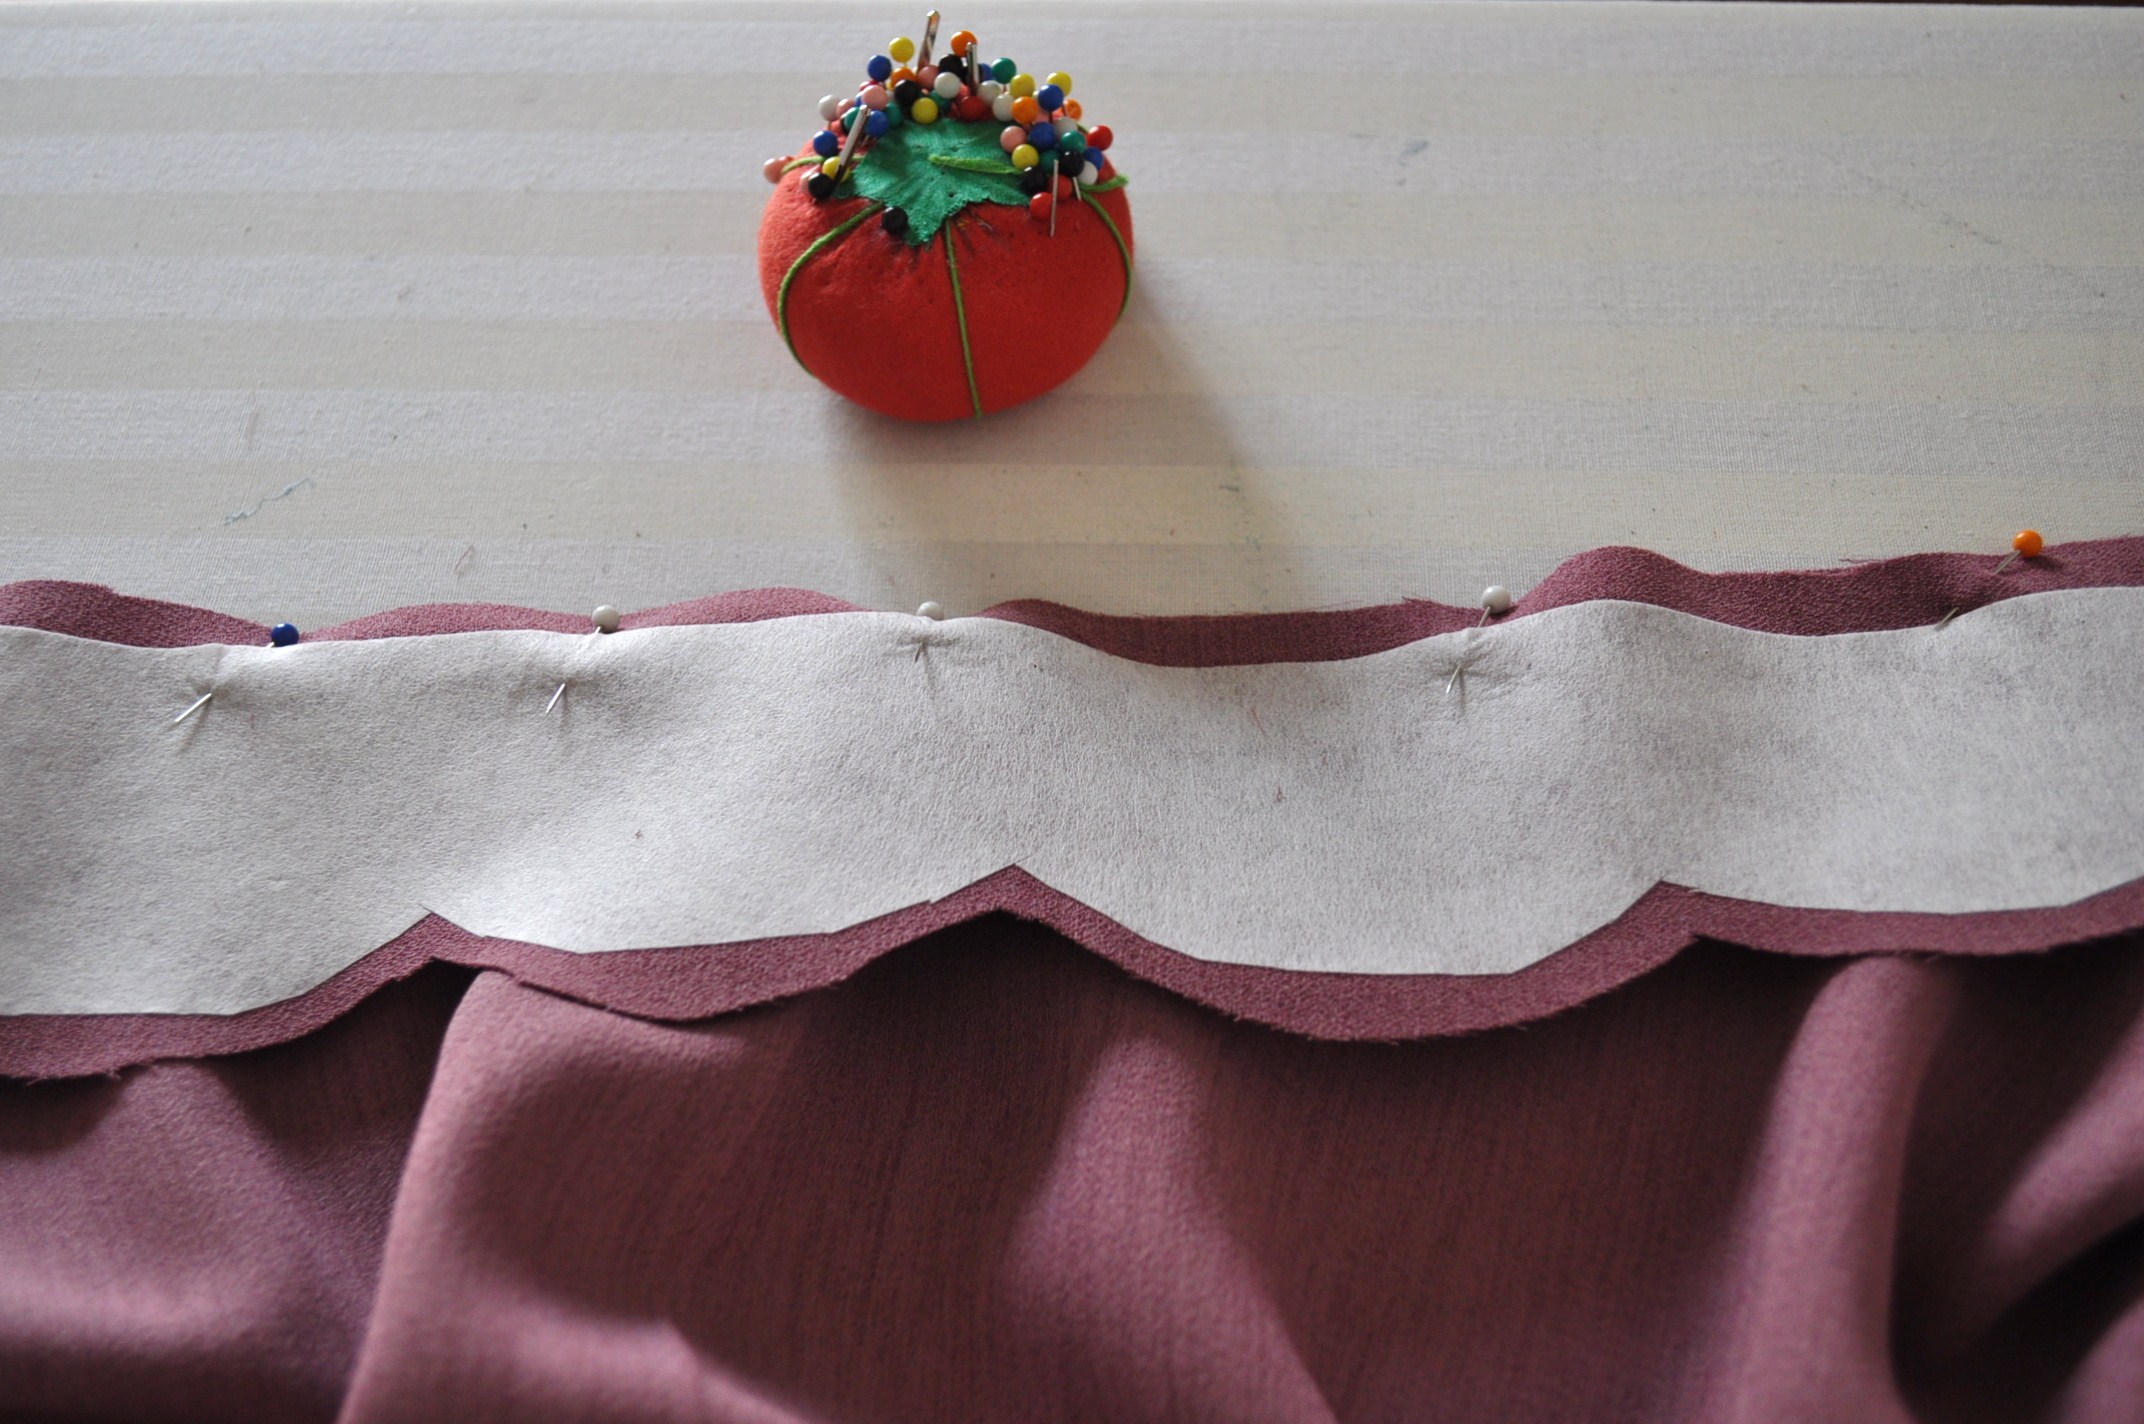
  1. Cut 1 fusible interface, center folded for waist band. Cut the interface ¼” smaller on top, and ½” smaller on sides and bottom.
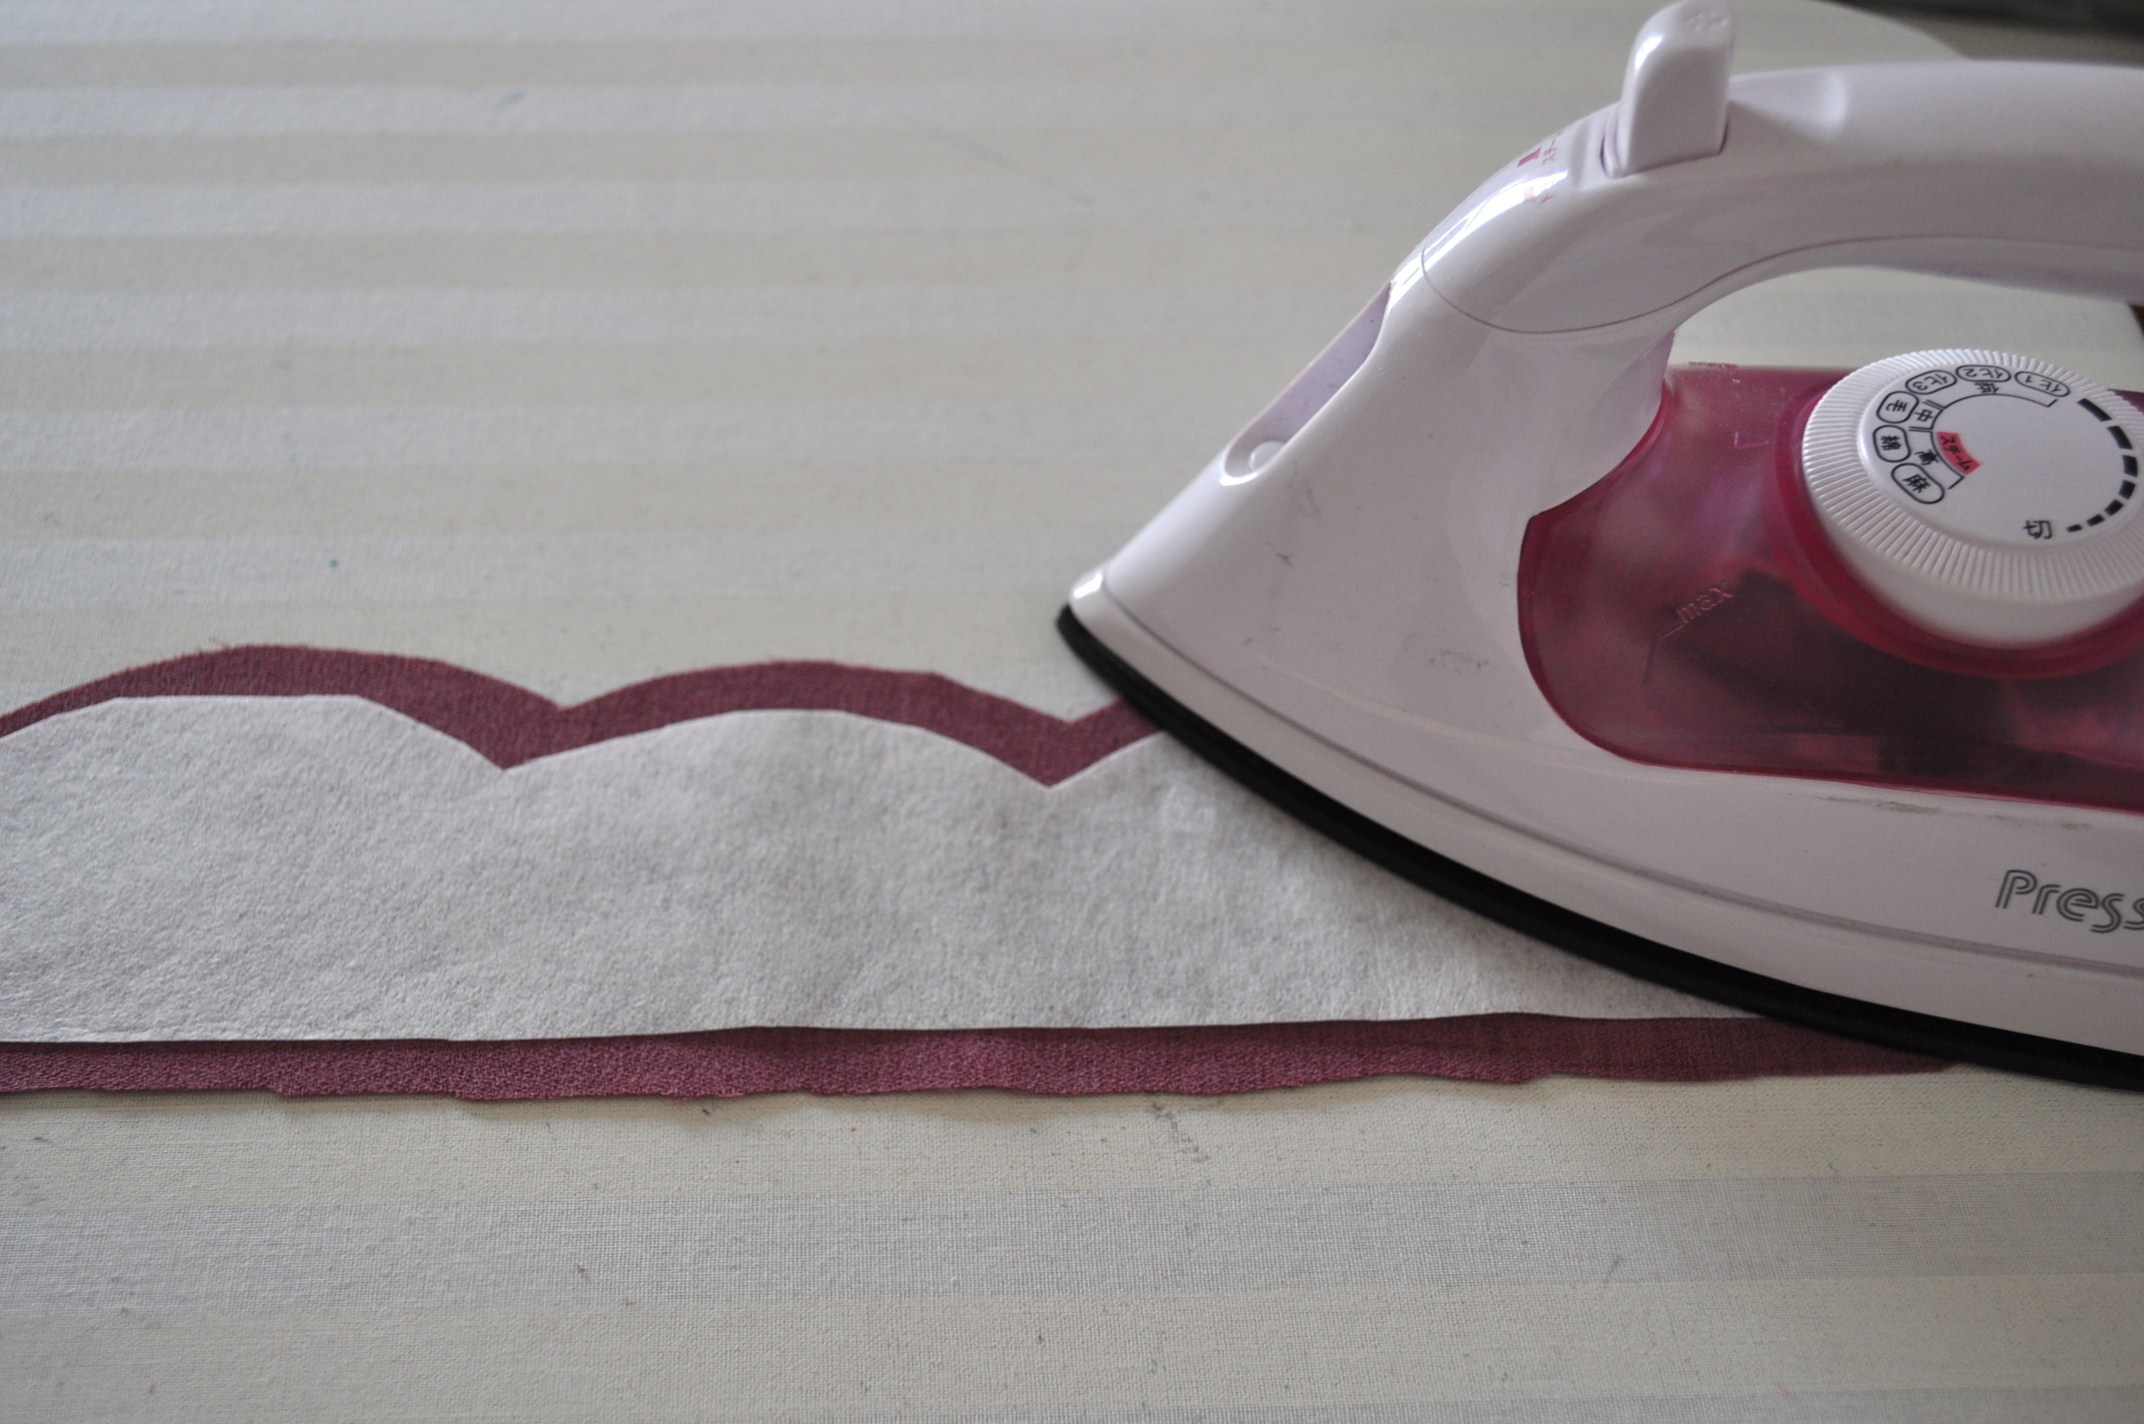
  2. Iron the interface on one of the waist band pieces (you only need one interface piece).
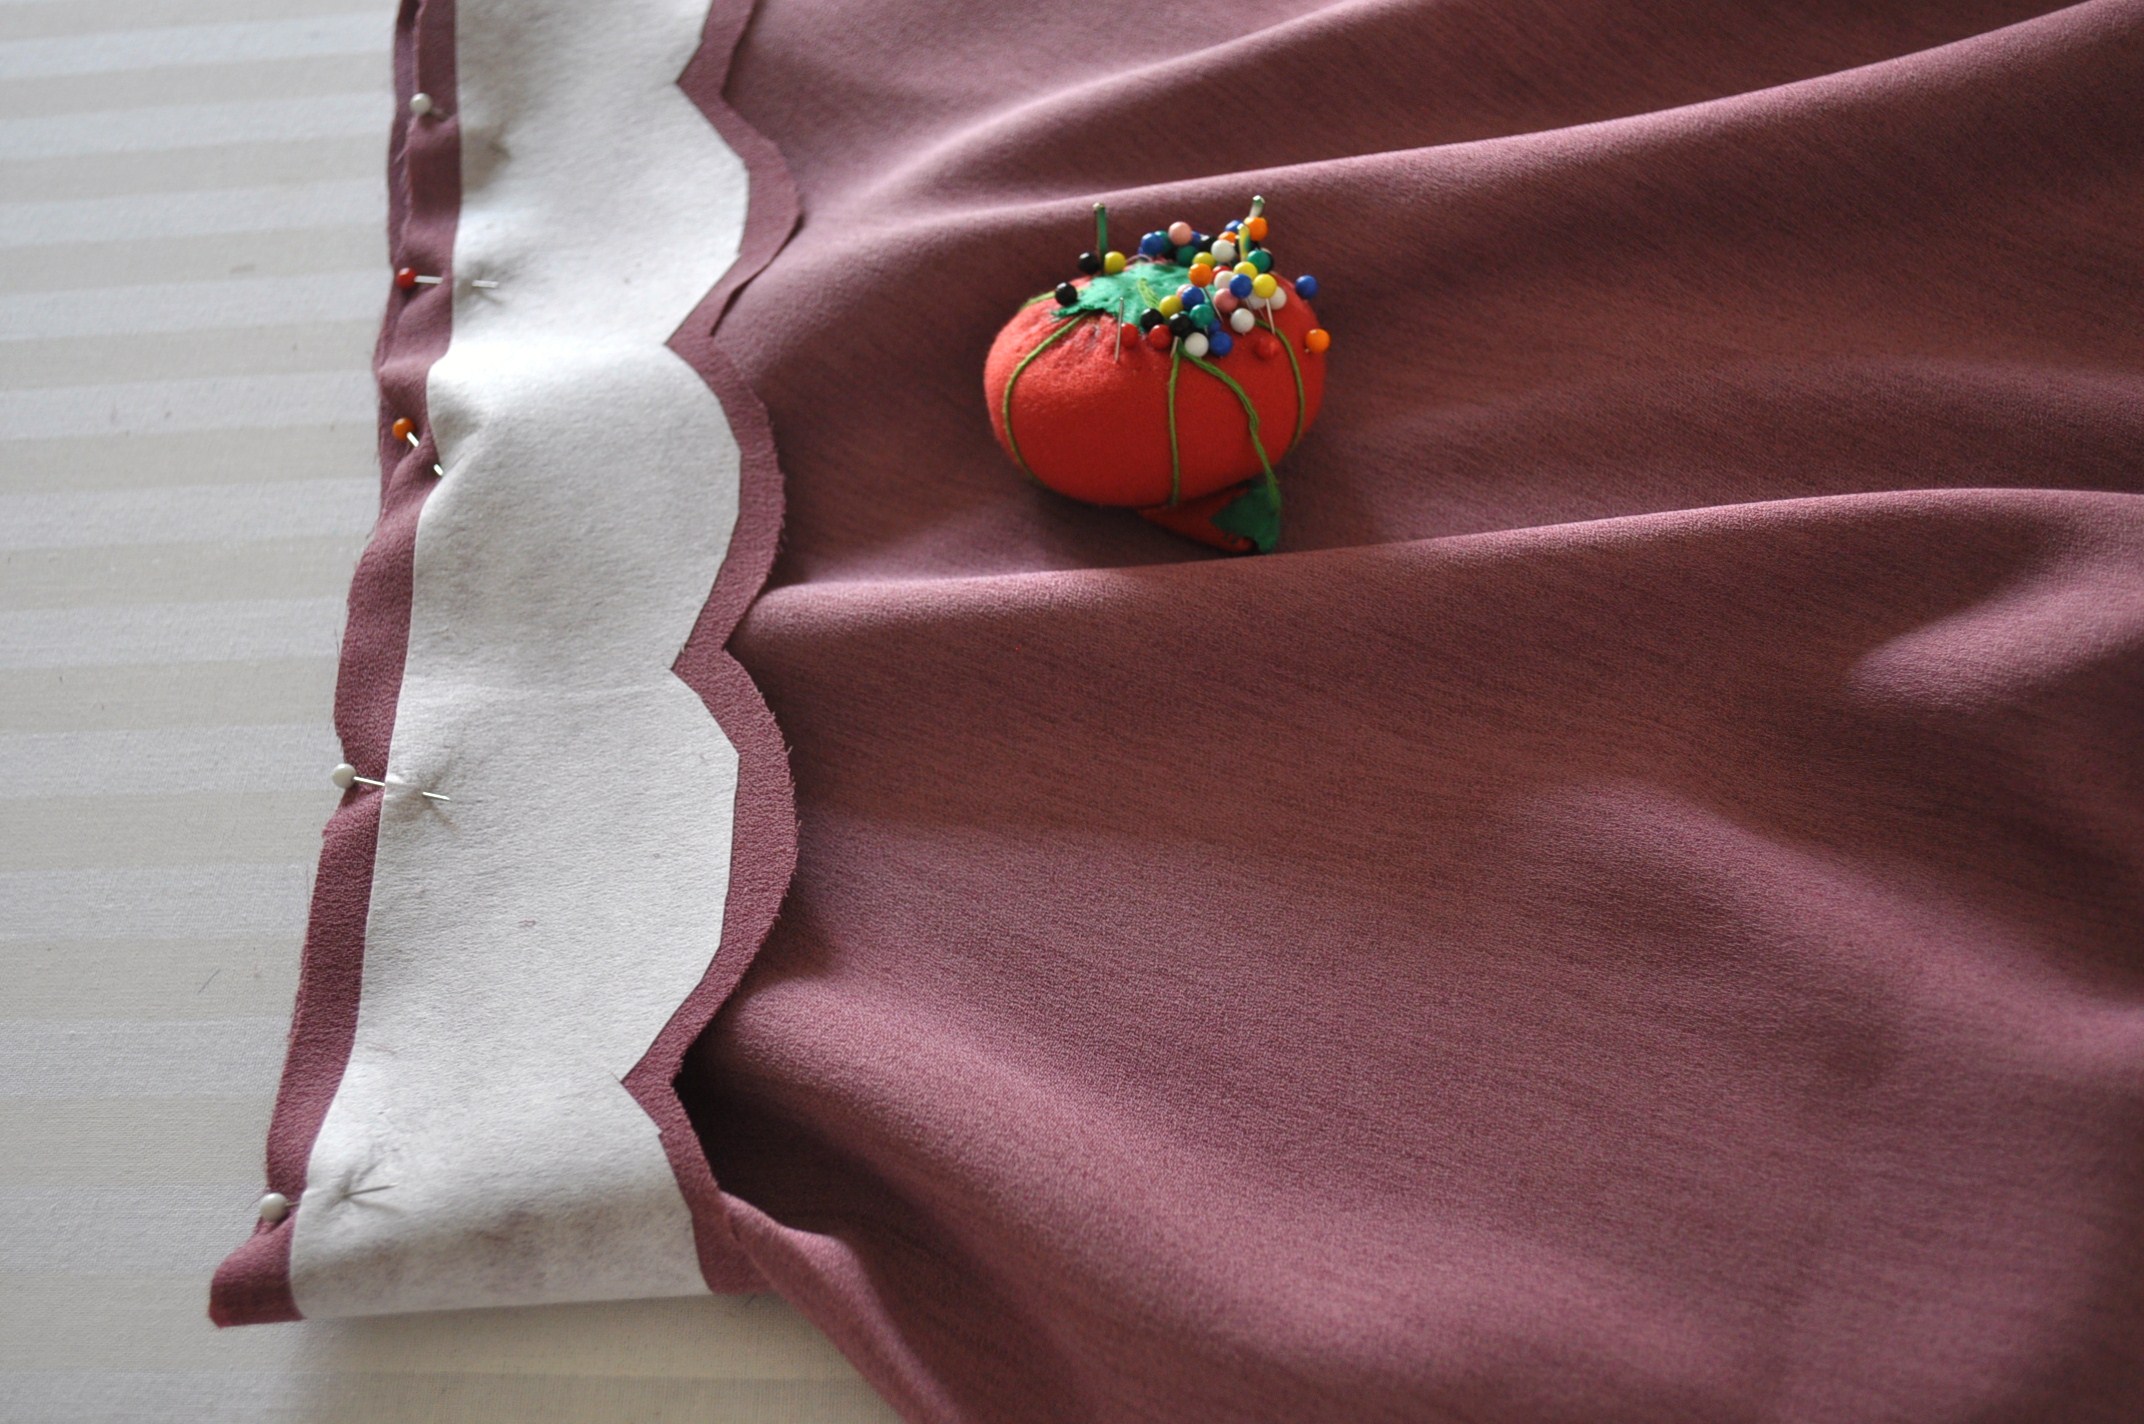
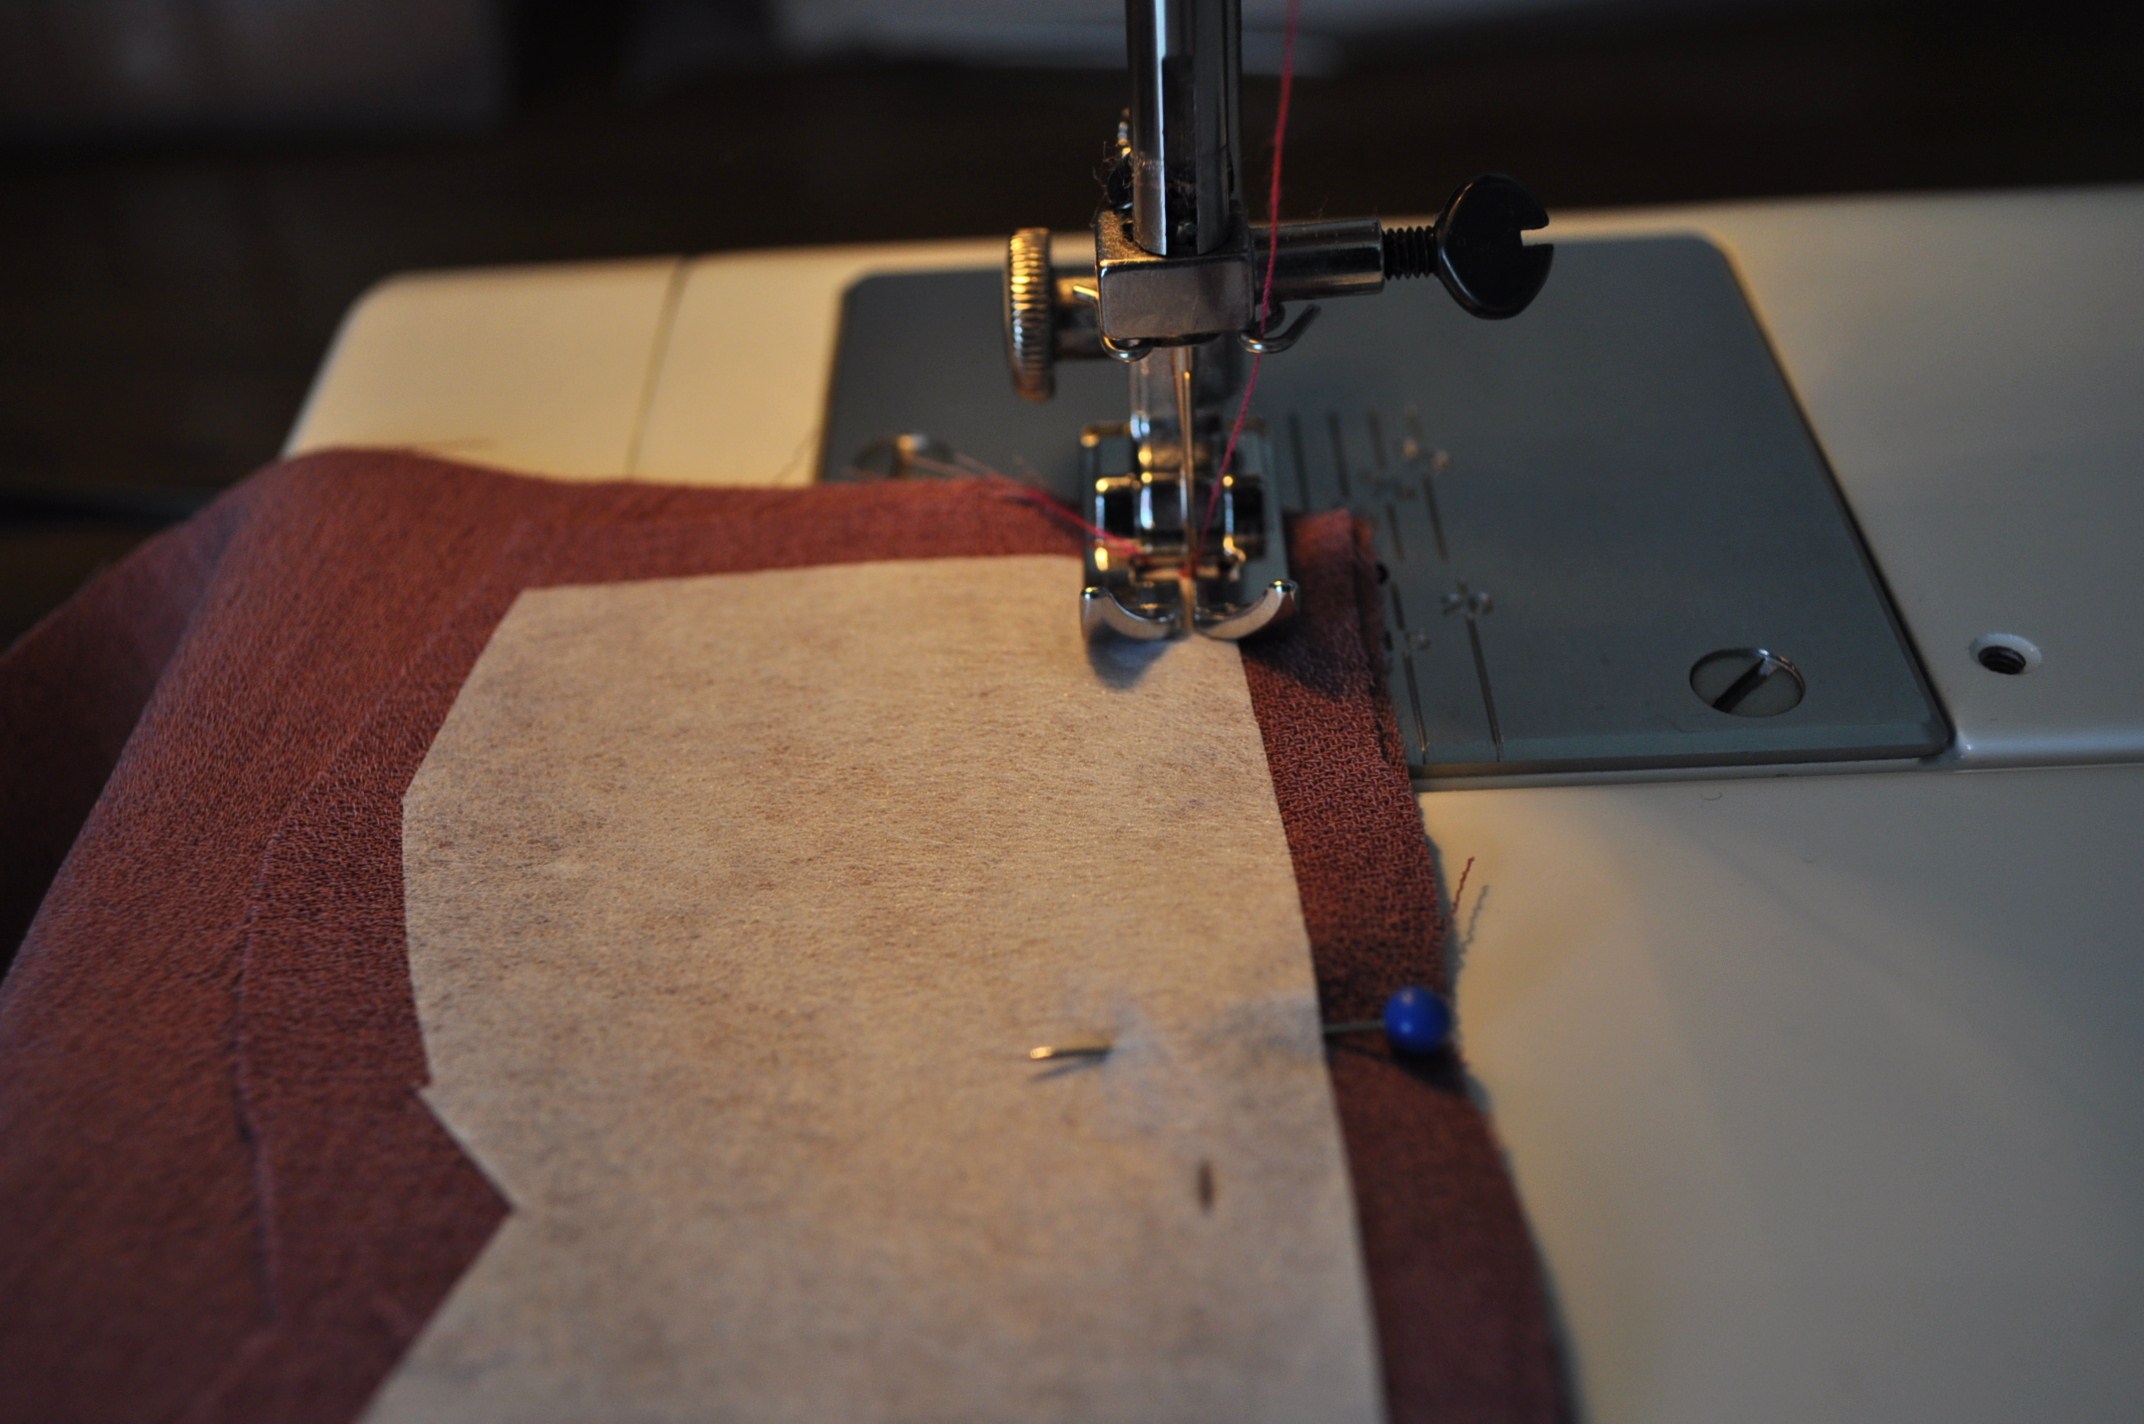
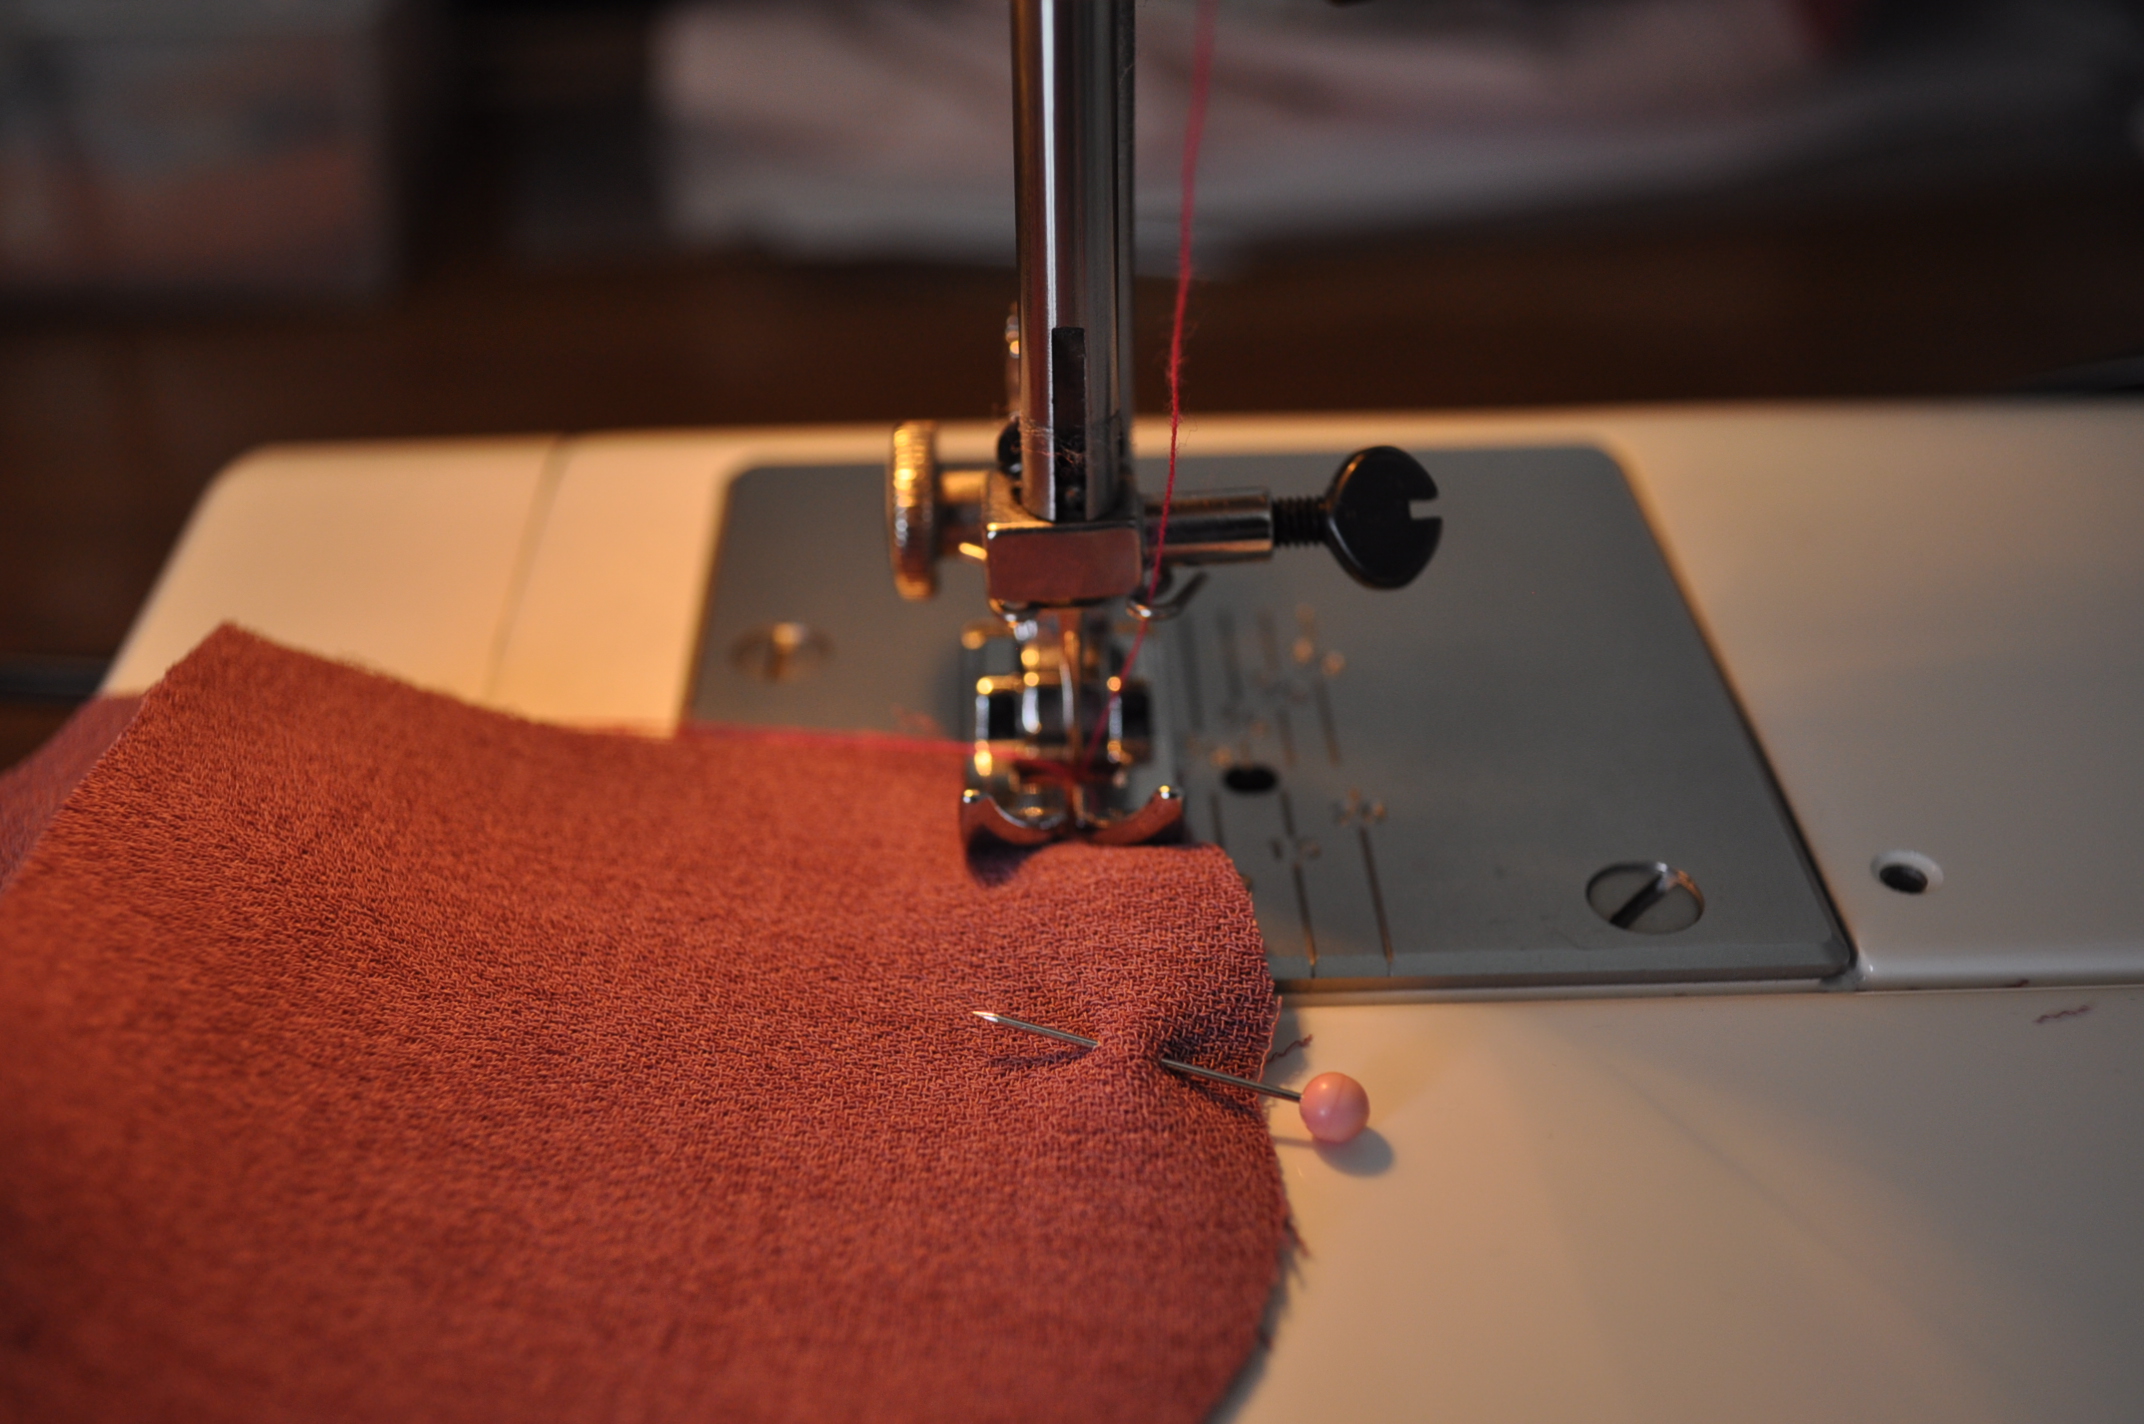
  3. Pin the bottom line of the waist band with interface and and the top line of the skirt piece with right sides facing together.  Sew the waist band skirt piece together.
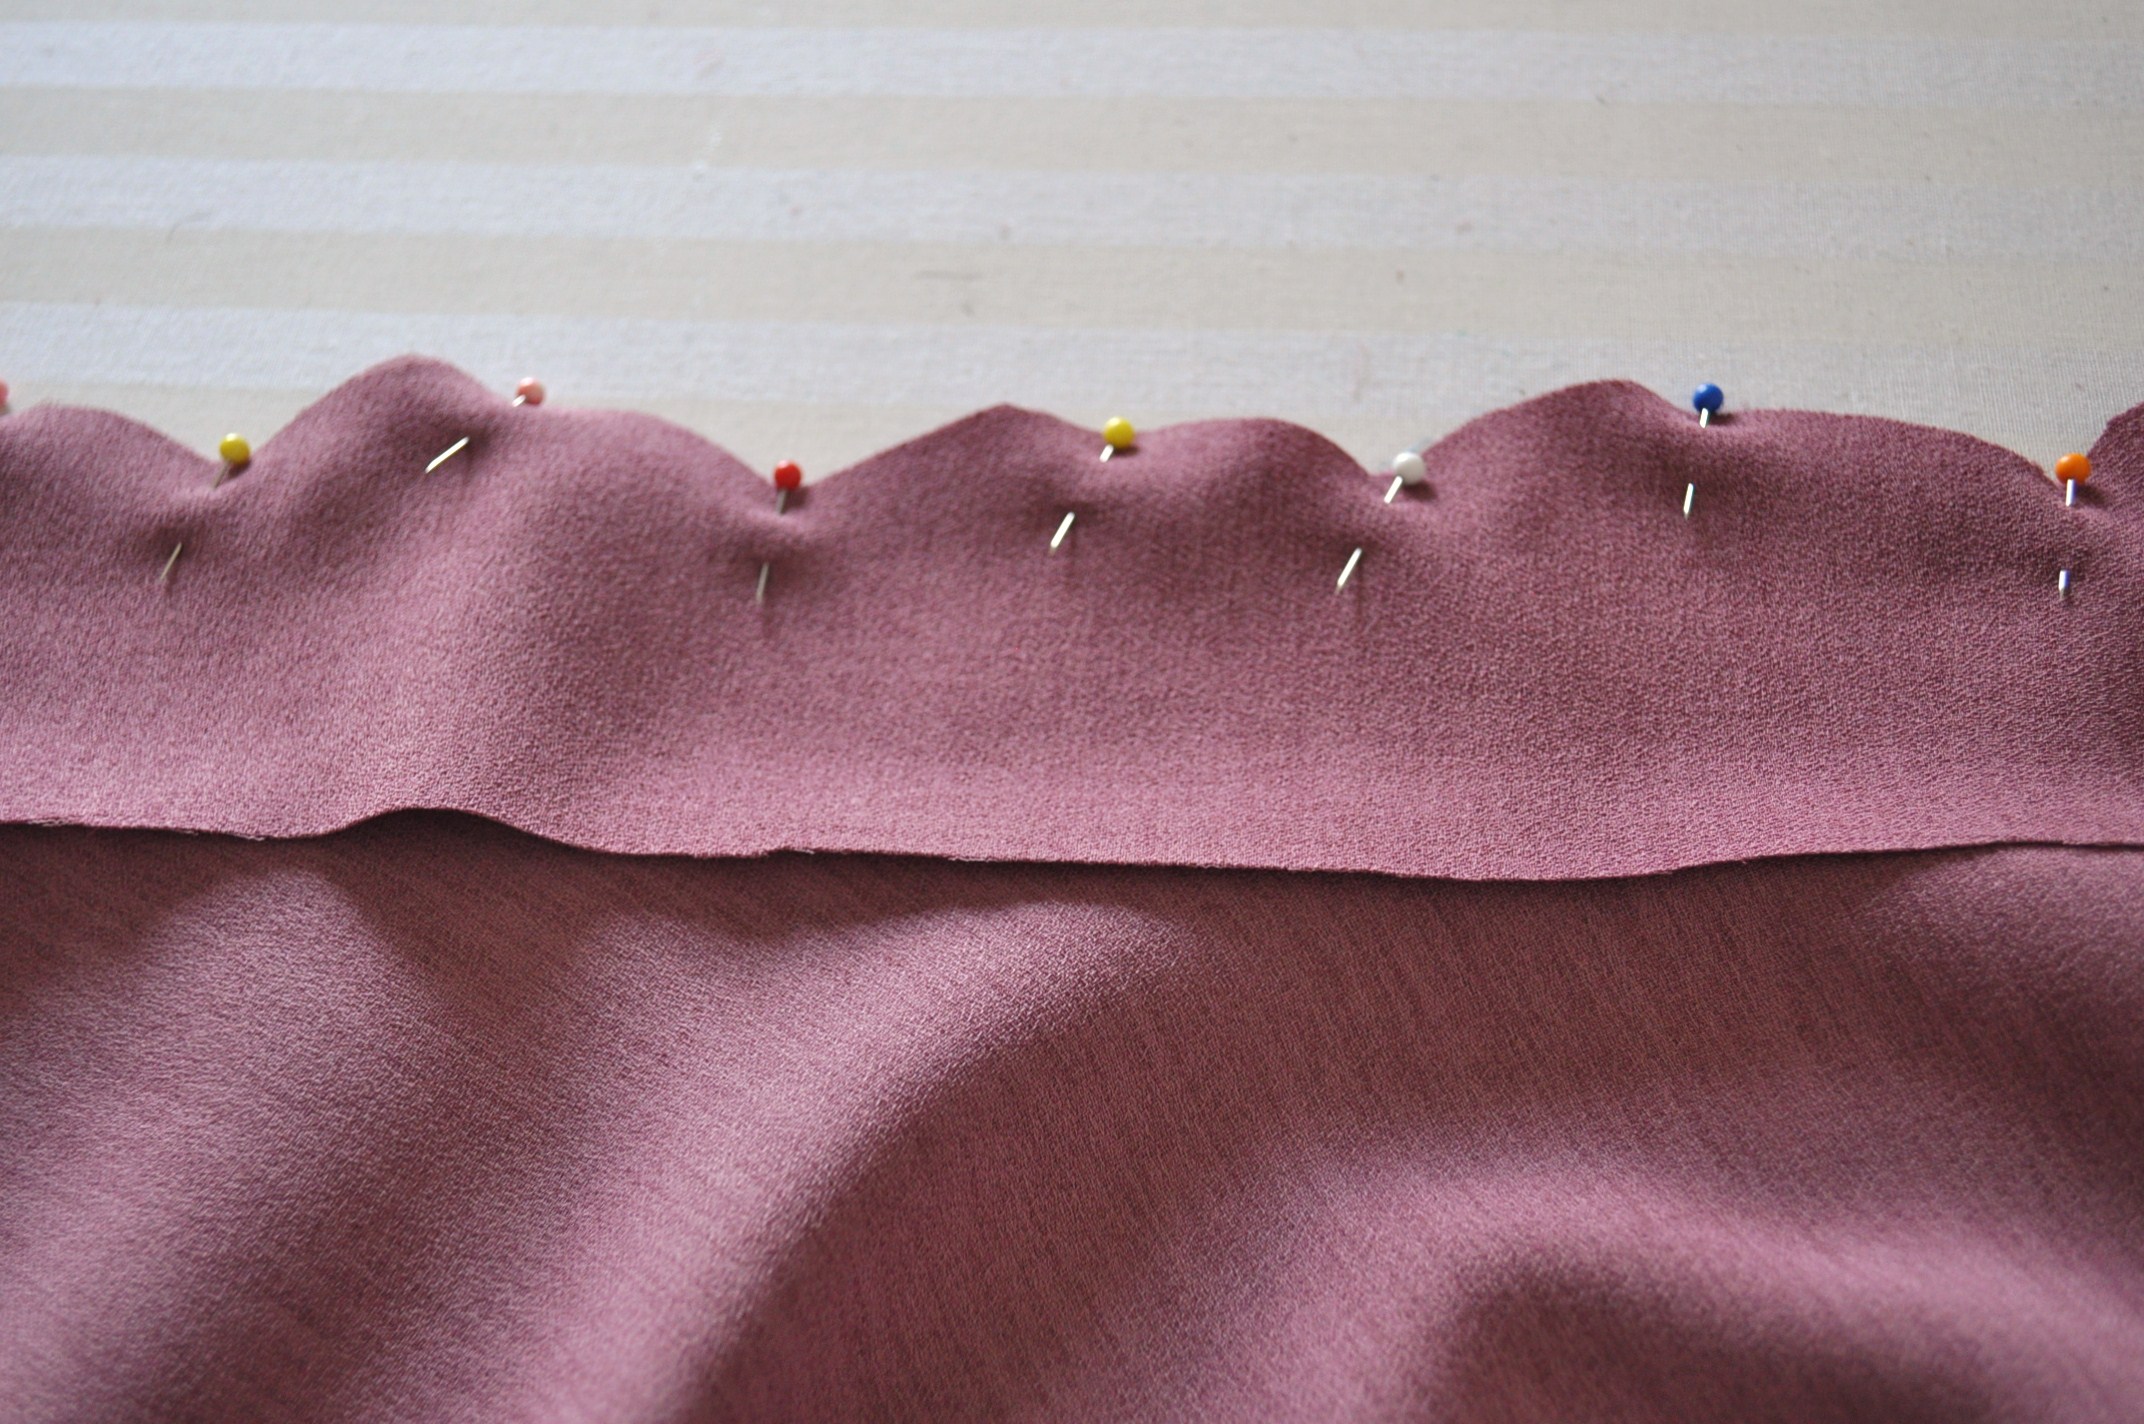
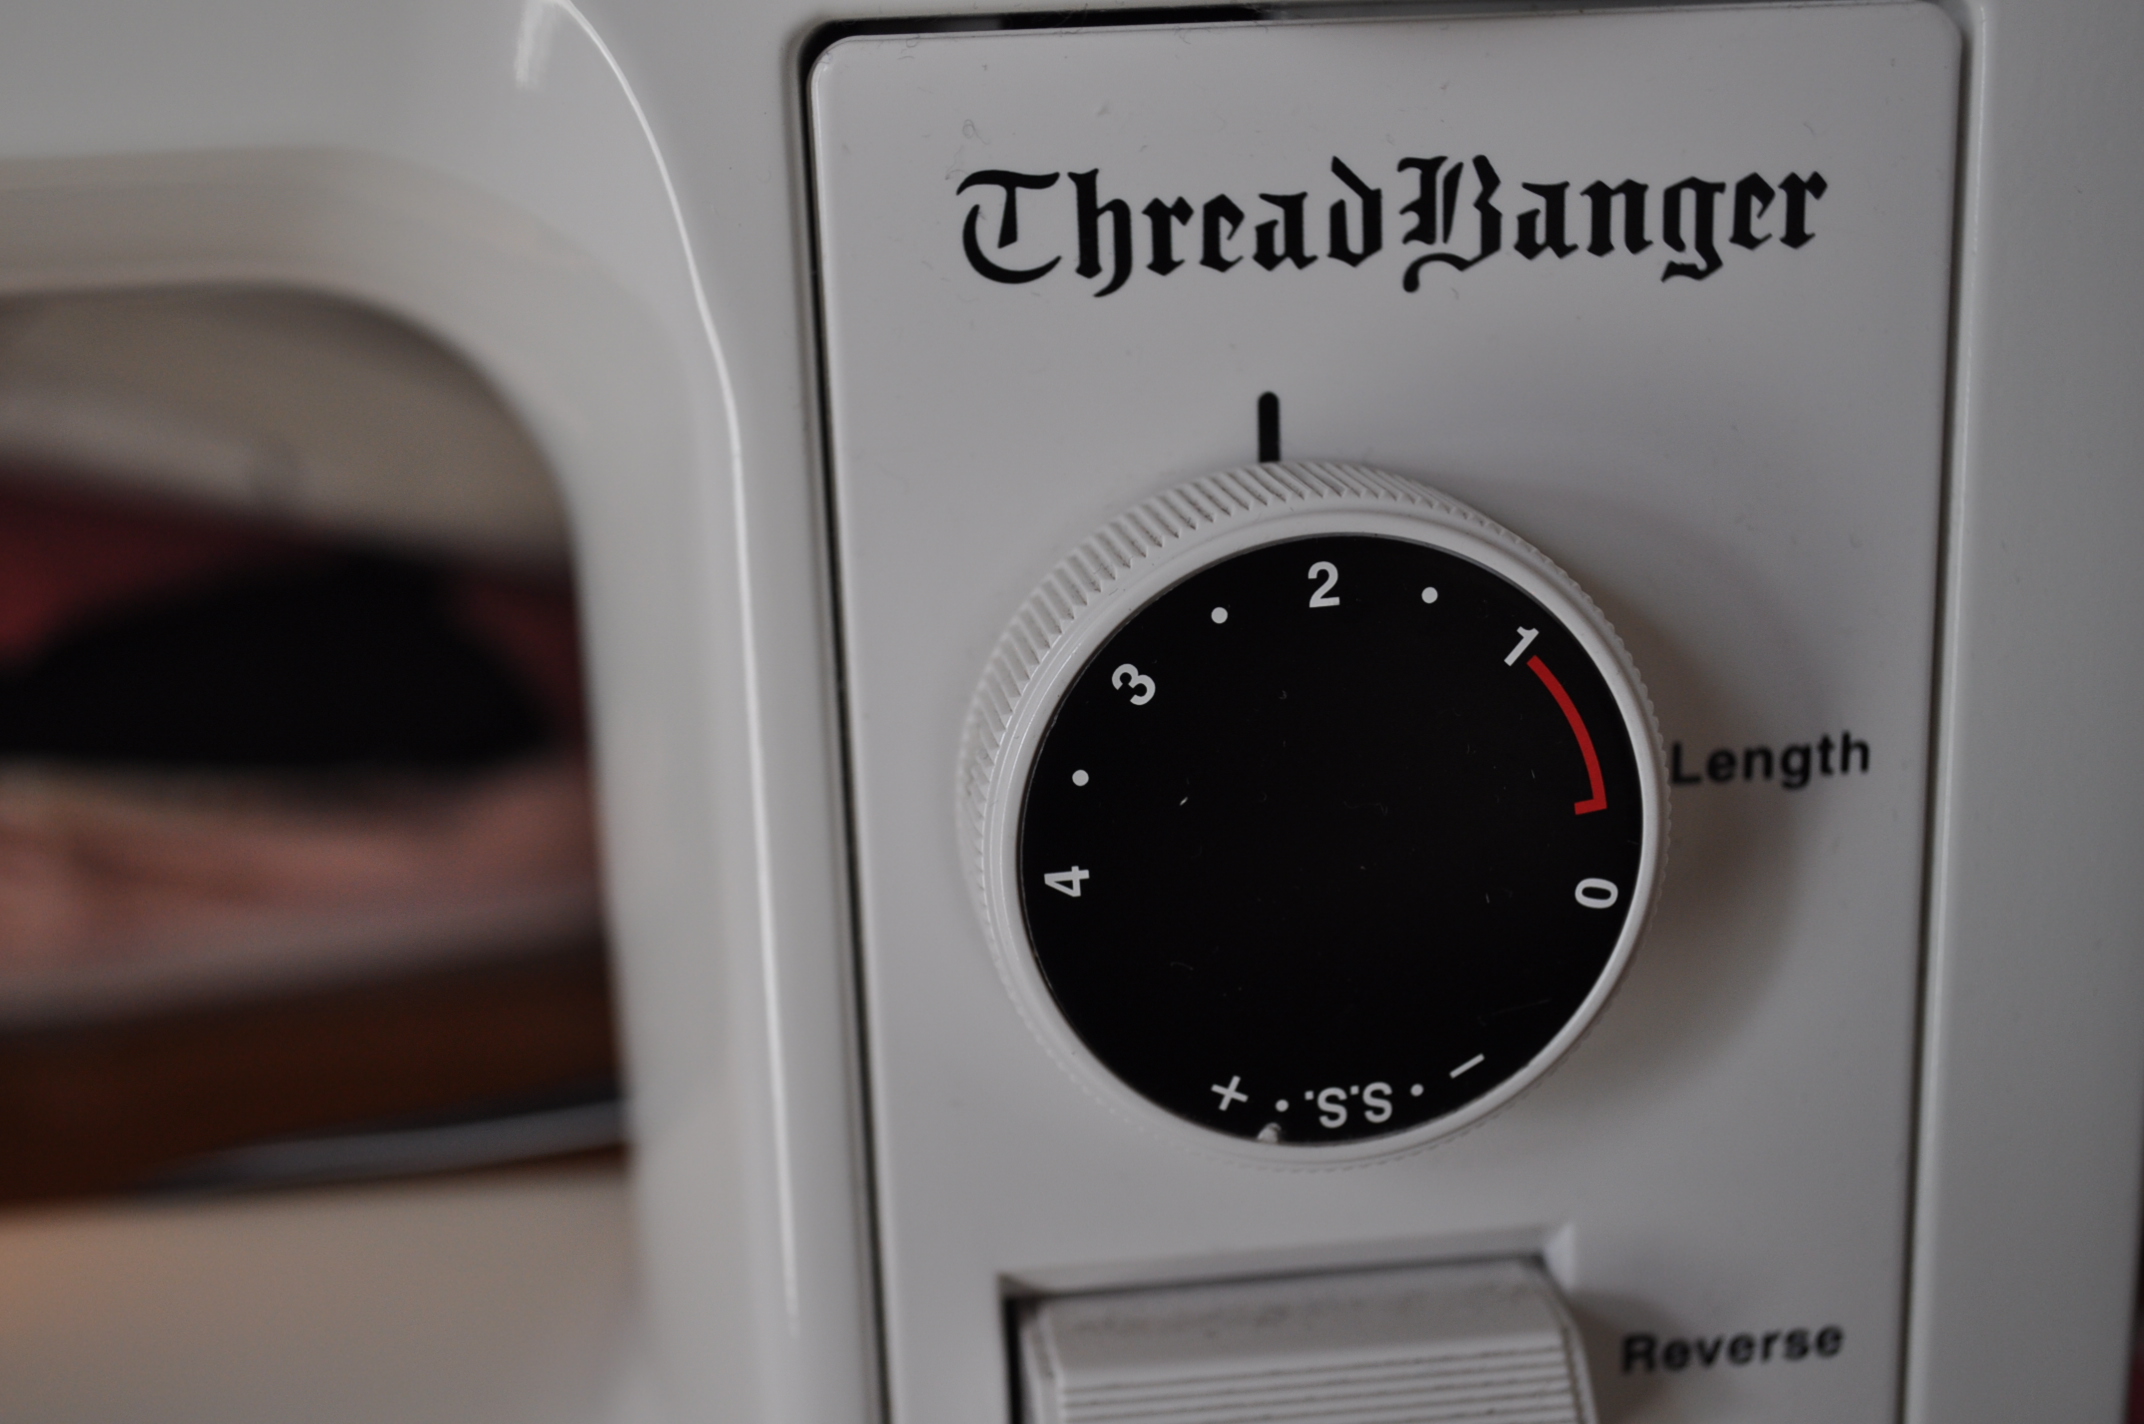
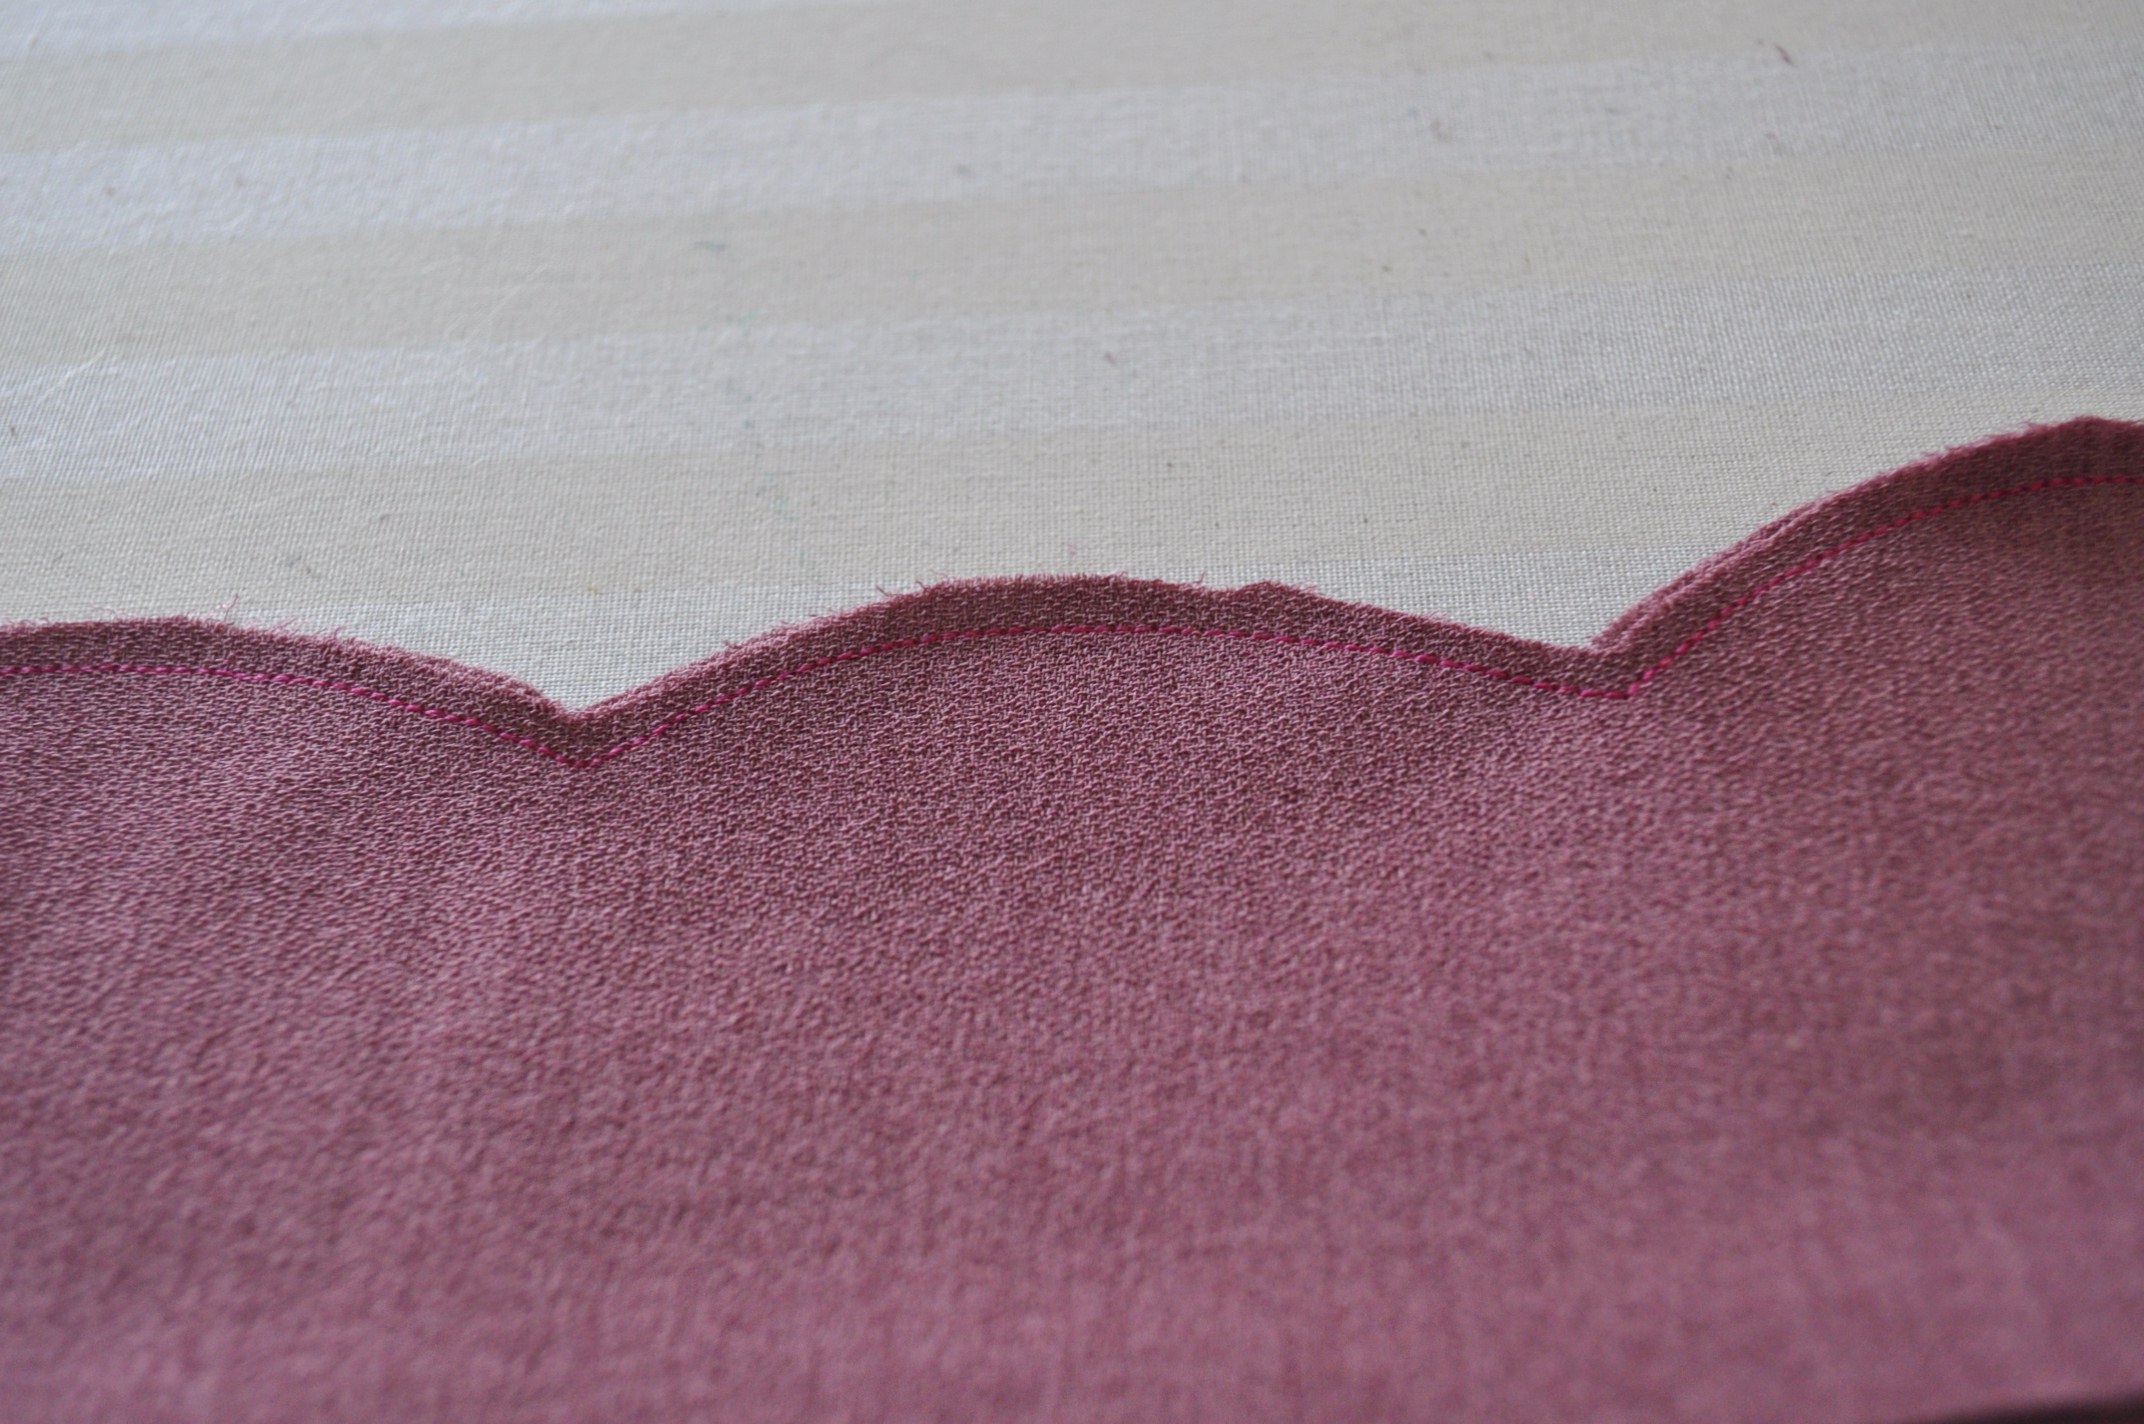
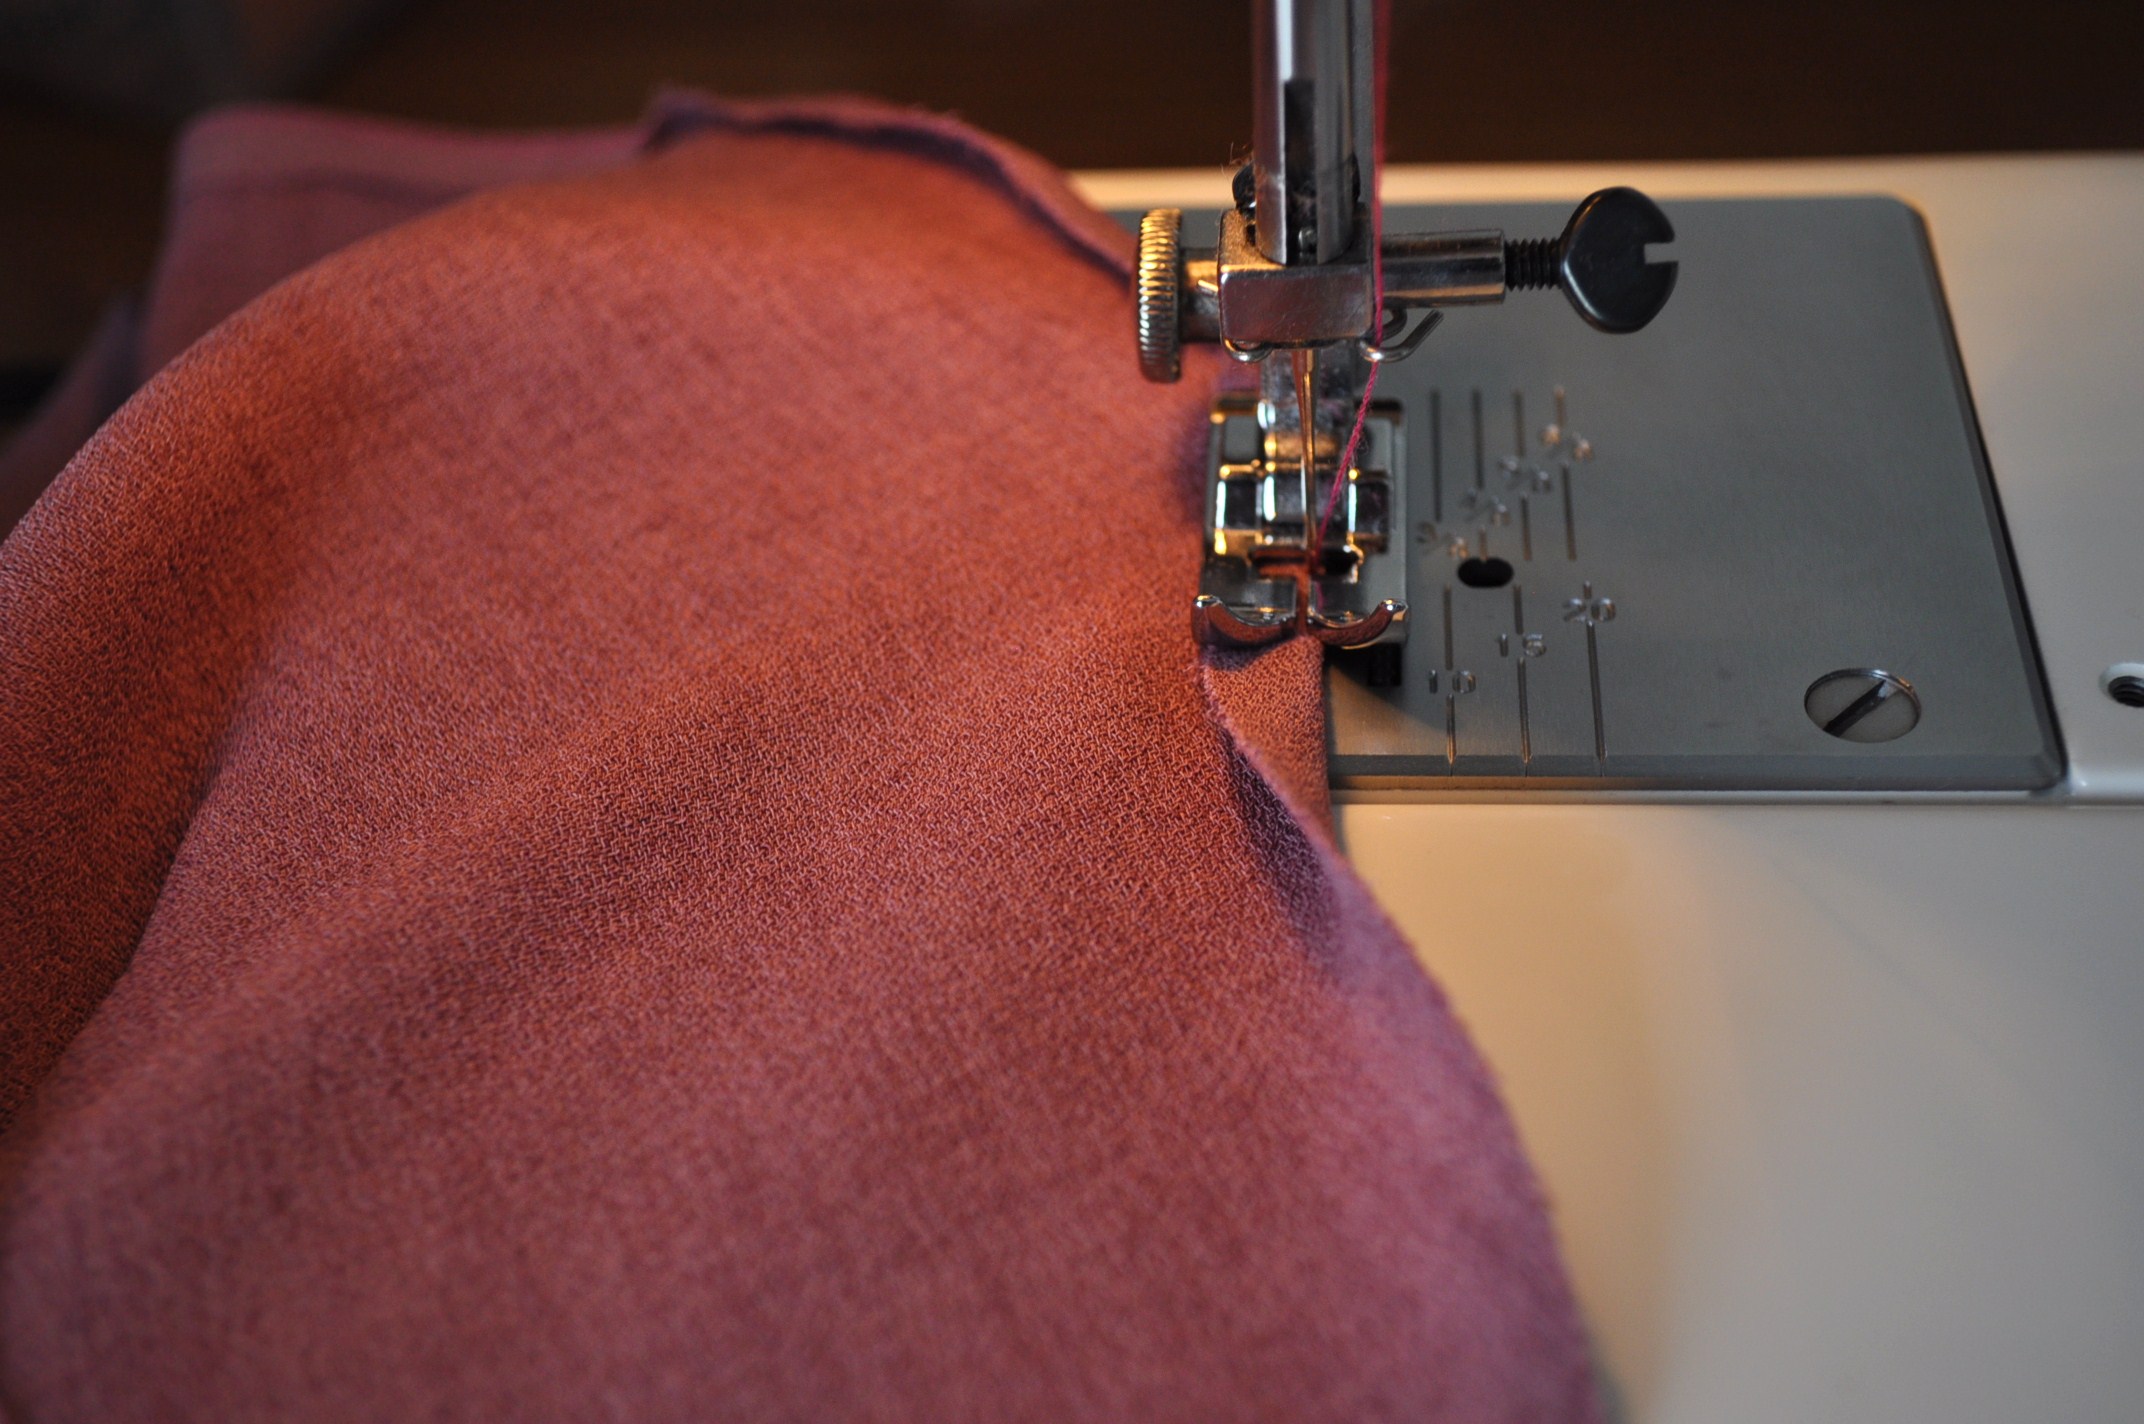
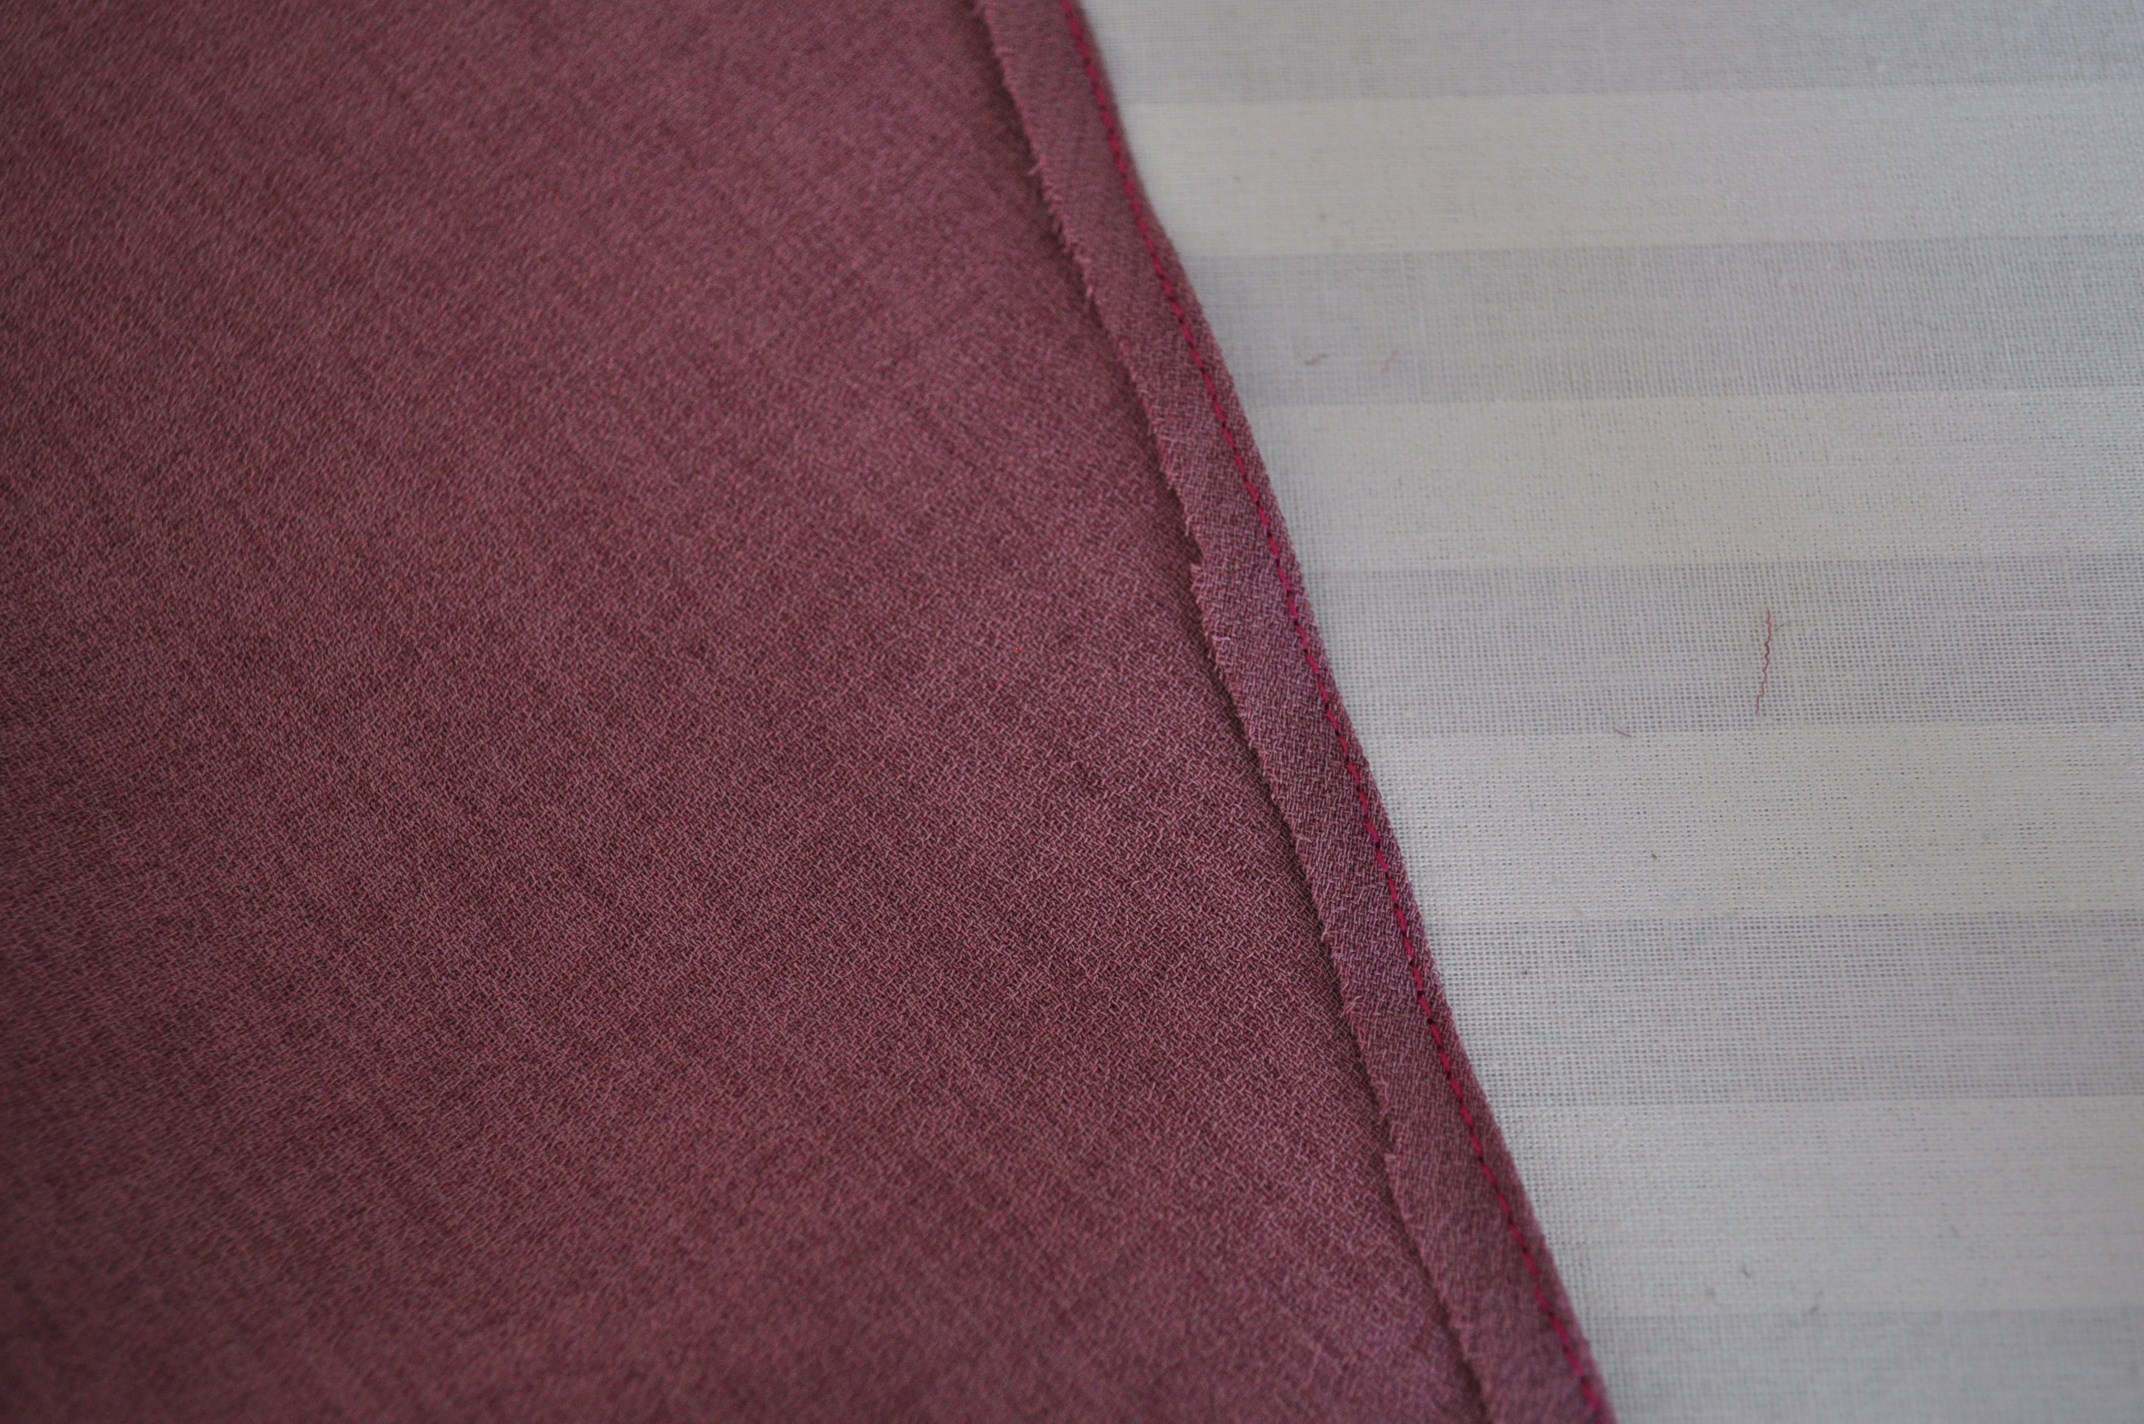
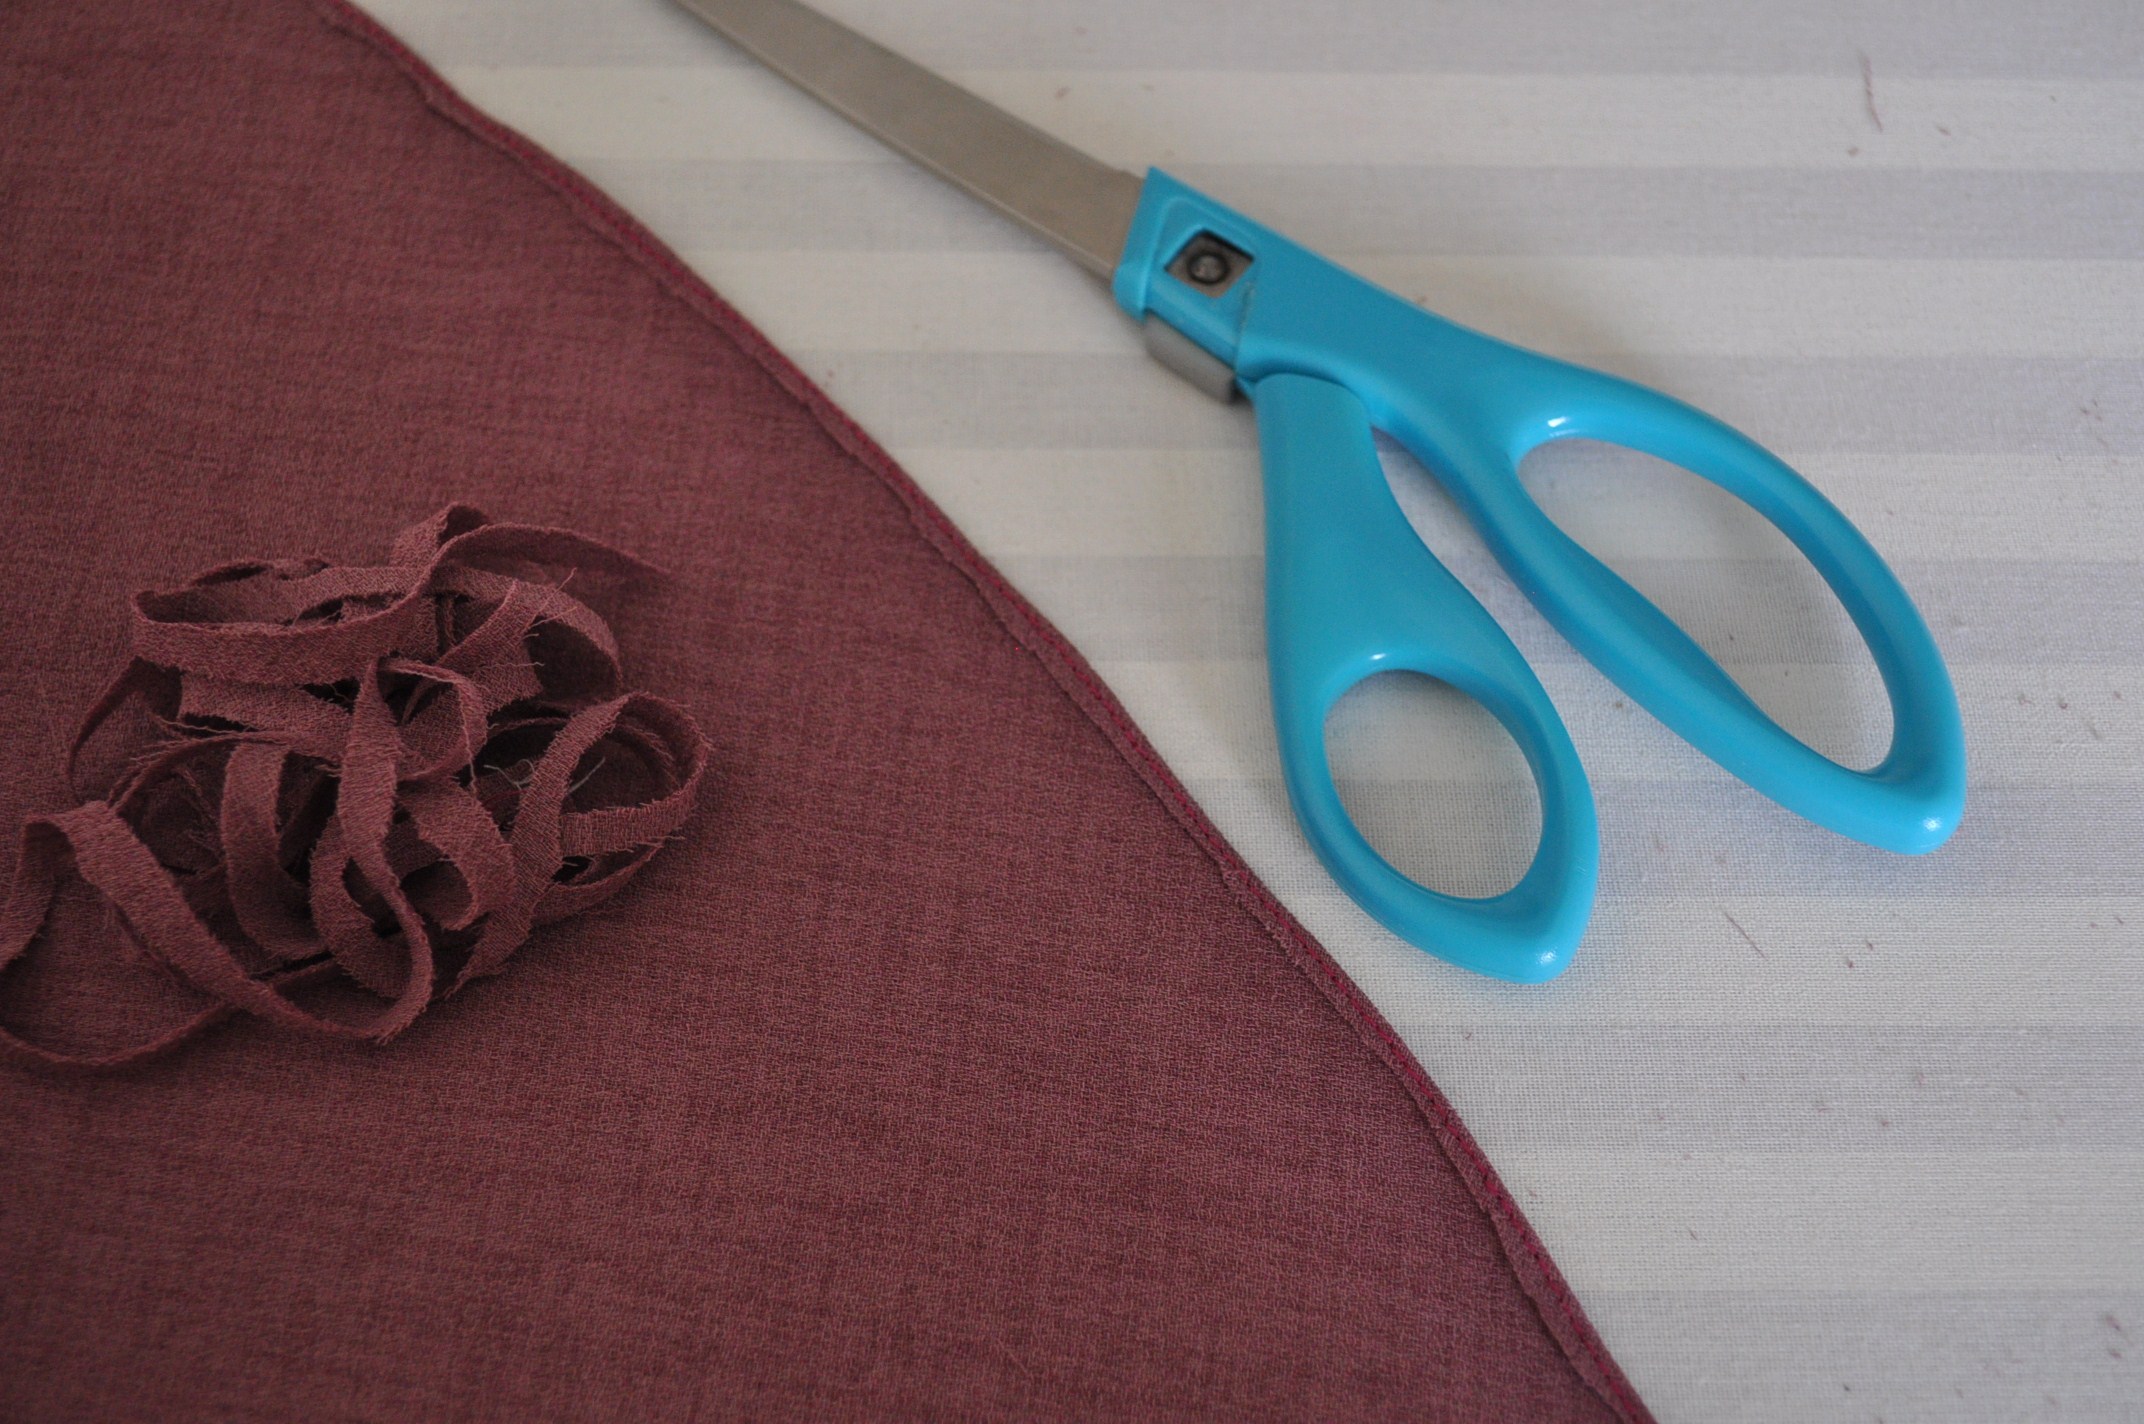
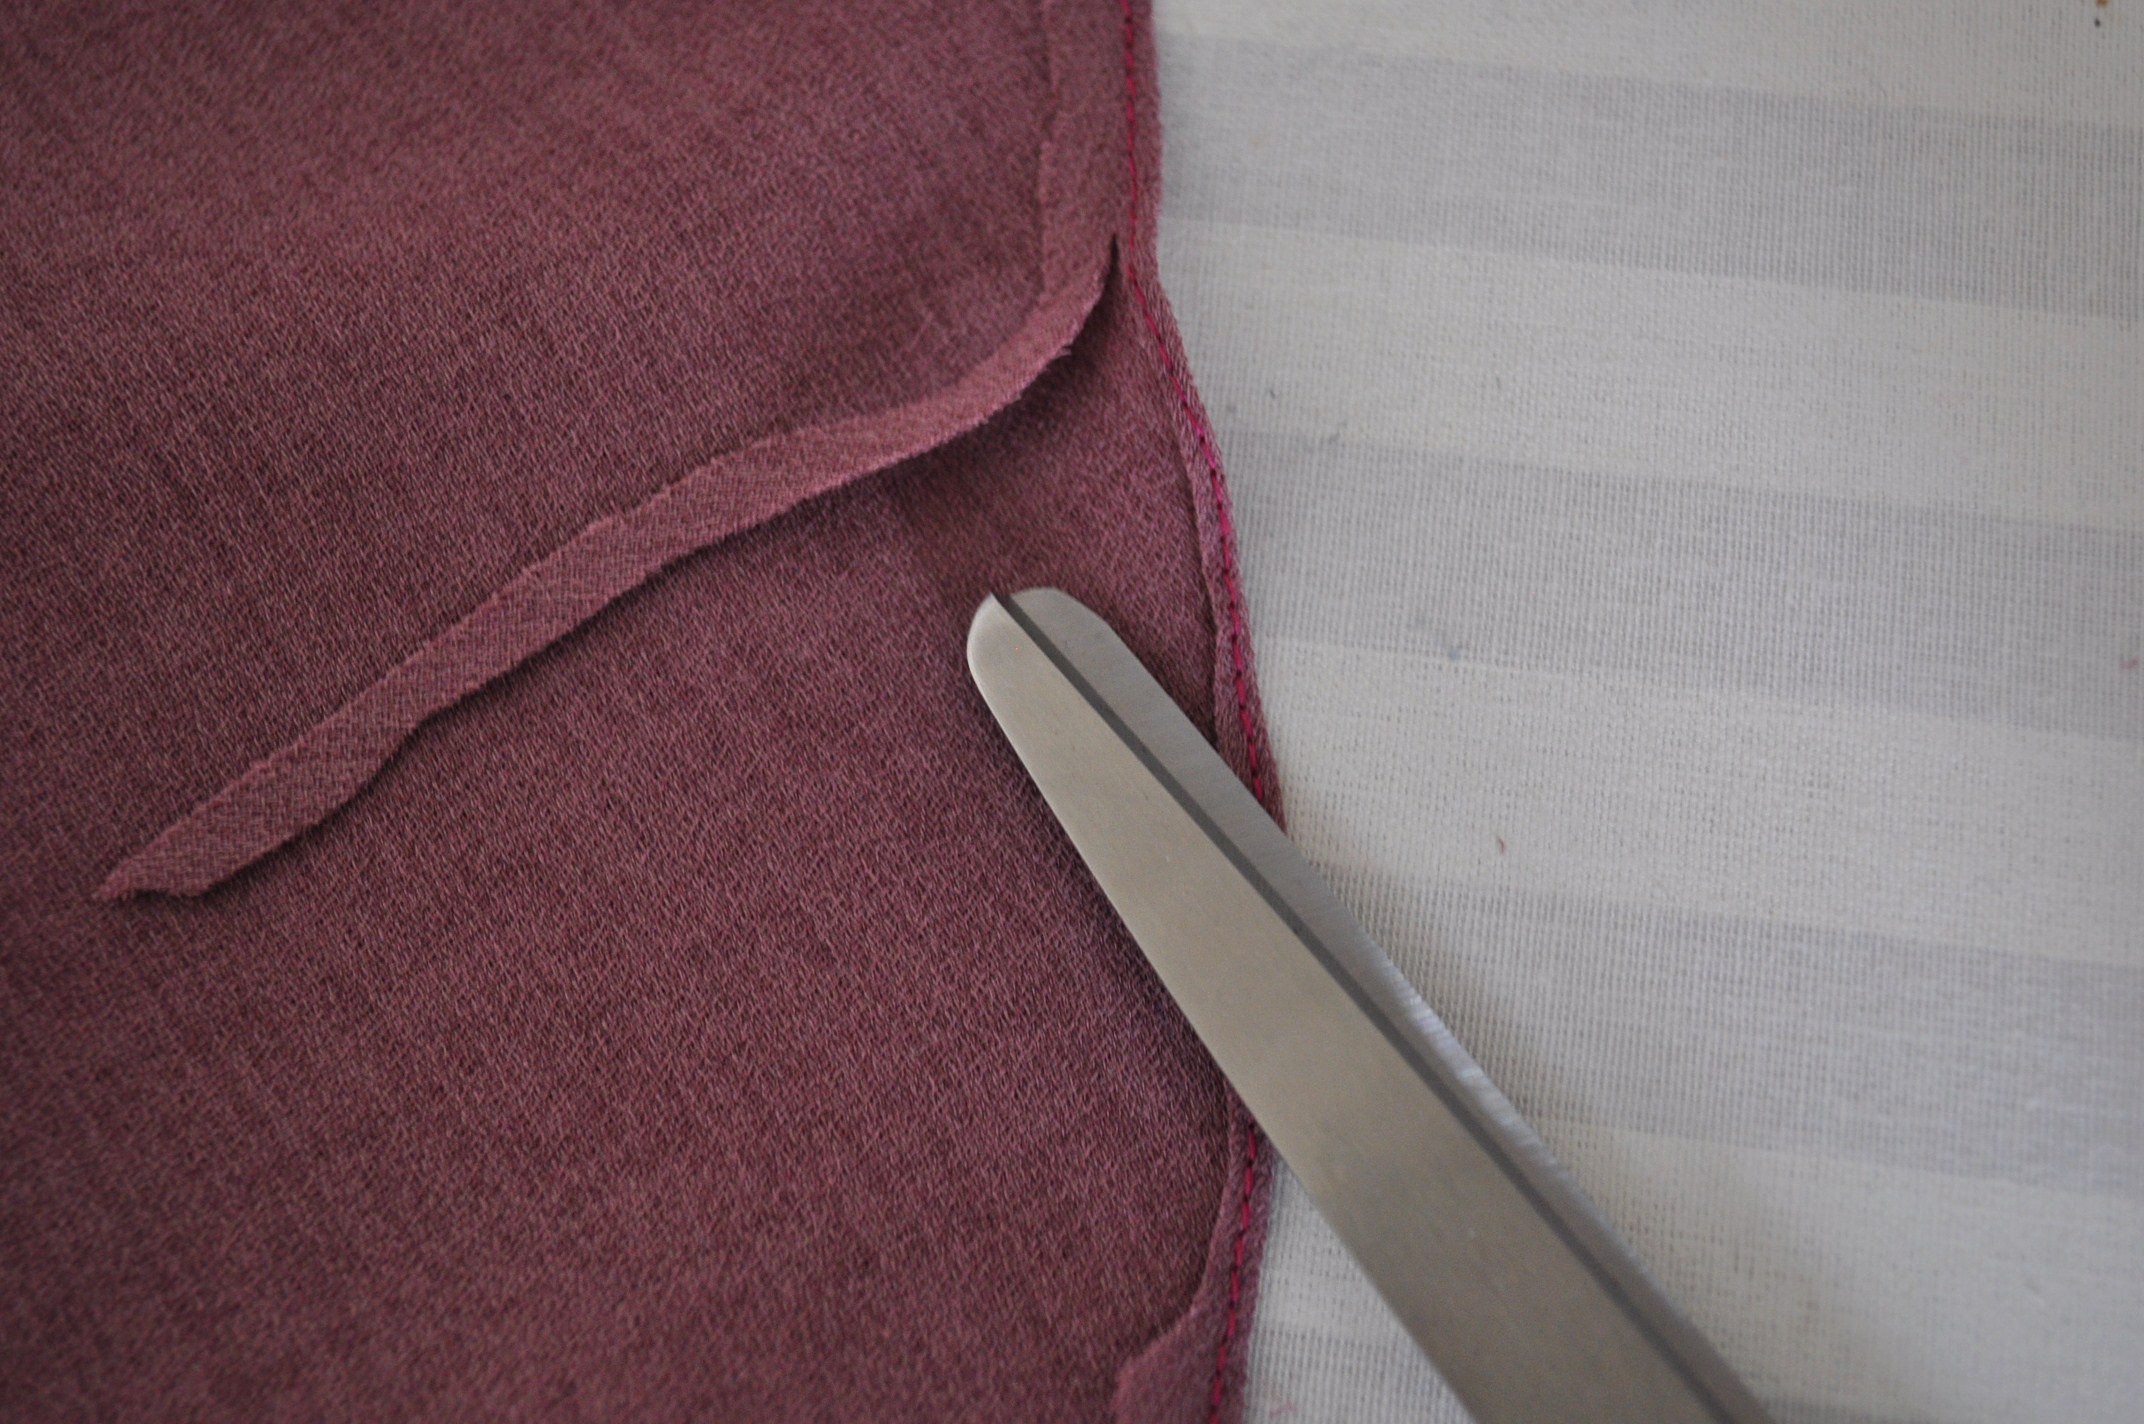
  4. Place the other waist band (the one without interface) on the waist band with the interface with right sides facing. Pin, and sew the top of the waist band, where the scalloped edge is. Use a smaller stitch choice of your sewing machine, so you can skip clipping the curves. I used stitch setting “2” on my sewing machine.
  5. Turn the waist band inside out, so the wrong sides of the waist bands are facing.
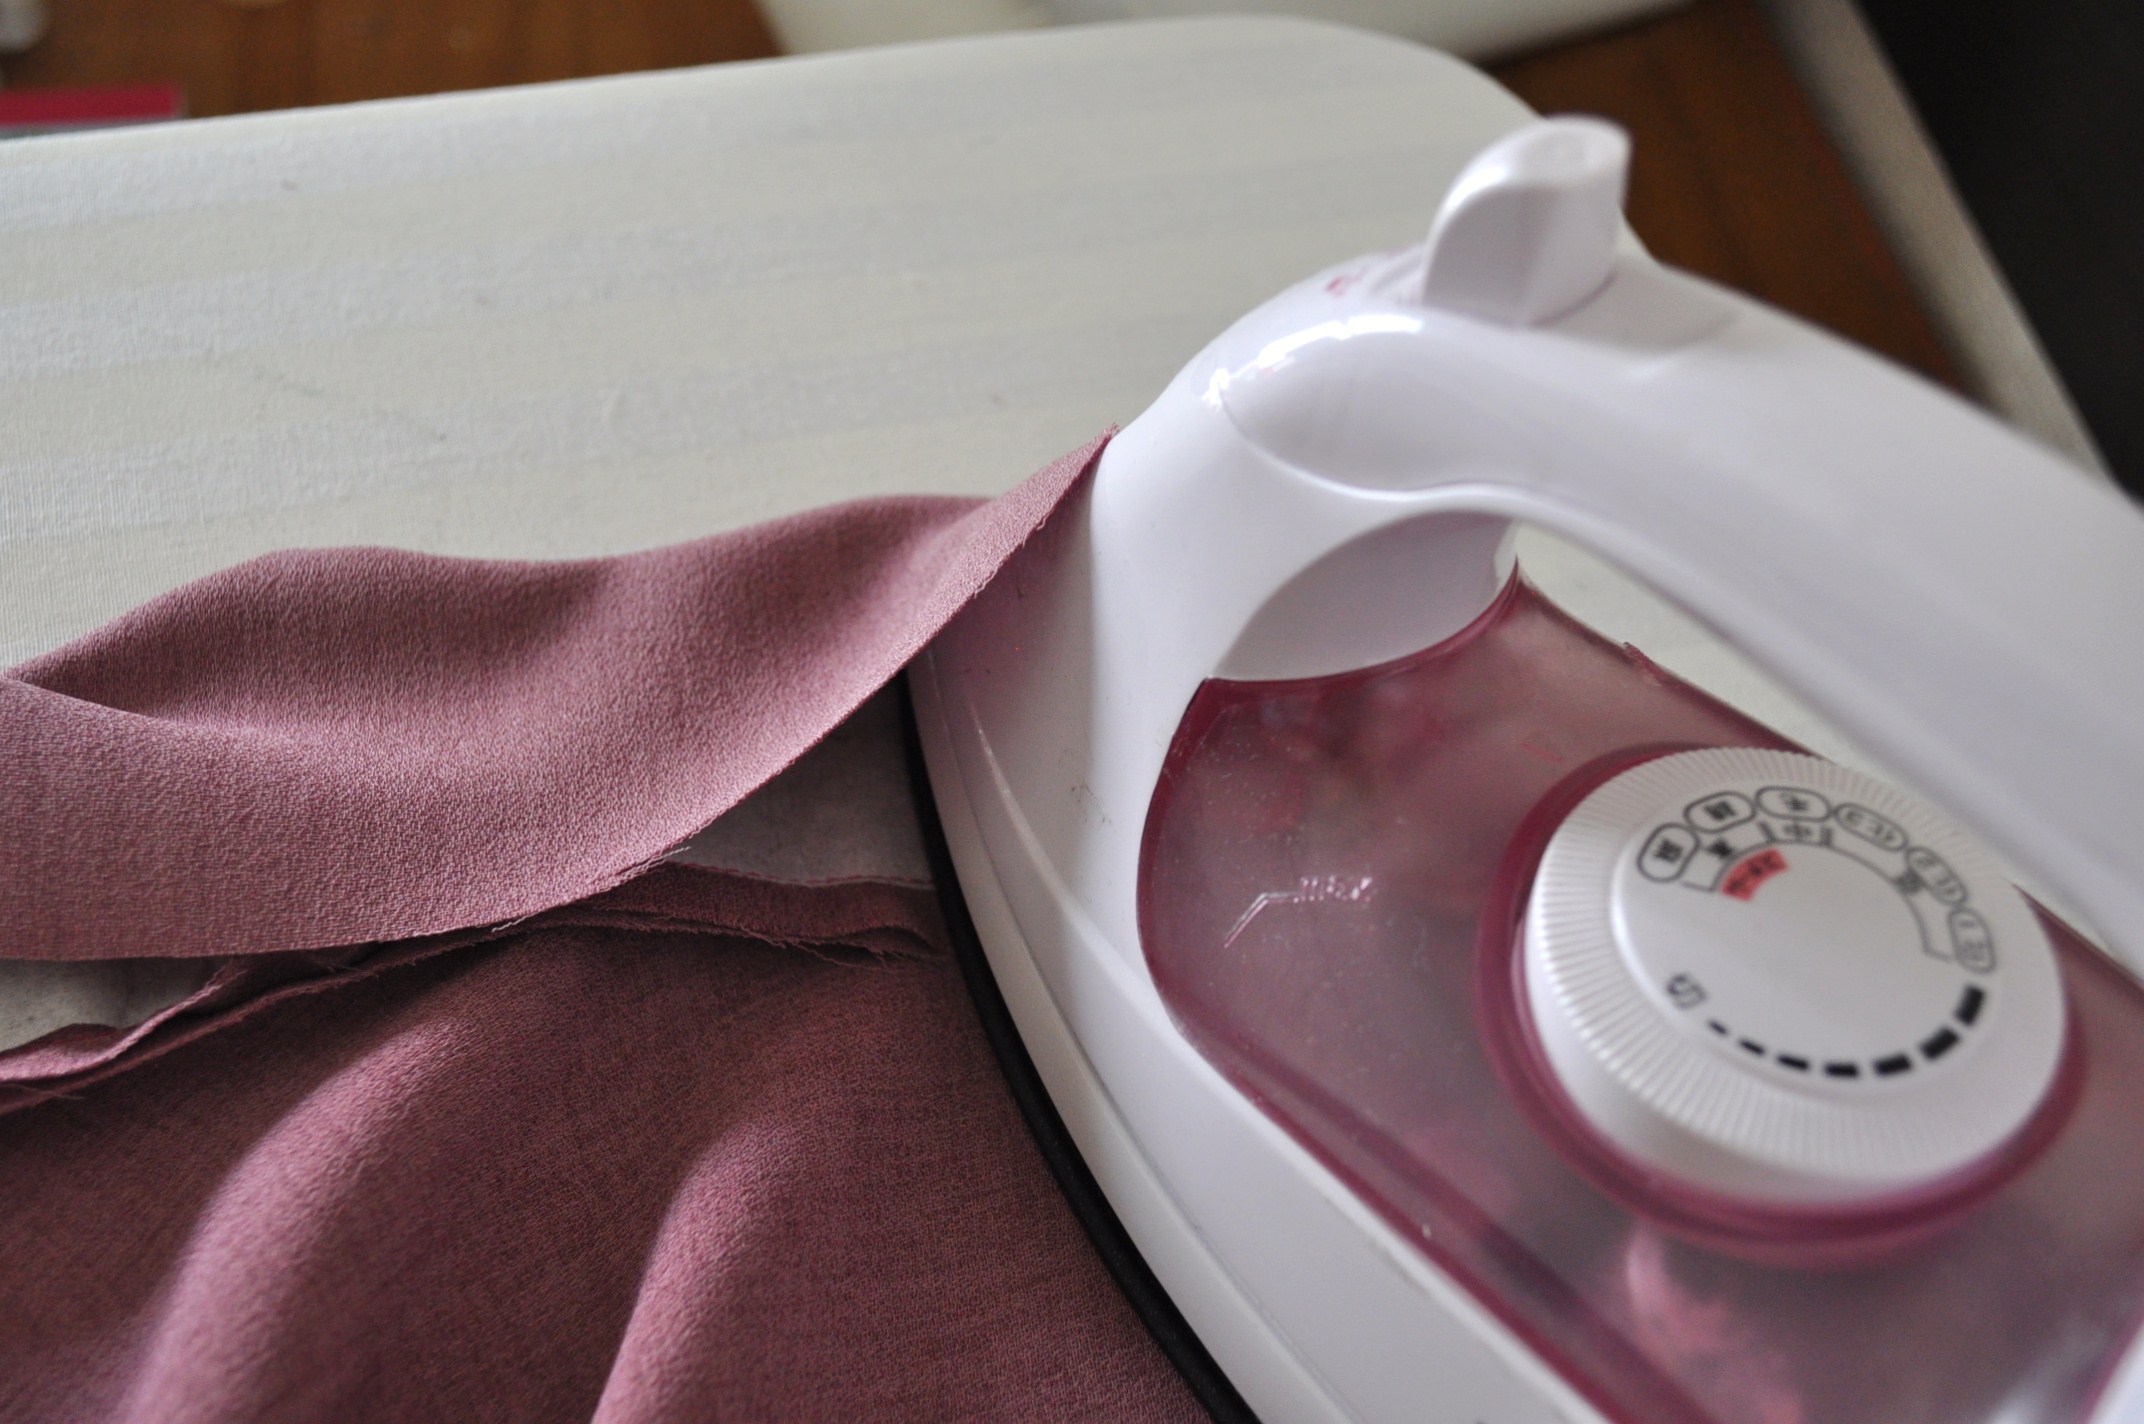
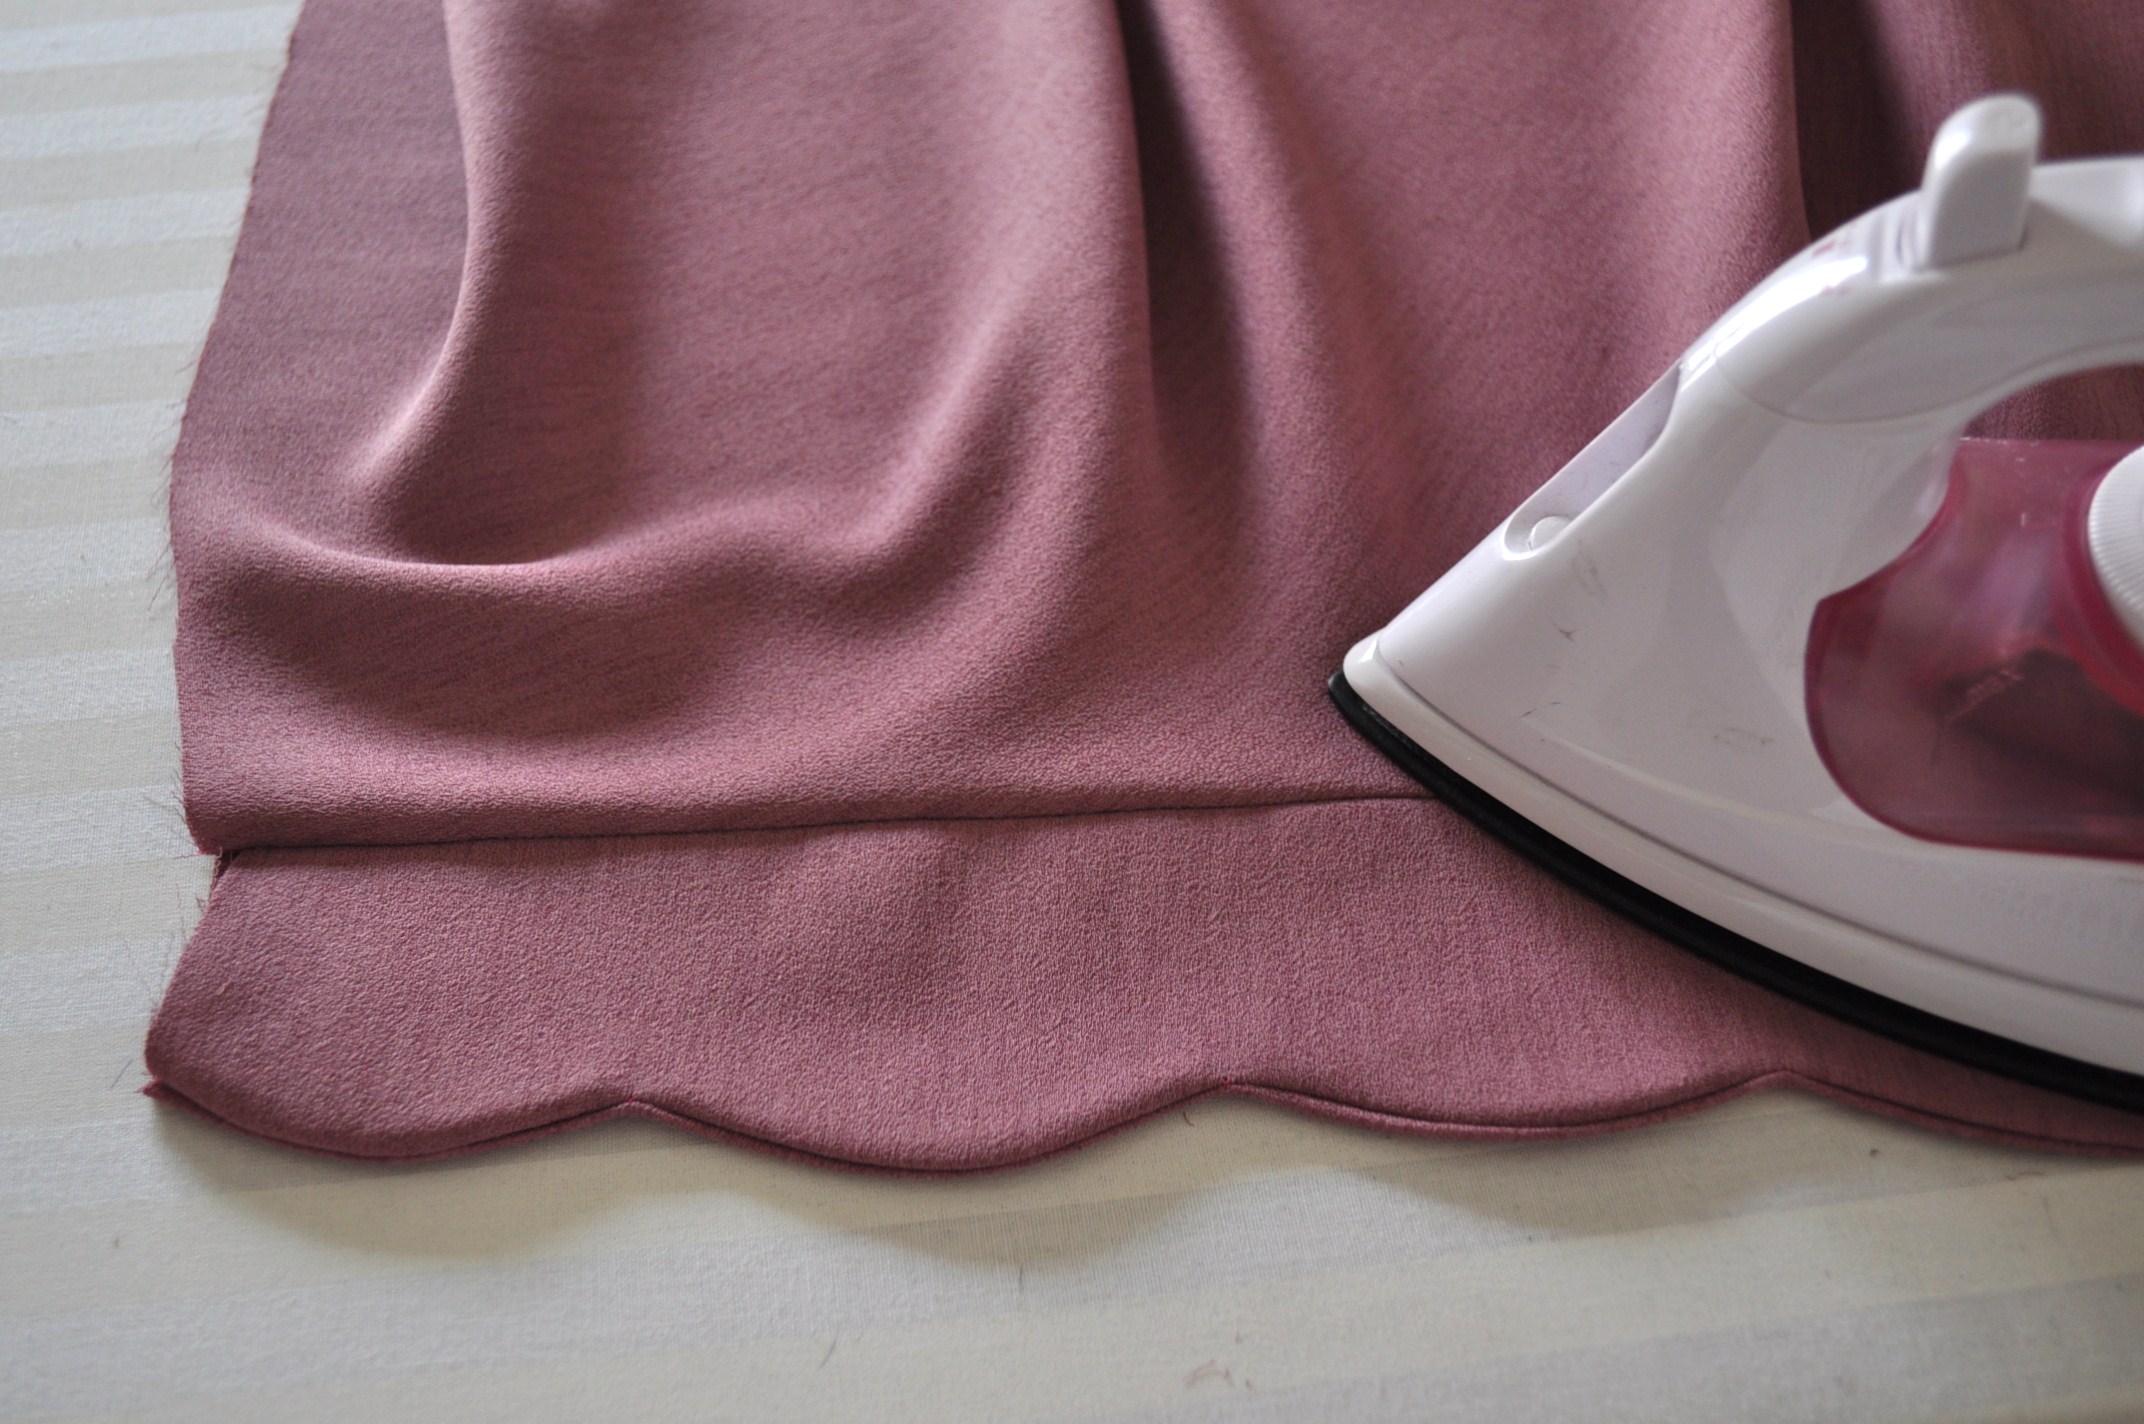
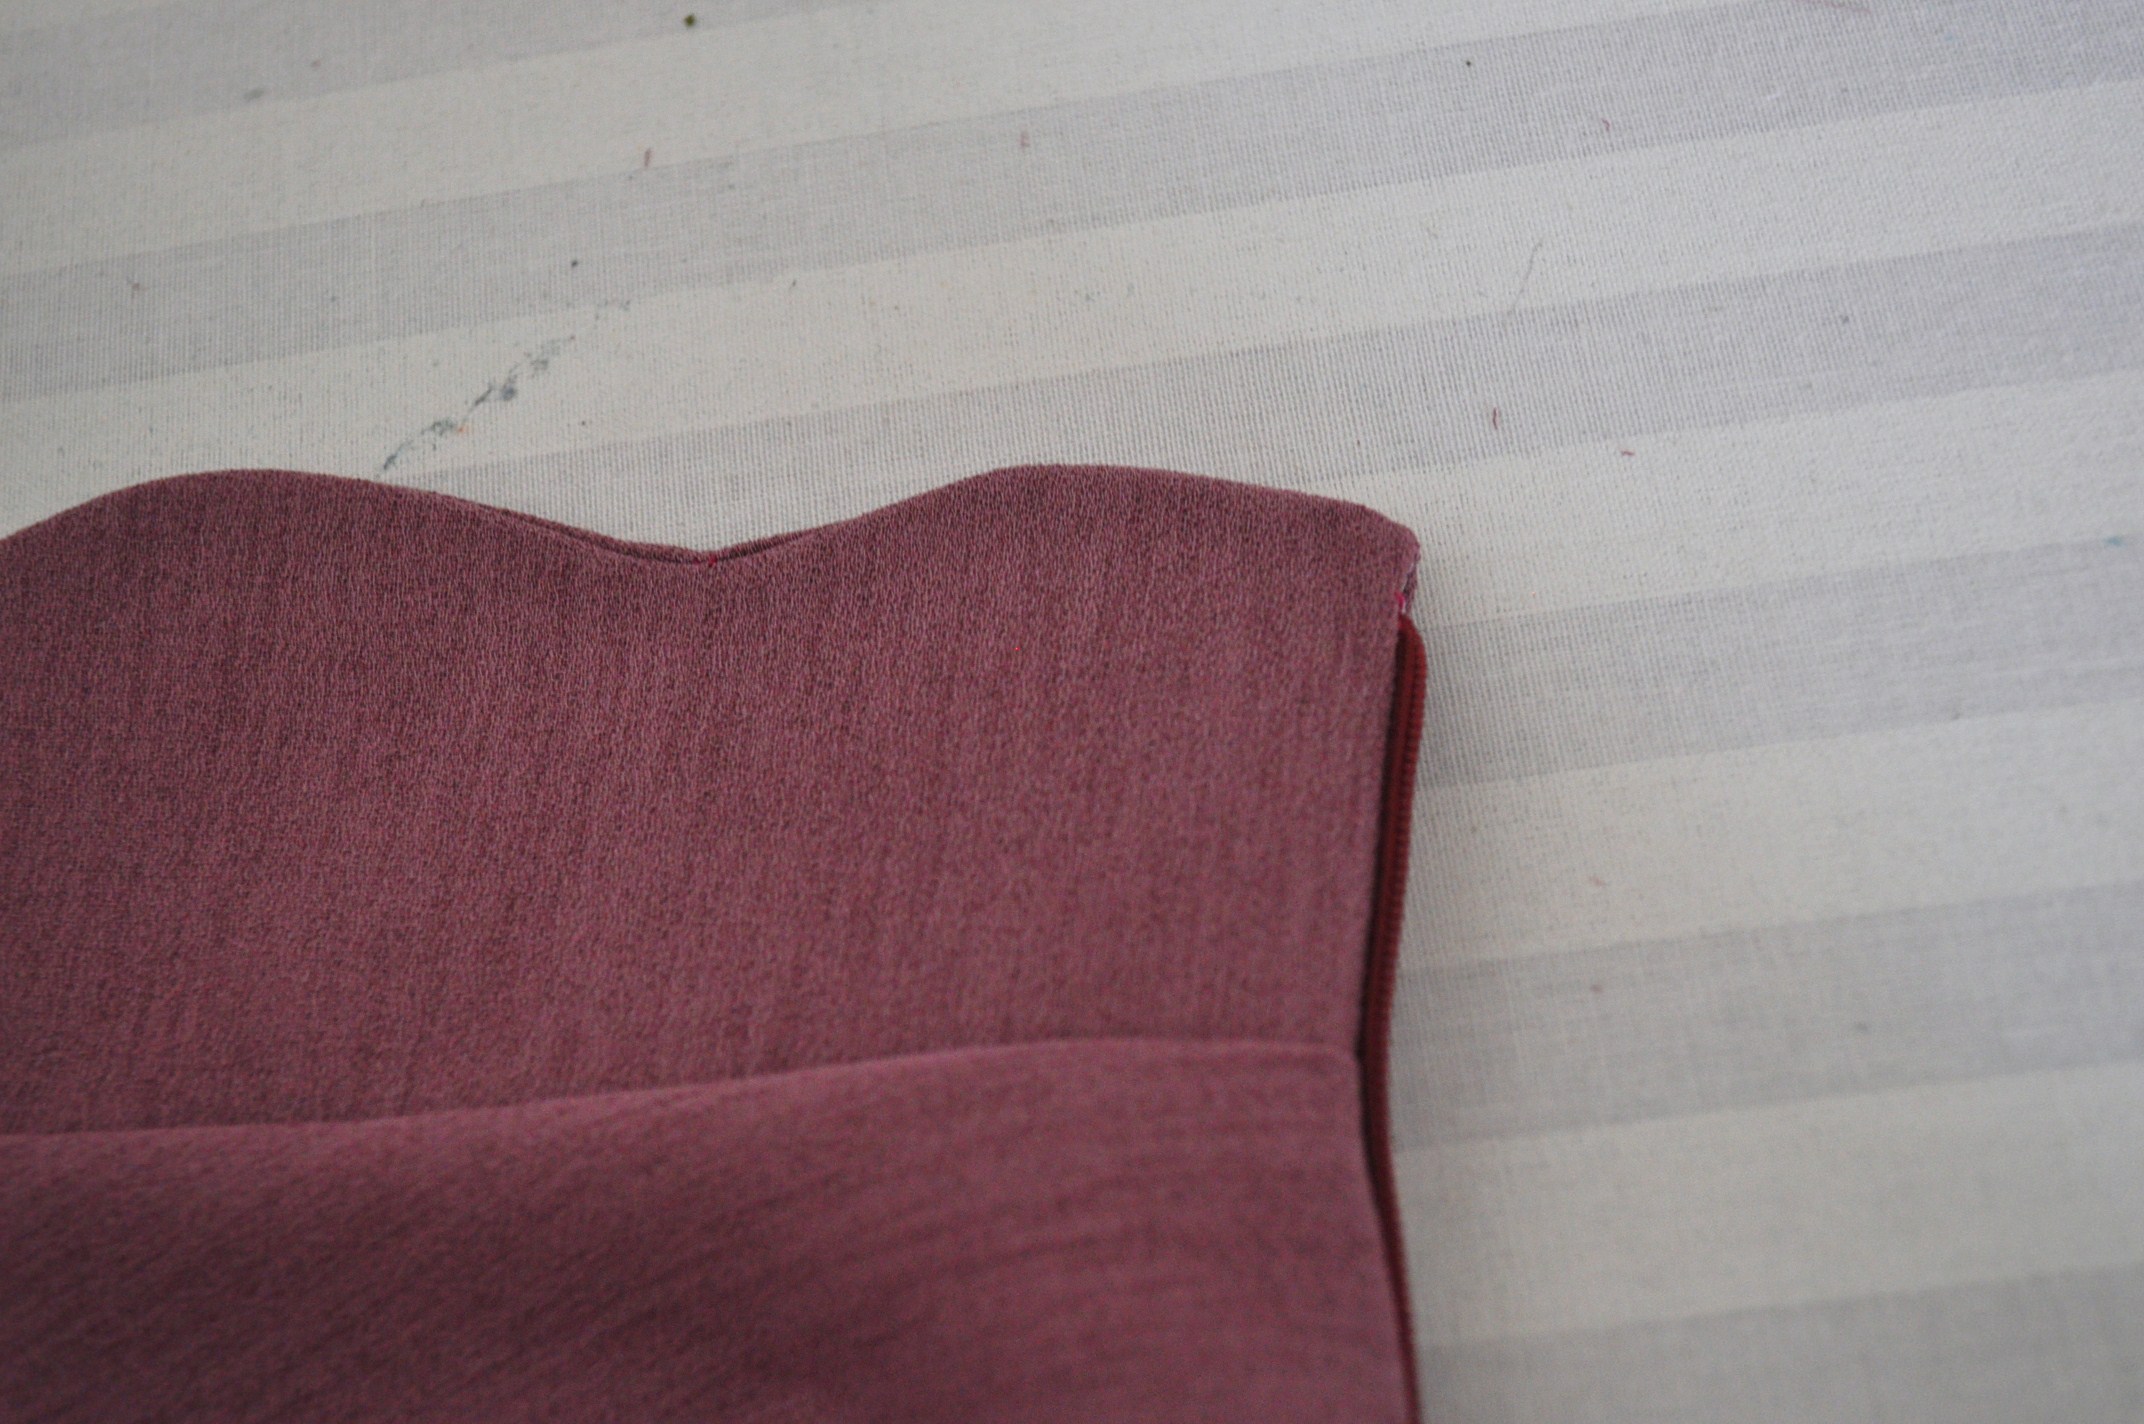
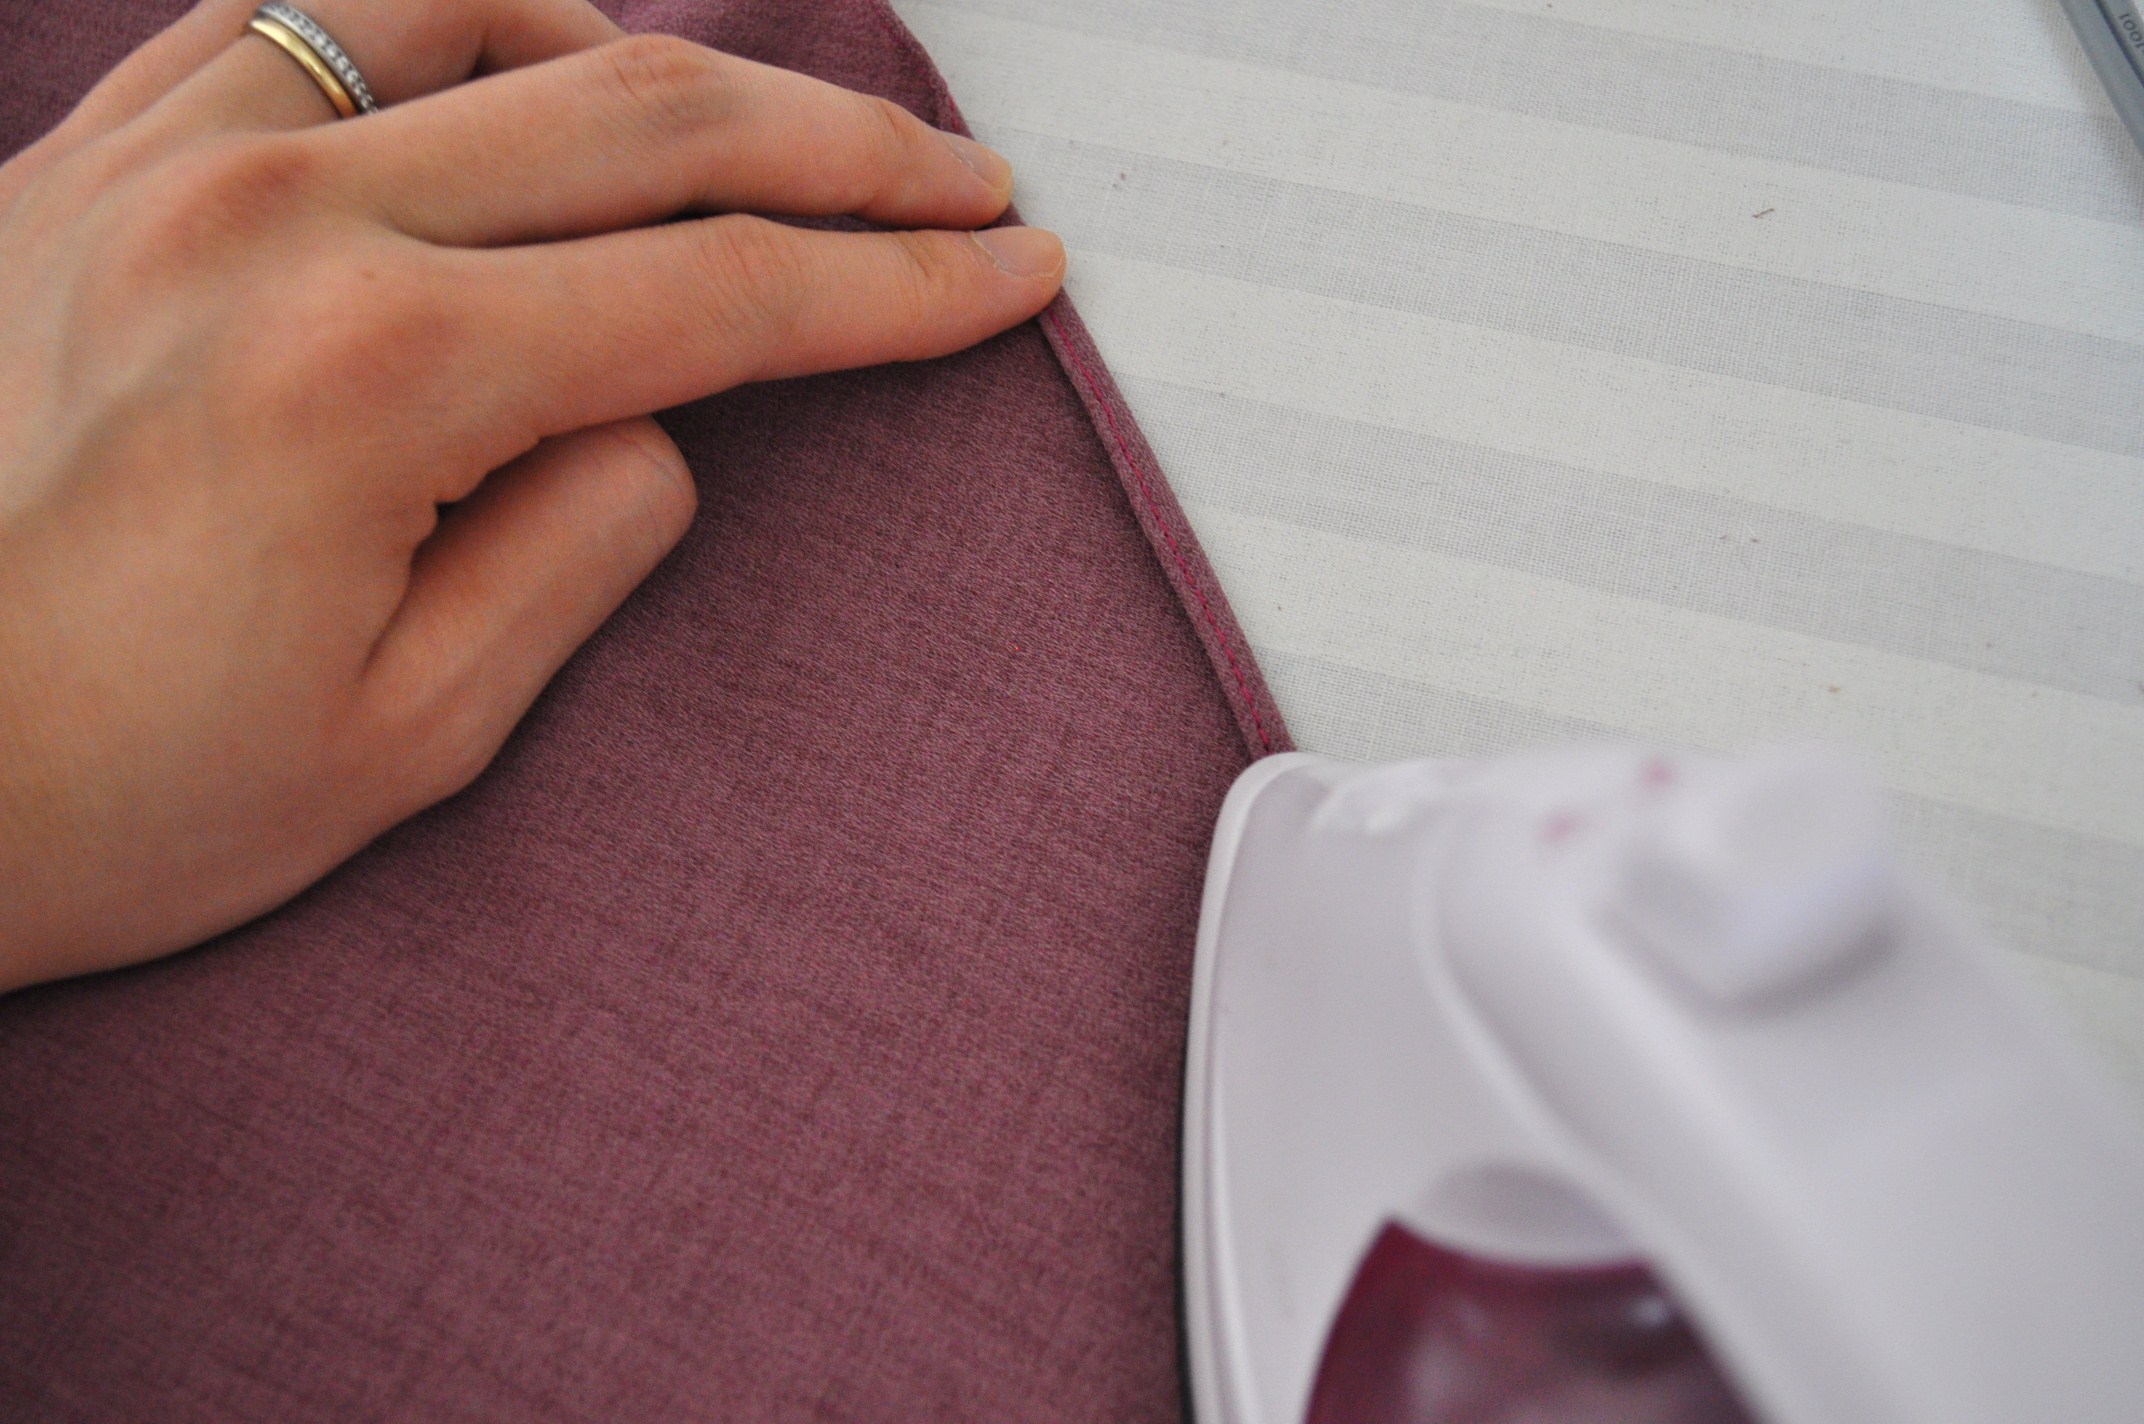
  6. Iron the waist band. First iron from the inside of the waist band (wrong sides of the fabric), and then press the scalloped edge from the right side.
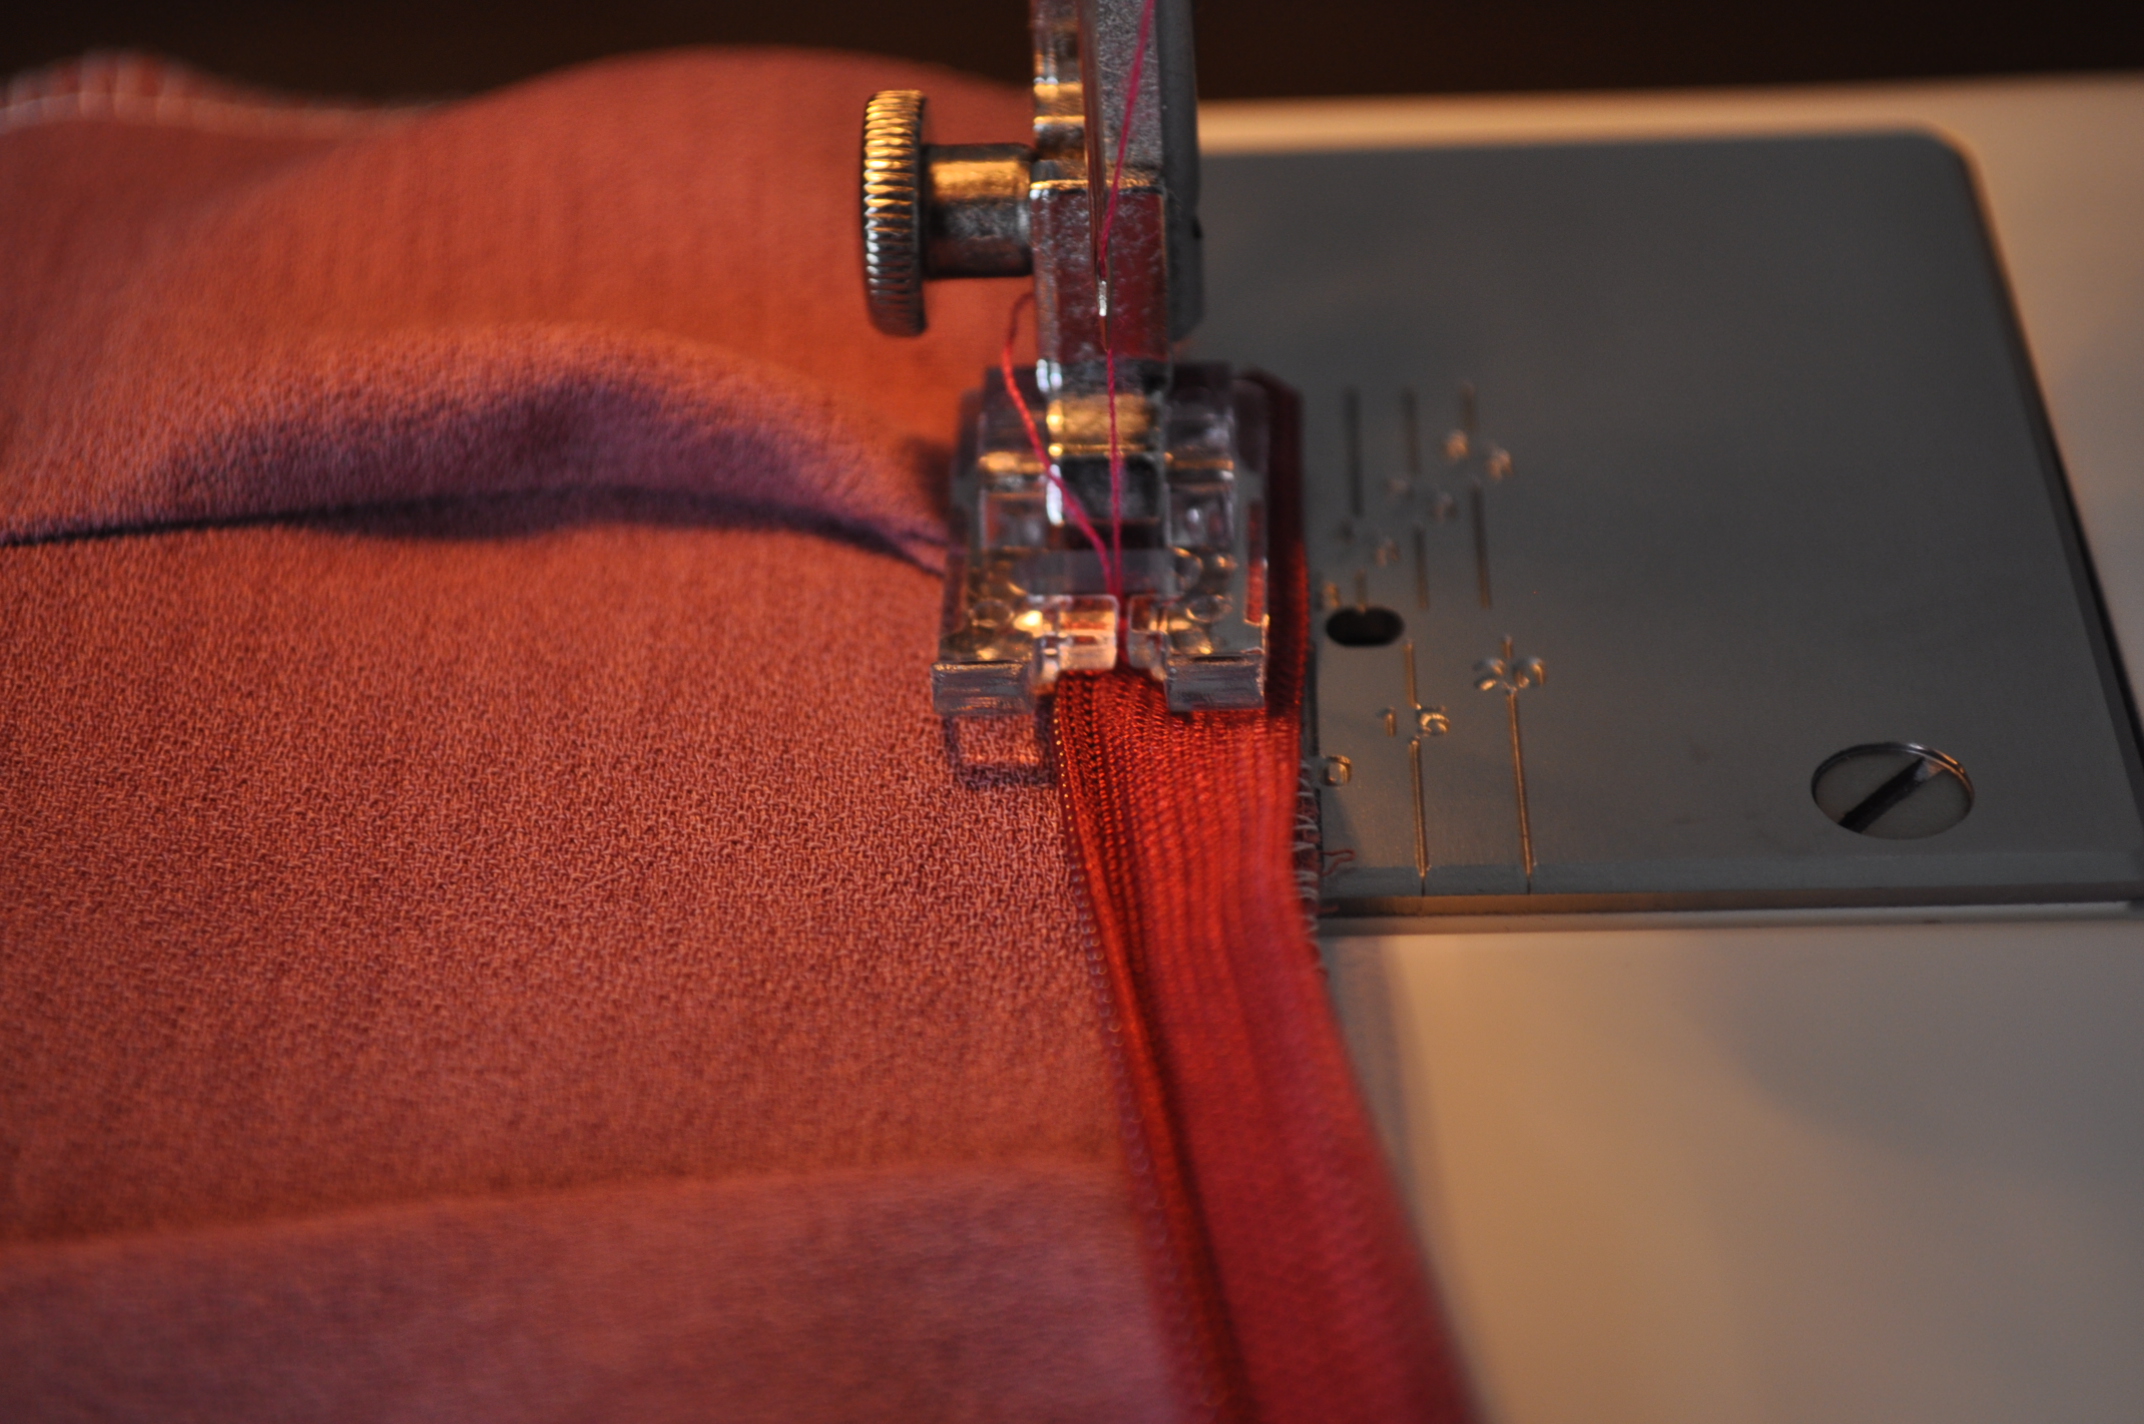
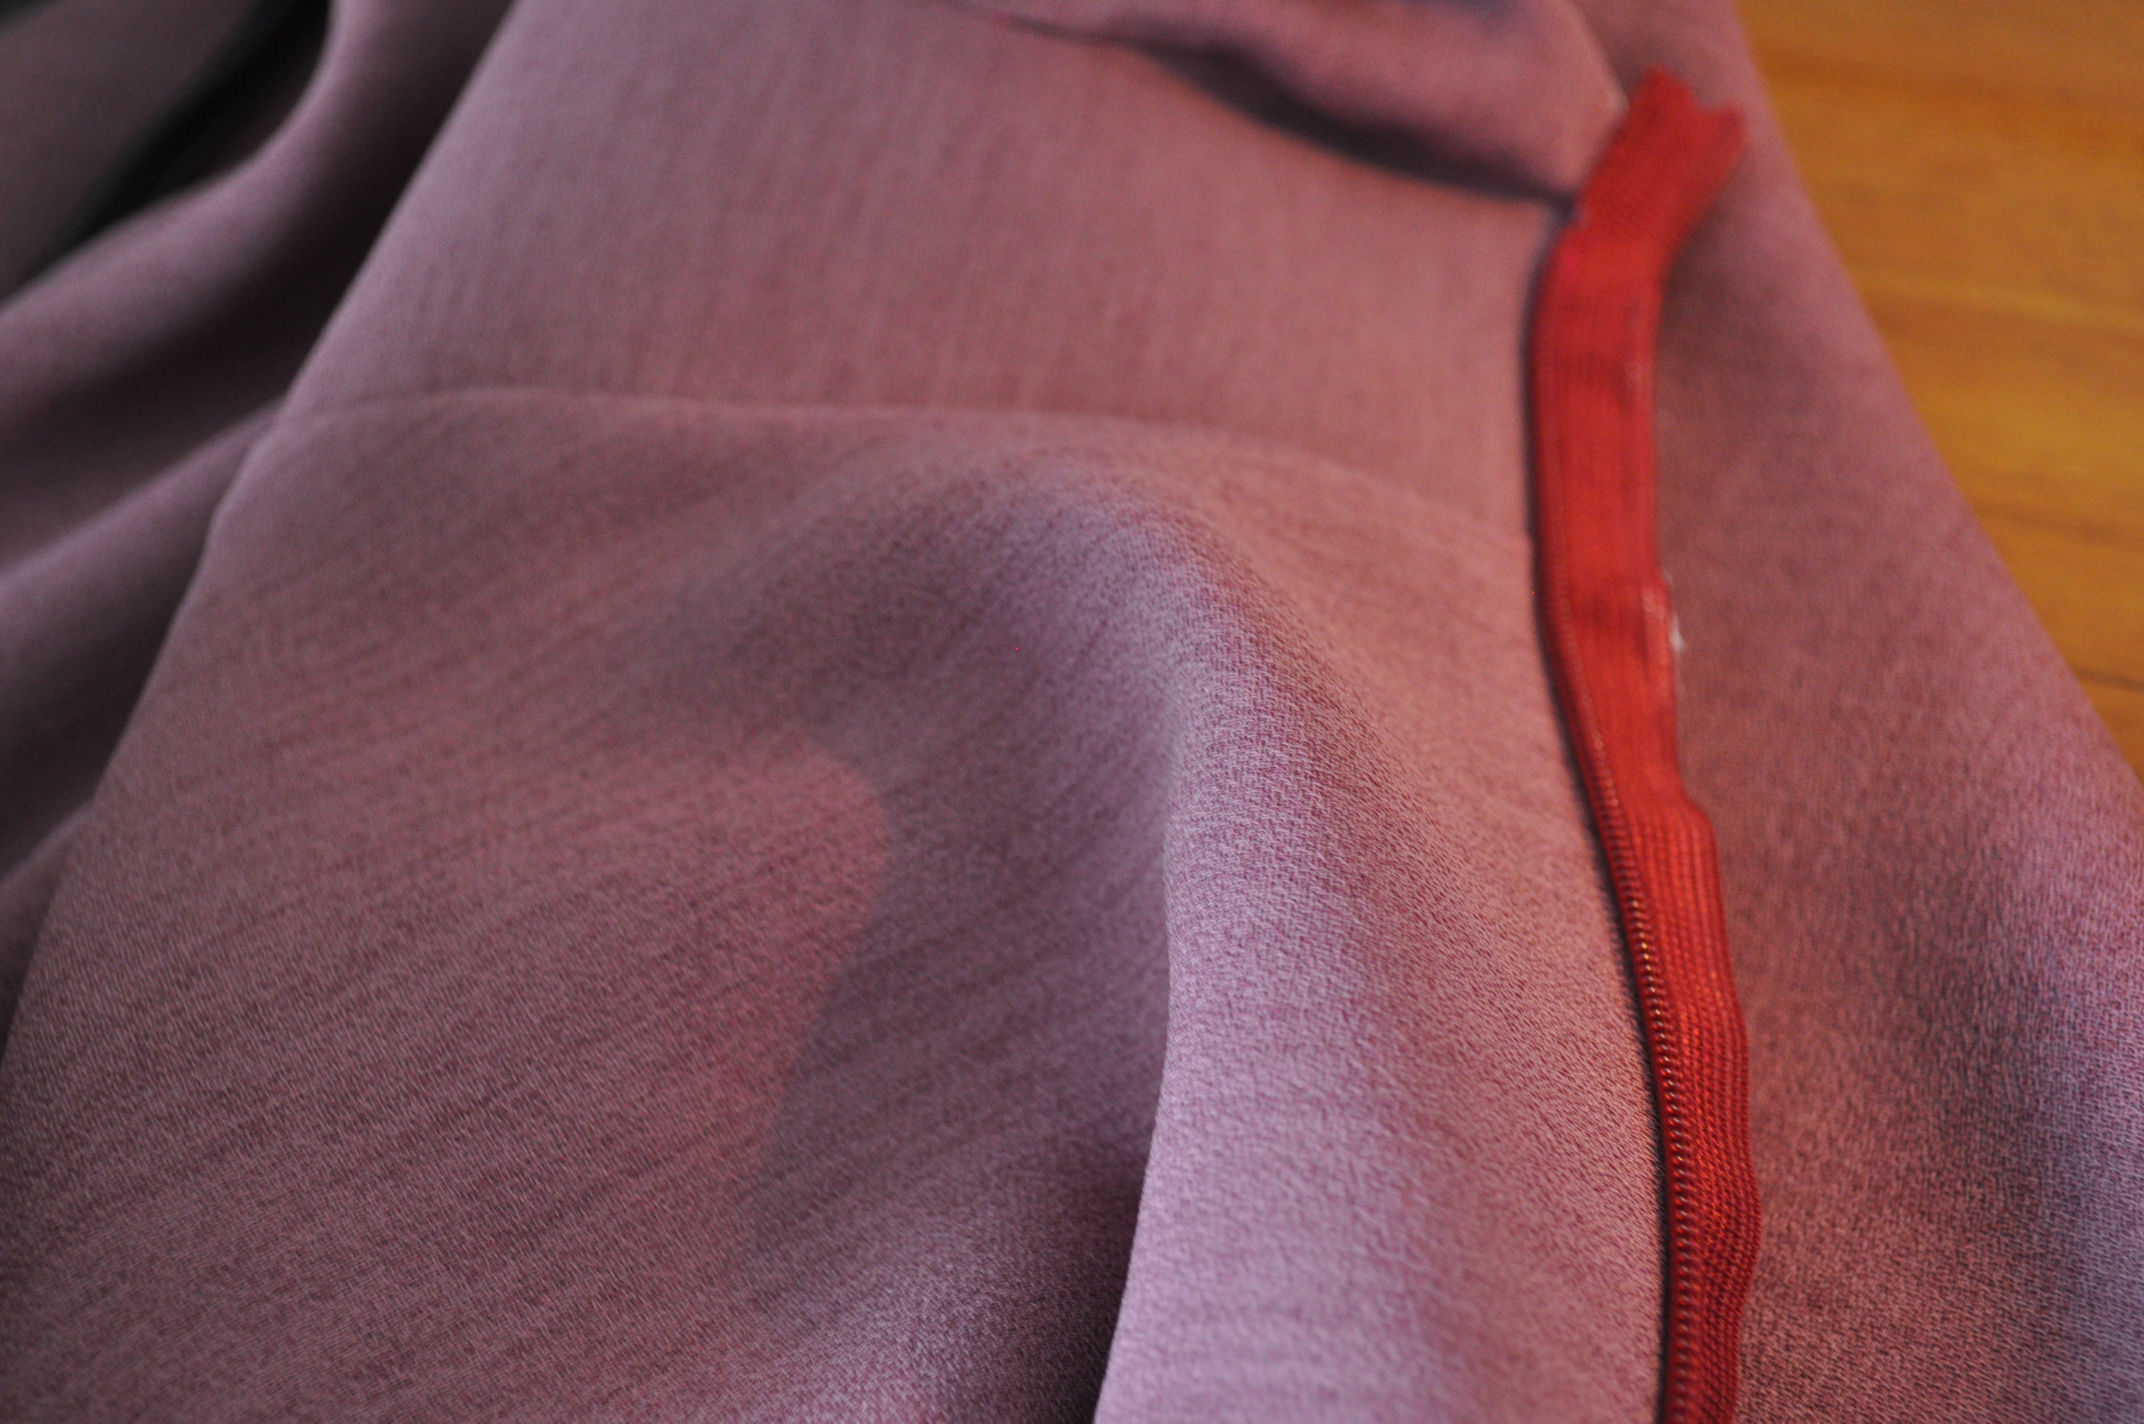
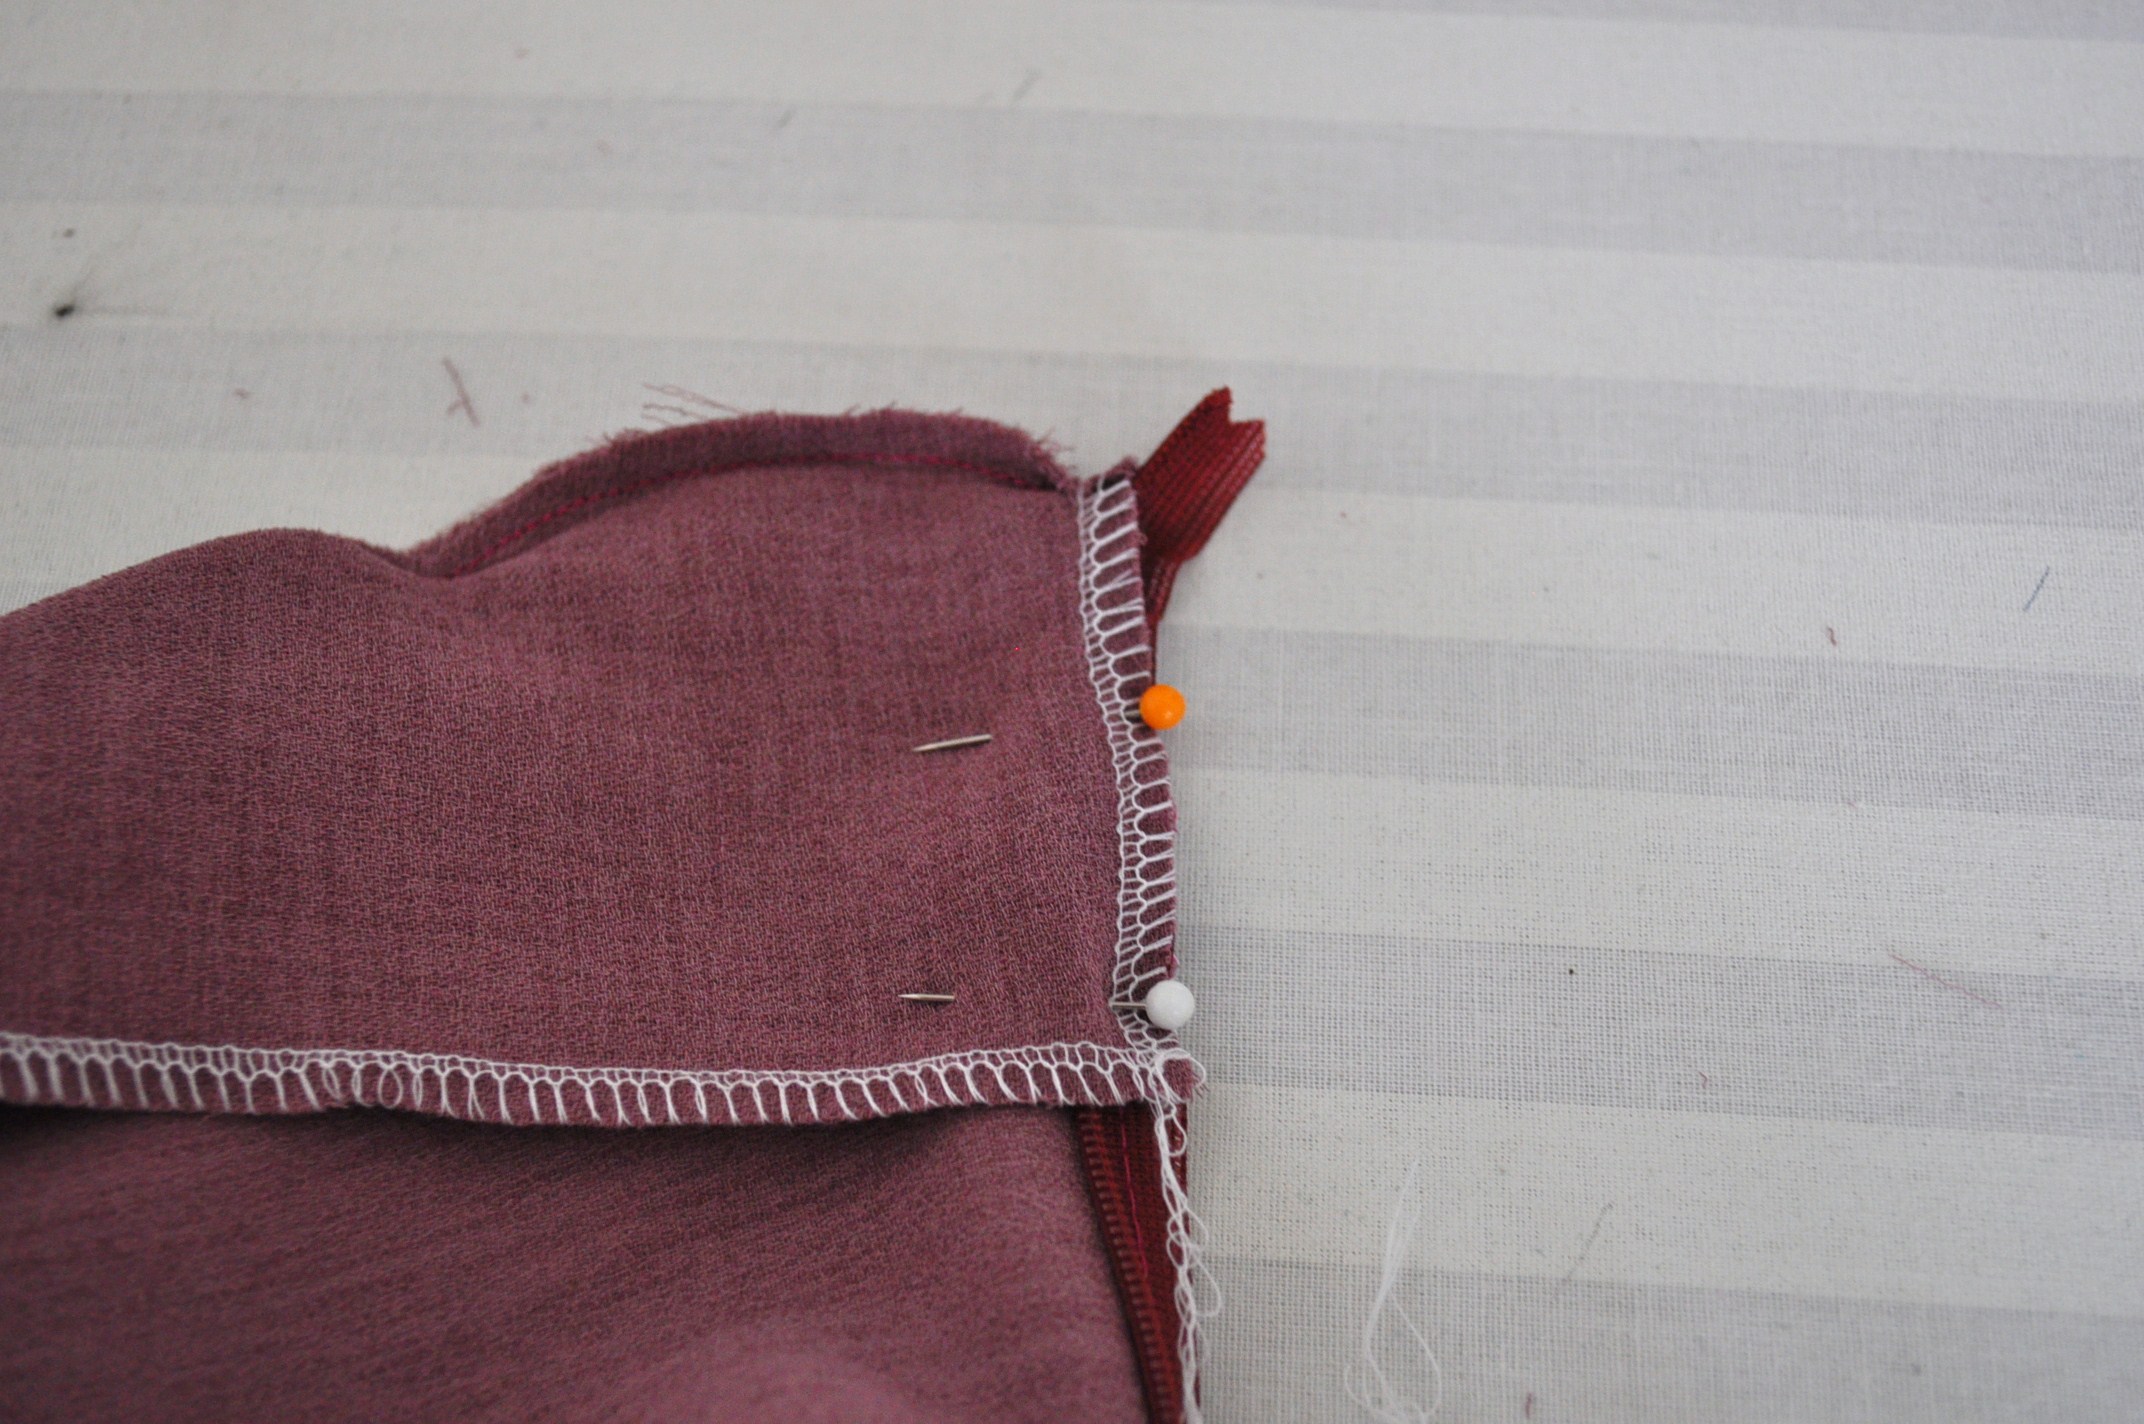
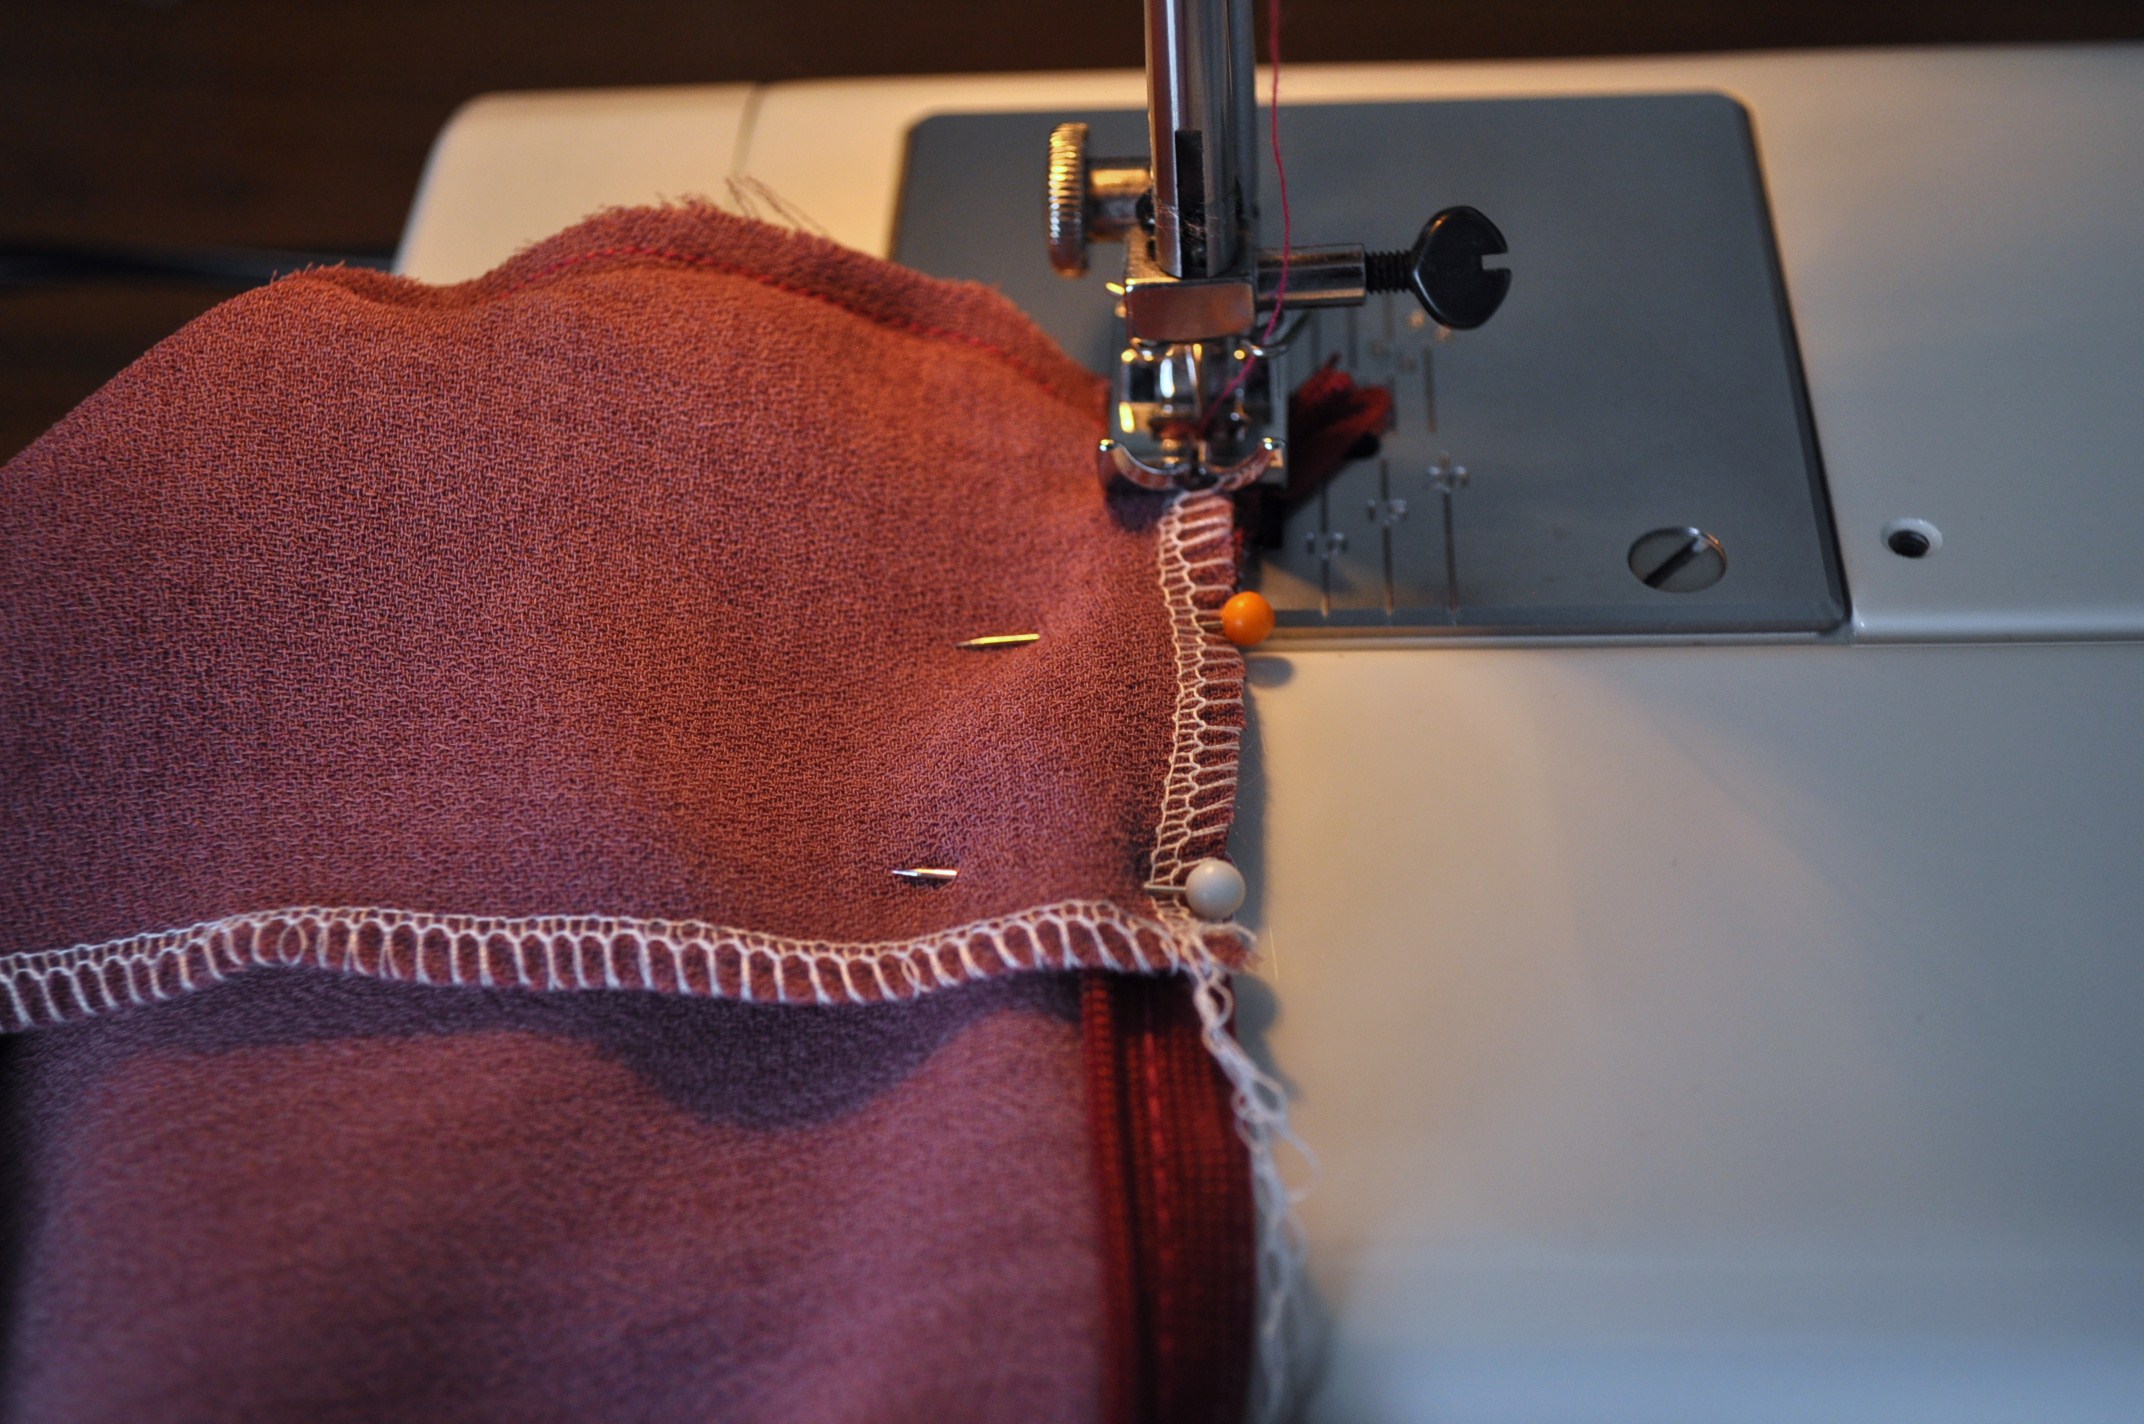
  7. Sew in an invisible zipper. Place the zipper from the top of the waist band and sew, using an invisible zipper foot. Then sew the rest of the side together.
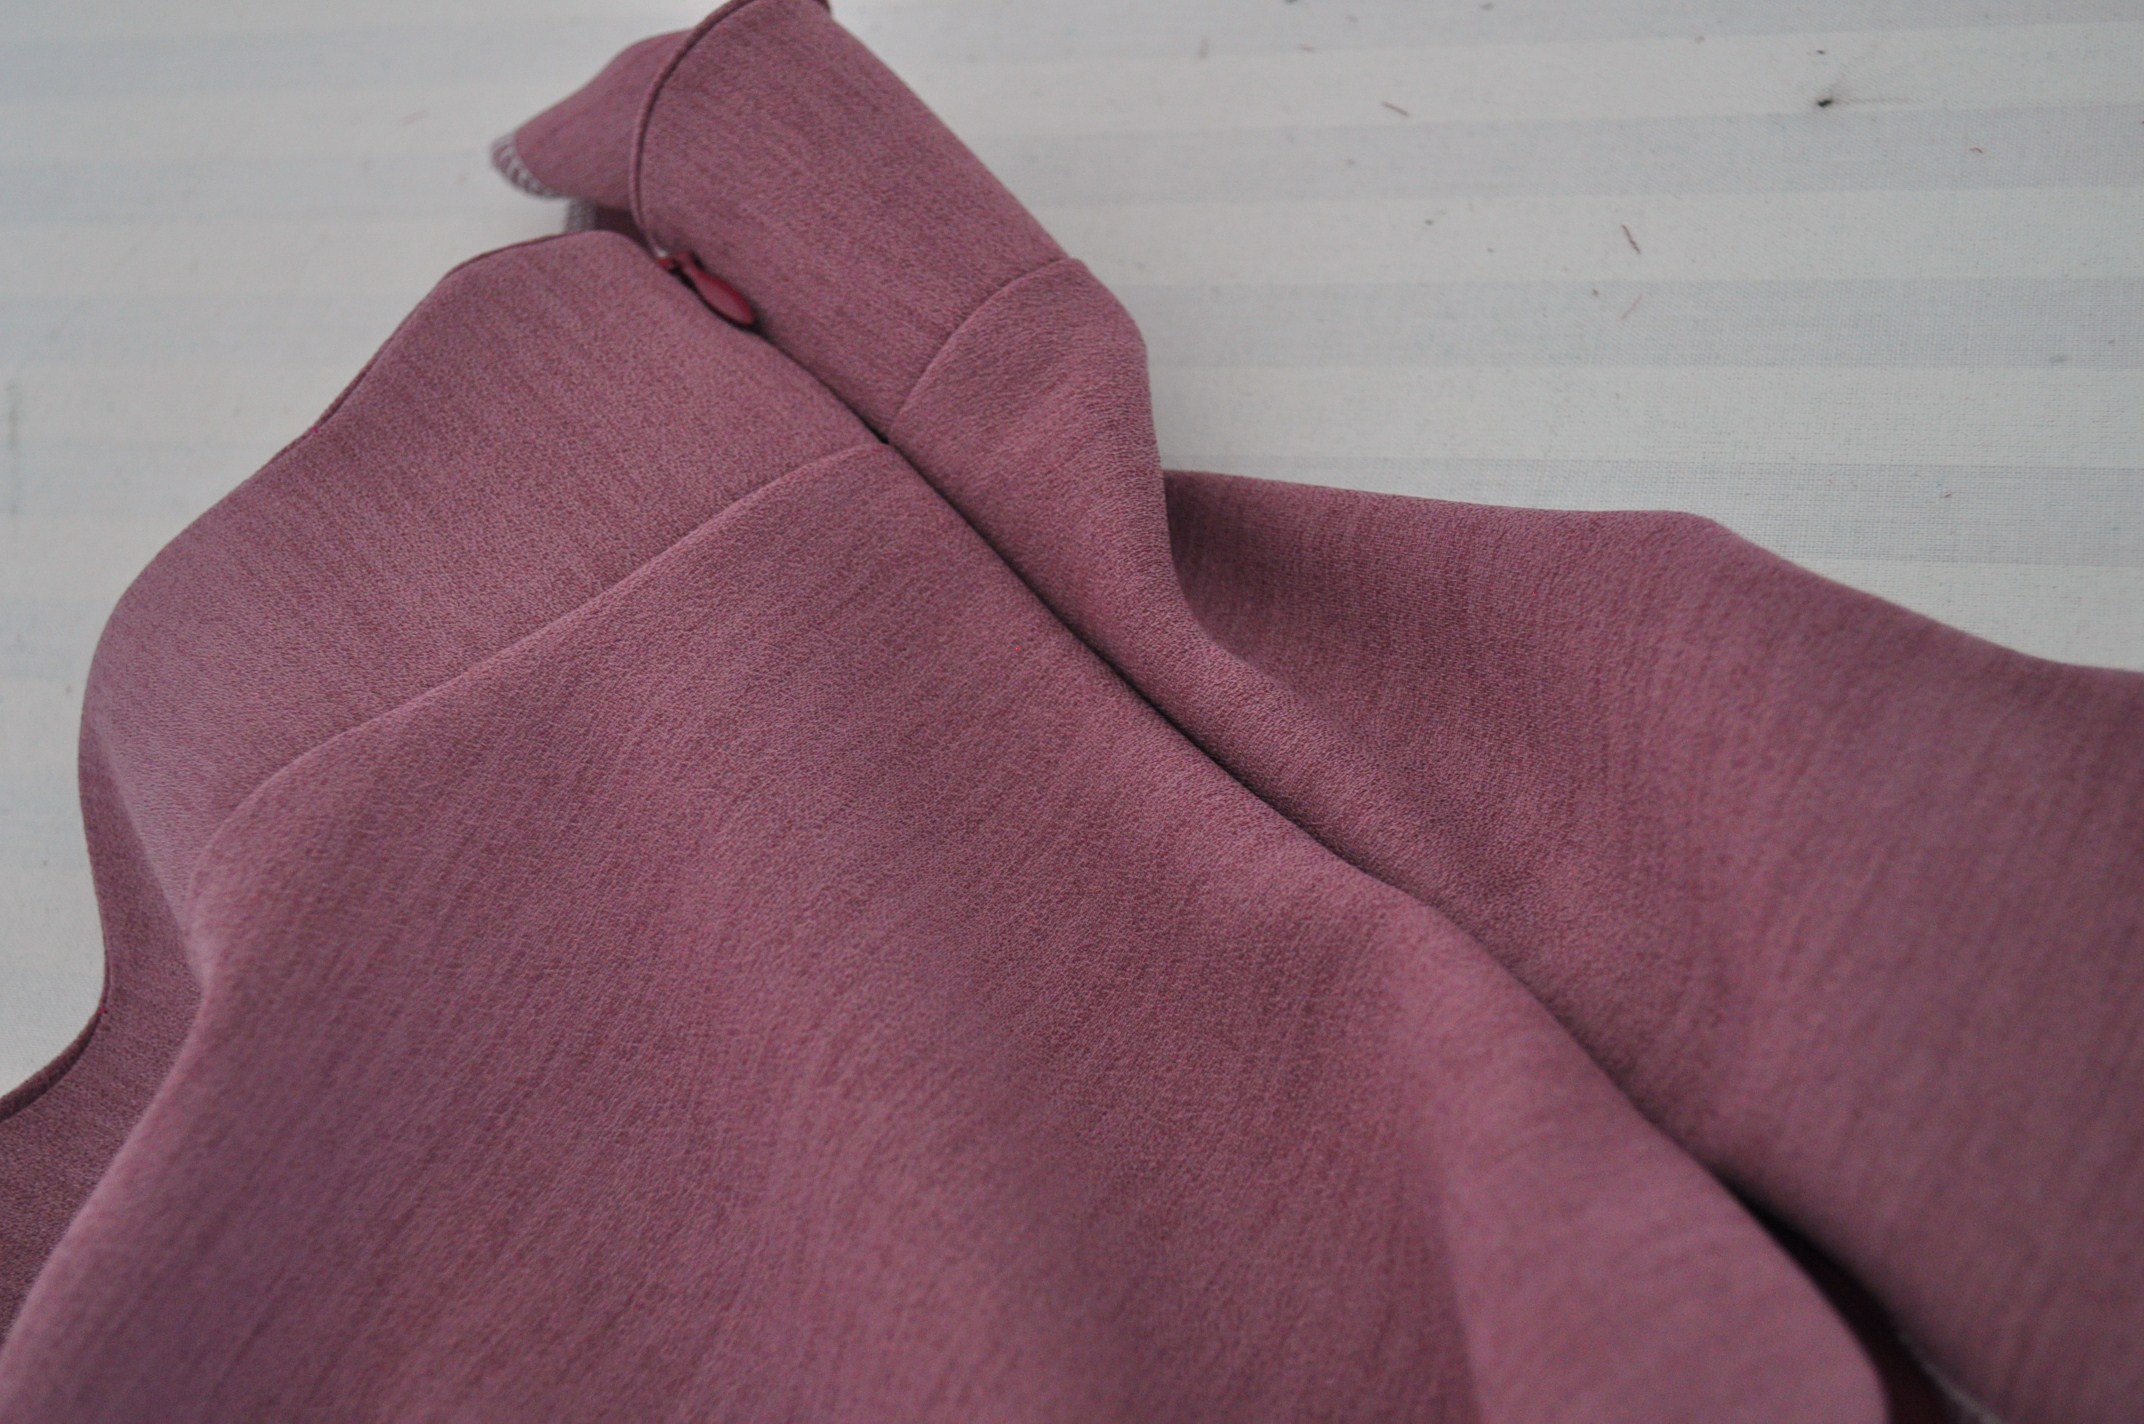
  8. Pin the end of waist band (without interface), excess of the zipper, and the other waist band (with interface) together, and sew to the bottom end of the waist band. Turn the waist band inside out.
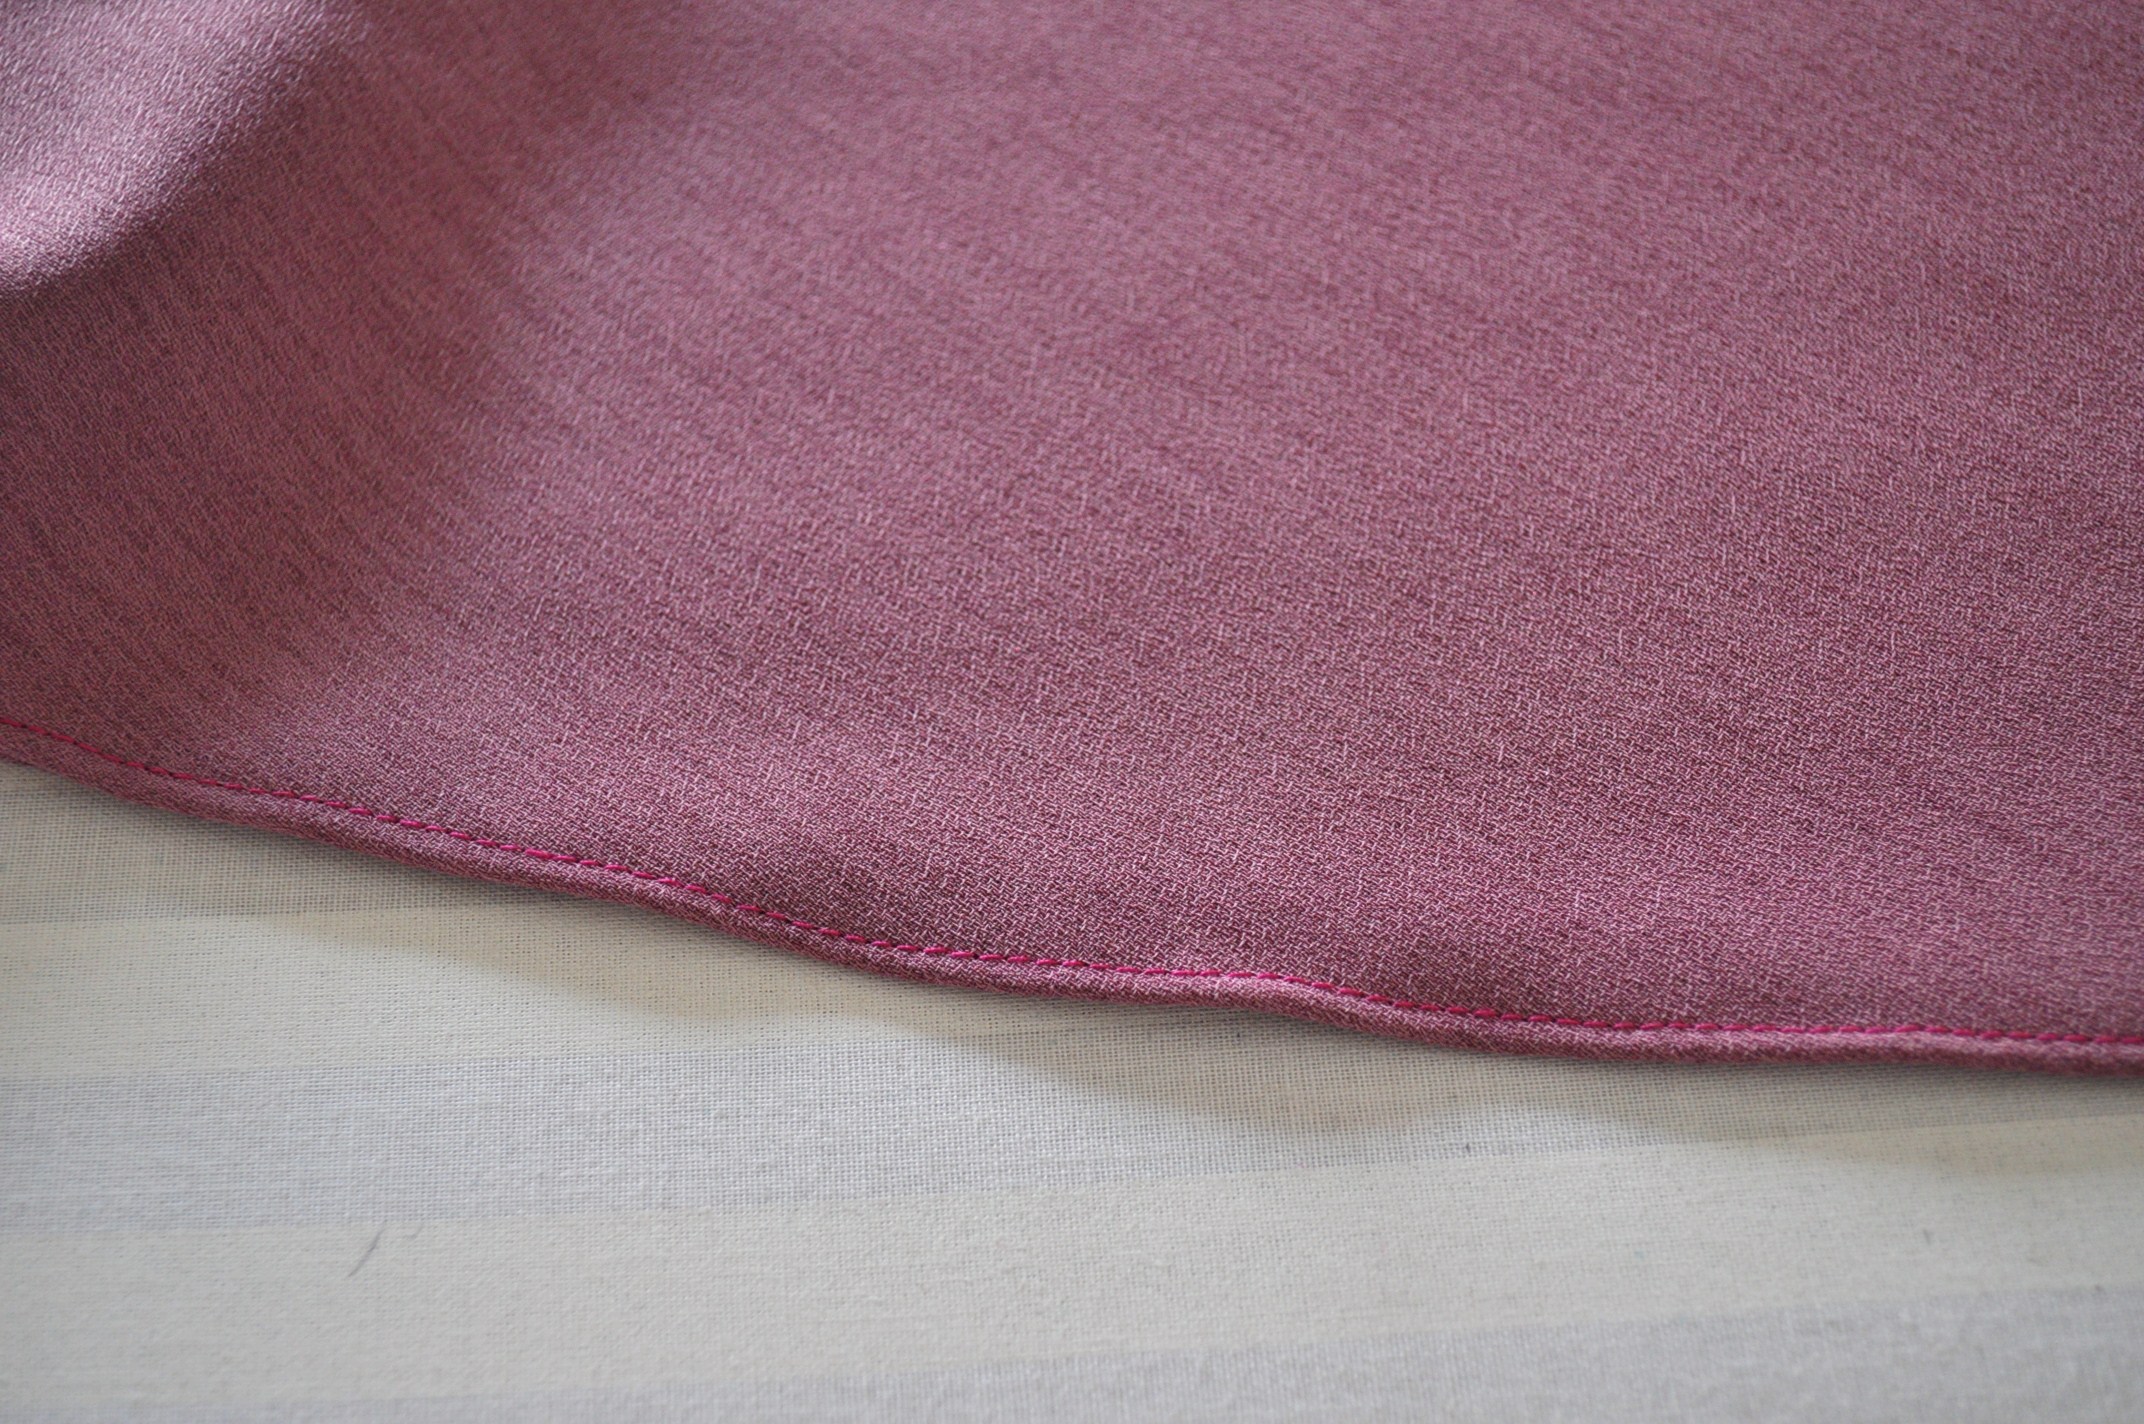
  9. Hem the skirt. For this half circle skirt, I think narrow a hem (or baby hem) works the best so we won’t have to deal with easing in the fullness on a wider hem. Fold ¼” from the hem line and stitch the outer edge. Clip the excess fabric. Fold again for ¼”, and iron. Then top stitch on the stitch you just sewed.

« Previous Page

Primary Sidebar

JOIN MY EMAIL LIST

You can read a sample newsletter here, including my latest edition.

Recent Posts

  • UNPLAN shinjuku Pop Up
  • Japanese Iconic Pop Up & Mini Fashion Show 
  • Responsible Marché Vol.8 — A Day to Discover the Stories Behind Clothes
  • Seplumo Nihonbashi POP UP
  • Coaster Aobadai X VIVAT VERITAS POP UP

Categories

Follow me

  • Email
  • Facebook
  • Instagram
  • Pinterest
  • Twitter
  • YouTube

♥ Blog Archives

  • Etsy
  • Creema

Footer

ABOUT ME

My name is Chie. I design and make custom wedding dresses in Tokyo, Japan. Read More…

GET UPDATES!

Get monthly updates including new items in the shop, favorite links and more!

CONTACT

Feel free to send a message if you have any comment:

chie@vivatveritas.com

LET´S GET IN TOUCH

  • Email
  • Facebook
  • Instagram
  • Pinterest
  • Twitter
  • YouTube
Furisode — the long-sleeved kimono young women tra Furisode — the long-sleeved kimono young women traditionally wear once in their lives, for their Coming of Age Day ceremony (Seijin Shiki) at 20 — often gets worn just that one time. I actually wore my cousin’s furisode for mine, so hers got a second life. But most don’t. They live for one single day, then disappear into the back of a drawer, unseen for decades 😴

But beautiful silk doesn’t have to end there.
From a once-in-a-lifetime ceremonial robe to something you can wear again and again. This piece — butterflies mid-flight, flowers in bloom — deserved a new season. So I remade it into an i line dress.

振袖は、生涯でたった一度しか袖を通さないことが多いです。

私自身は従姉妹の振袖を着たのでその振袖は二度人に着られたけど、成人式の日だけを生きて、あとはタンスの奥で眠り続ける😴誰にも見られないまま、何十年も。

でも良い生地には、終わりがないんです。

一度きりの晴れ着から、何度でもまとえる一着へ。蝶が舞い、花が咲くこの1着に、新しい季節を与えたくて、マーメイドラインのドレスに仕立て直しました。

#kimonoremake #振袖リメイク #upcycledsilk
オーストラリアからのお客様がオンラインで着物を選び、オーダーしてくださいました✂️ まずは仮縫いを オーストラリアからのお客様がオンラインで着物を選び、オーダーしてくださいました✂️

まずは仮縫いを郵送でお届けし、Zoomの画面越しに丈や身幅を確認しながら、少しずつドレスは形になっていきました。

桜の下で、鳥居の朱色の中で笑う二人の写真が届いたとき、 遠く離れた場所からでも、確かにこの手で紡いだものが誰かの人生の一部になったのだと感じて嬉しかったです♡

A customer from Australia chose her kimono online and placed an order✂️

I first mailed a mock-up, and little by little, checking the length and width over Zoom, the dress took shape.

When the photos arrived of the two of them smiling under the cherry blossoms, in the vermillion red of the torii gate — even from far away, I felt so happy knowing that something woven by my hands had truly become part of someone's life♡

📷@whoshotthephotographer
👰‍♀️@cscambary 

#KimonoUpcycled #MadeToOrder #BridalCouture
#着物リメイク #国際オーダー
このシルクの軽さ、暑い季節にちょうどいい🫠 一枚の着物から、ワイドパンツを作りました✂️薄手のシル このシルクの軽さ、暑い季節にちょうどいい🫠

一枚の着物から、ワイドパンツを作りました✂️薄手のシルクは風を通して、歩くたびに裾がふわりと揺れます♪

後ろ姿には、着物の袖だった部分を使っていてお尻の部分の花柄が上下逆さまになっています👻最初は迷ったけれど、これはこれで面白いなと思ってそのまま残しました🫶🏻

一点ものなので、この一本だけ。気になる方はプロフィールのリンクから見てみてください♡

This silk is so light, perfect for the hot season 🫠

I made these wide-leg pants from a kimono✂️ The thin silk lets the breeze through, and the hem sways softly with every step ♪

The back is made from what used to be the kimono sleeves, so the floral pattern on the hips ends up upside down👻 I wasn’t sure at first, but honestly it grew on me, so I left it as is 🫶🏻

One of a kind, just this one pair. If you’re curious, the link is in my profile ♡

#着物リメイク #kimonoremake #正絹 #一点もの #和柄 夏の装い ワイドパンツ
数年前に制作したシルクのドレス。 今回「Released. Reimagined.」というコンセプ 数年前に制作したシルクのドレス。

今回「Released. Reimagined.」というコンセプトに合わせて、@redyeingproject さんに黒染めをお願いしました。

Helen x Vivat Veritasのイベントにベンダーとして出展してくださったご縁から生まれたコラボレーションです。

「服を捨てる前に、黒染めという選択肢を。」
色あせた服を、グラム単位の染め直しで蘇らせる——そんなコンセプトに強く共感しました。

天然素材のシルクスカート部分は深く美しい黒へ。
シャンティレースの部分は、少し緑がかった表情のある色に変化しました。

一着を長く着続けるための、小さな選択。
Before / Afterの写真、ぜひご覧ください🩷🖤

A silk dress I made a few years ago.

For this ""Released. Reimagined."" concept, I asked @redyeingproject to dye it black.

This collaboration grew out of a connection made when he joined the Helen x Vivat Veritas event as a vendor.

""Before you throw it away, consider black dyeing.""
His concept — reviving faded clothes through by-the-gram redyeing — really resonated with me.

The silk skirt, a natural fiber, transformed into a deep, beautiful black.
The chantilly lace took on a subtly greenish tone.

A small choice, in service of wearing one piece for longer.
Take a look at the before/after photos🩷🖤

黒染め
@redyeingproject

Photographers
@nothing_special_88
@japanphotographer_

Model
@sienna.christinaaa

Jewelry
@viviange

Hair
@angh0
@sho_kanaida
@iam__little__boy

Make up and videos
@glam_by_jyoti

#黒染め #RedyeingProject #ReleasedReimagined #着物リメイク #サステナブルファッション
これを着て、カフェに行ったら絶対目立ちそう😆☕ アップサイクルで生まれた、新しいファッションの形。 これを着て、カフェに行ったら絶対目立ちそう😆☕

アップサイクルで生まれた、新しいファッションの形。
コーヒー豆袋のジャケット × 着物リメイクのセットアップ。

一枚一枚、生地の柄合わせから縫製まで、すべて手で仕上げています🪡🧚
実はこの着物、裏地にも別布を仕込んでいて、羽織ると初めて見える色があるんです♡

ヴィンテージ素材に眠っていたストーリーを、
もう一度誰かの日常に届けたくて作りました。

If you wore this to a café, you'd definitely stand out 😆☕

A new form of fashion, born from upcycling. A coffee bean sack jacket × a kimono-remake set-up.

Every single piece is finished entirely by hand, from matching the fabric patterns to the sewing itself 🪡🧚 Actually, this kimono has a different fabric worked into the lining too — there's a color that only reveals itself once you put it on ♡

I wanted to give the stories sleeping in vintage materials a chance to become part of someone's everyday life again.

Photographer 
@nothing_special_88 

Model
@emorylove33

Jewelry
@viviange

Make up
@elanoramua

#アップサイクルファッション #着物リメイク #サステナブルファッション
実はこのお洋服、今回のショーに入れるか自分では迷っていました。結構前に作った作品だったので。でもヘレ 実はこのお洋服、今回のショーに入れるか自分では迷っていました。結構前に作った作品だったので。でもヘレンと話す中で、これも一緒に見せようと決めました。

ヘレンと3週間近く一緒に準備を進める中で、コレクションの作り方、見る人を楽しませる魅せ方、ルック全体の組み立て方など、本当にたくさんのことを学びました。自分一人だったらこのルックスを入れる決断はしなかったと思う。誰かと一緒に作ることで見えてくるものがあるんだなと、改めて実感しました。
ヘレン、ありがとう♡

Honestly, I wasn't sure whether to include this piece in this show. It was something I'd made a while back. But talking it through with Helen, we decided to show it together after all.

Working with Helen for almost three weeks to prepare for the show, I learned so much — how to build a collection, how to style looks that engage an audience, how to put together a look as a whole. I don't think I would have made the decision to include this piece if I'd been on my own. Creating something together with someone else really opens your eyes to things you wouldn't see alone.

thank you Helen @designerhelen♡

Model @izumi_nishida

Photographer 
@nothing_special_88 

Jewelry
@viviange

Hair 
@angh0
@sho_kanaida
@iam__little__boy

Make up
@glam_by_jyoti

#KimonoUpcycled #SustainableFashion #DesignerCollab #着物リメイク #ものづくり
お客様からお預かりした大切な帯。 大切に保管されていた帯ほど、実は「日常でどう使えばいいかわからな お客様からお預かりした大切な帯。

大切に保管されていた帯ほど、実は「日常でどう使えばいいかわからない」という声をよく伺います。だからこそ、その帯の物語を読み解きながら、現代の暮らしに馴染むデザインに仕立て直すことを意識してます😌

パッと見にはわからないけれど、実は使いやすさを追求した仕掛けが隠れています。

ショルダーを付ければ、両手が空くアクティブなスタイルにも対応👜

あなたの思い出の帯も、こんな風に日常の相棒にしてみませんか?

A precious obi entrusted to me by a client.

I often hear people say they aren't sure how to incorporate their cherished obis into their daily lives. That is exactly why I focus on reading the story woven into the fabric and reimagining it into a design that fits modern living😌

There are hidden details that make this bag truly functional, even if you can't see them at first glance. By attaching the shoulder strap, it becomes the perfect hands-free bag for an active lifestyle👜

#upcycledfashion #着物リメイク #obibag #remake #sustainablestyle
飛行機と電車の中で作ったジャケットです✈️🚆 去年の夏の3週間、アメリカとヨーロッパを旅しながら、 飛行機と電車の中で作ったジャケットです✈️🚆

去年の夏の3週間、アメリカとヨーロッパを旅しながら、座席でひたすらチクチク🪡着物の裏地にキルト芯を挟んで、フリーハンドで刺し子して、日本に帰ってから染めました。

This jacket was made on airplanes and trains✈️🚆

Over three weeks last summer, traveling through the US and Europe, I stitched away in my seat🪡 
Kimono lining sandwiched with quilt batting, sashiko stitched freehand, then dyed after I got back to Japan.

Model
@kana_nakar

Photographer 
@nothing_special_88 

Nails
@ms_muse_nail

Jewelry
@viviange

Hair 
@angh0
@sho_kanaida
@iam__little__boy

Make up
@glam_by_jyoti

#kimonoupcycle #sashiko #sustainablefashion #ReleasedReimagined
#刺し子
Follow me on Instagram

Copyright © 2026 · vivien theme by Lovely Confetti DMCA.com Protection Status

Copyright © 2026 Vivat Veritas