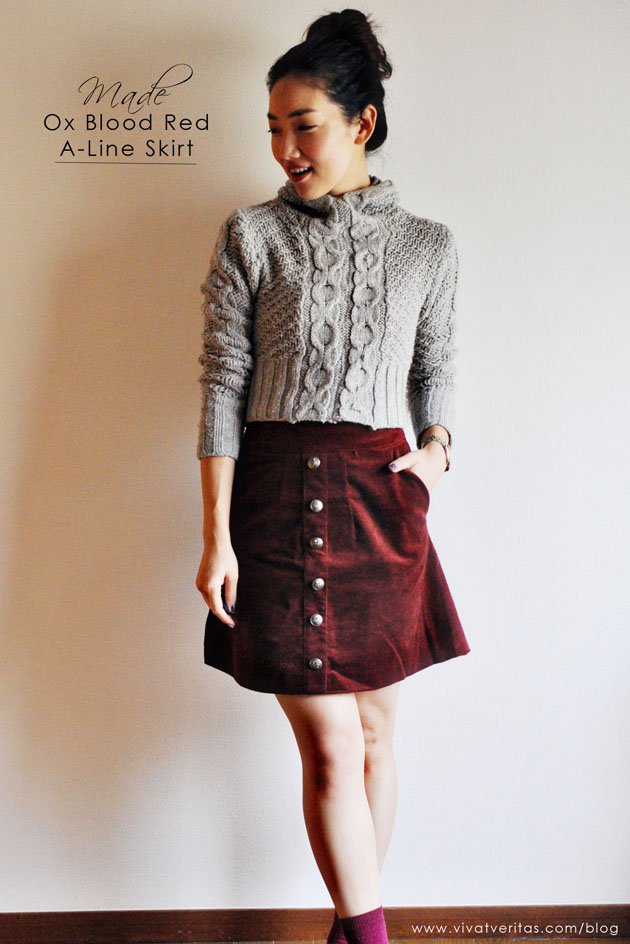
I’ve seen A-line mini skirts with front buttons popping up all over the place. So, I added it to my to-sew list for the fall. When I saw this ox blood color corduroy at Nippori Tomato, I snatched it. Also bought the same color lining at the sale section in Tomato.
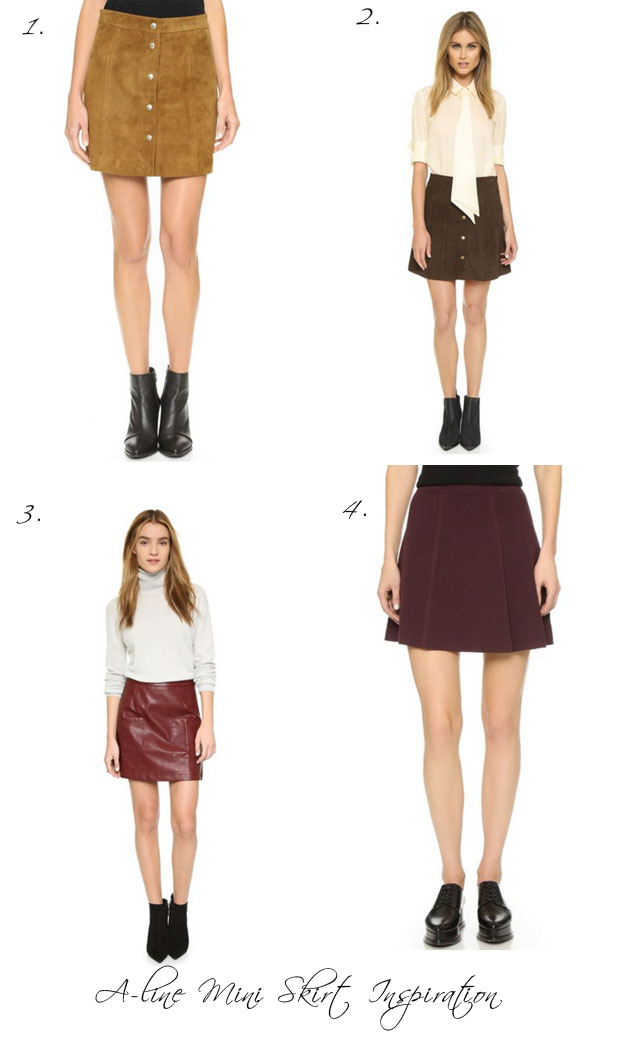
Below is my inspiration board for the skirt. I wanted it high or just waist, A-line, about 10cm above the knees and with the line of buttons in the center front. I also wanted it in some kine of winter fabric, like velvet, suede, leather or corduroy.
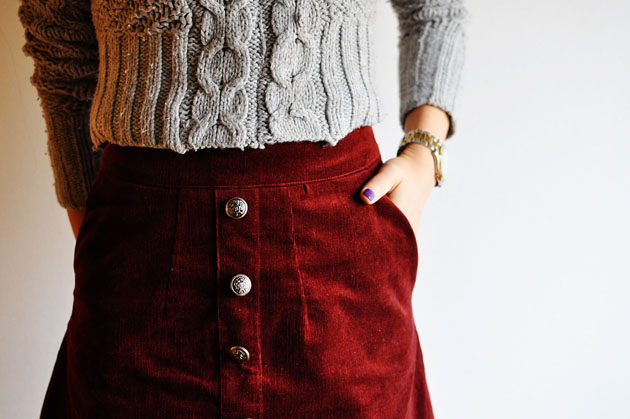
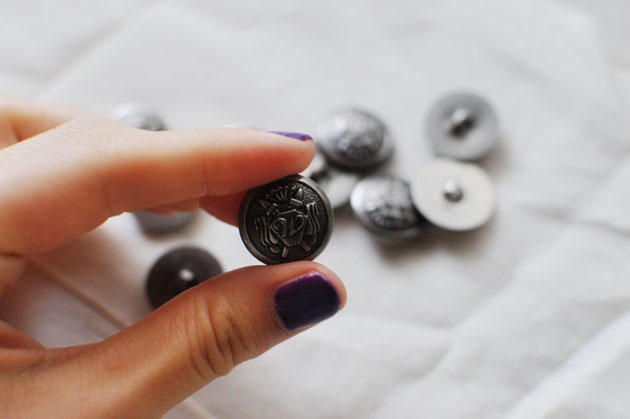
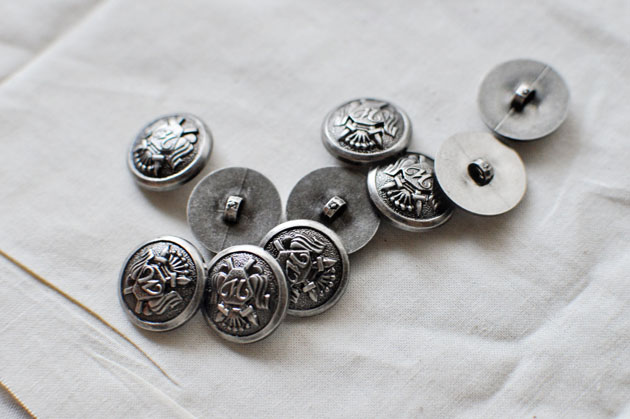
I cut the fabric based on the patterns I made for the Alice in wonderland skirt (blogged here). I like how this pattern has the side pockets. Since the patterns are for I-line skirt with back vent, I changed up the skirt shape, omitted the vent and shorten the hem. The skirt closure is placed in center back with an invisible zipper and the front buttons are faux. I added a stripe of fabric in the front and added six metal buttons I bought online at Nakamura (ナカムラ), my favorite place to source sewing knickknacks.
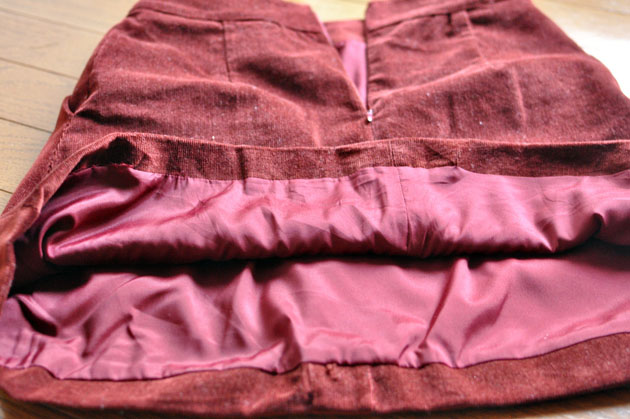
The lining was added in a bagged way so that the hem seam is invisible. This finish makes the clothes a bit more expensive! 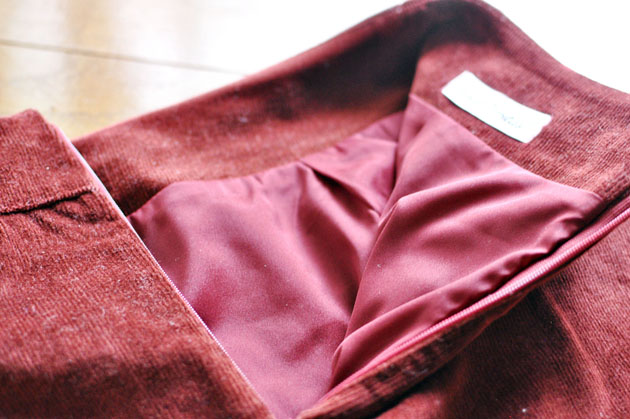
Now it’s time to wear! Today I wore his with cropped sweater I DIYed last year from an old thrifted cardigan. I’m planning of wearing this skirt with white turtleneck, chambray shirt or polkadot shirt this fall.
コーデュロイのスカート、作りました。
生地は日暮里トマト、ボタンは楽天ショップのナカムラで。
ハイウエスト気味で作ったので、クロップセーターでもいける!
この冬ヘビロテできそうなスカートに仕上がりました。


P.S. Shopbop is having a big sale! Hope over here to take advantage of the biggest sale of the year. I’m eyeing this as a gift to myself…The sale will begin at 7am EASTERN TIME Tuesday November 24th and will end at 11:59pm PACIFIC TIME on November 30th.  Find me elsewhere:


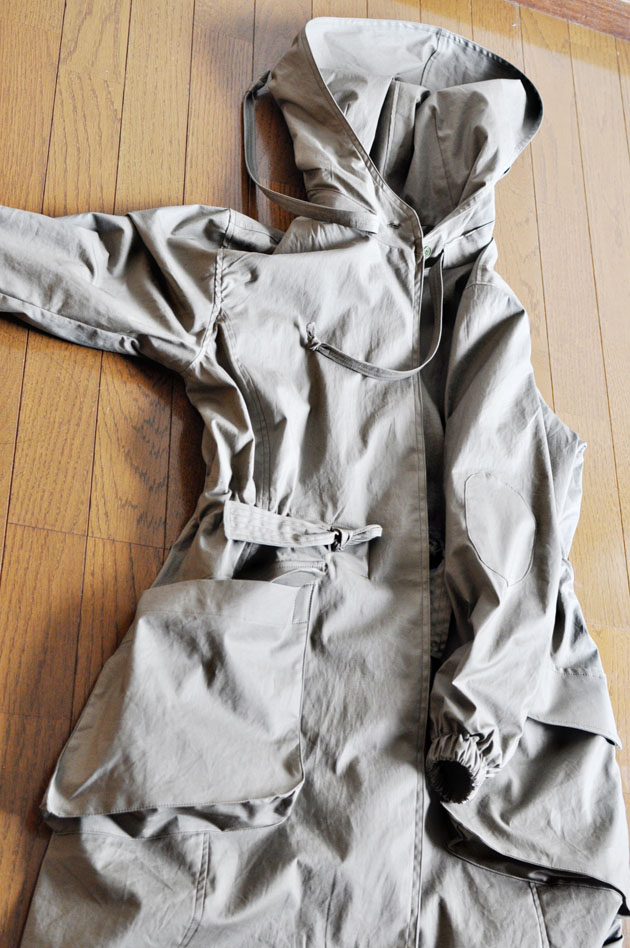
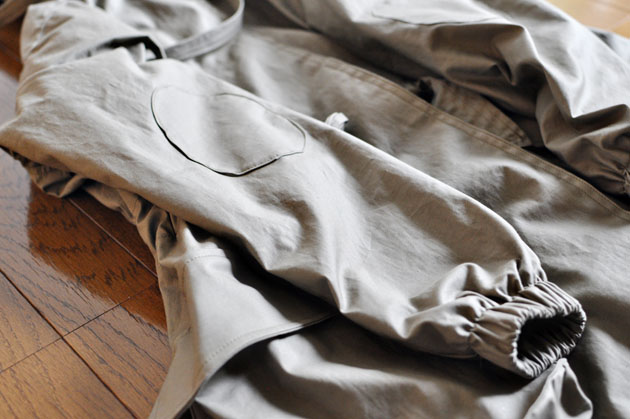
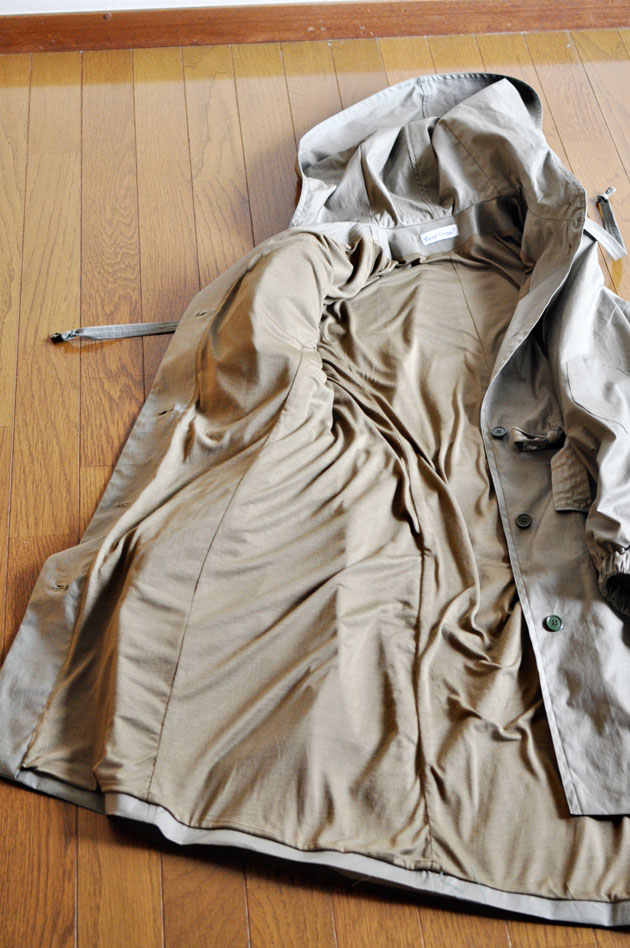
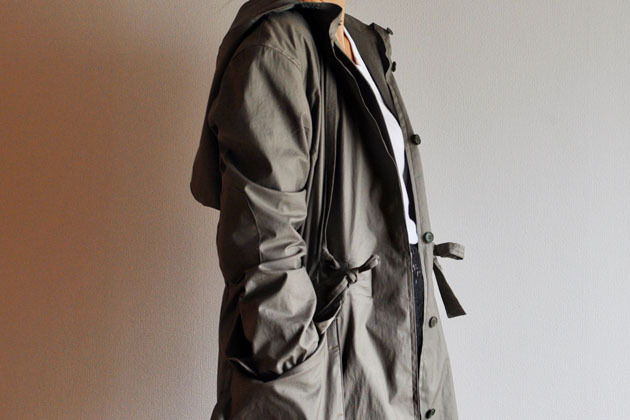
 My new parka is ready for just in time for the coming cold! I’ve been wanting to make a parka since I realized I did not have a single item in Khaki color in my closet. I was deciding between
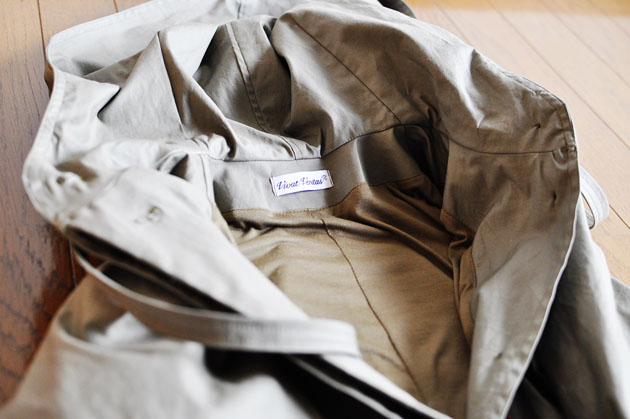
 Here is some pattern review.


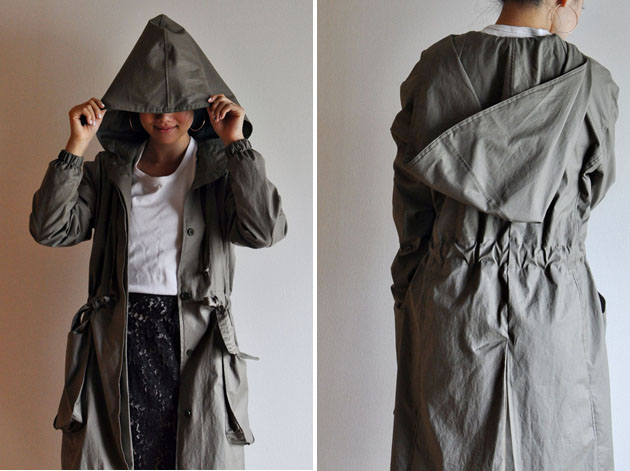
 秋から冬への変わり目のシーズン用に、パーカを作りました。
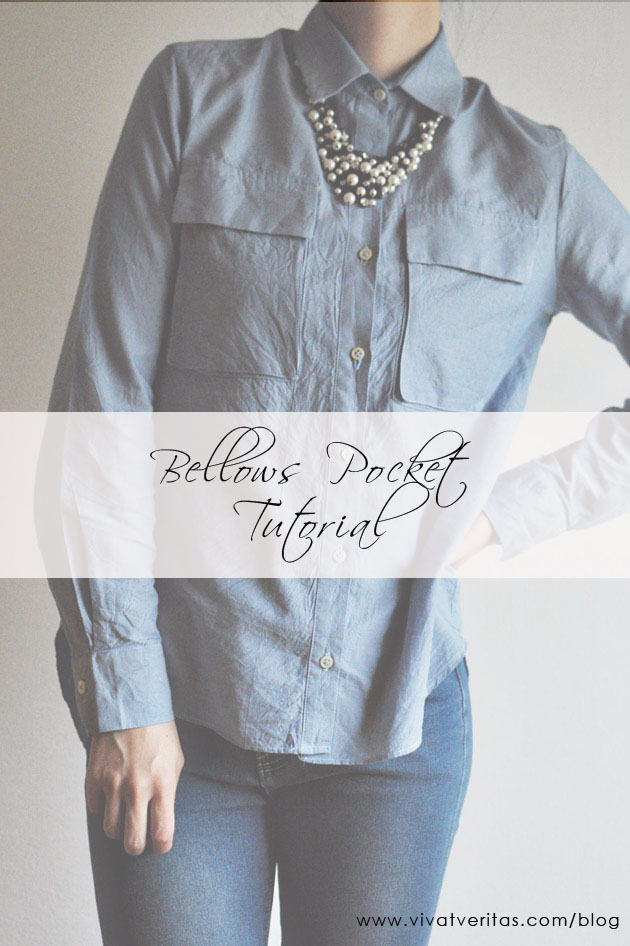 The last time I made a
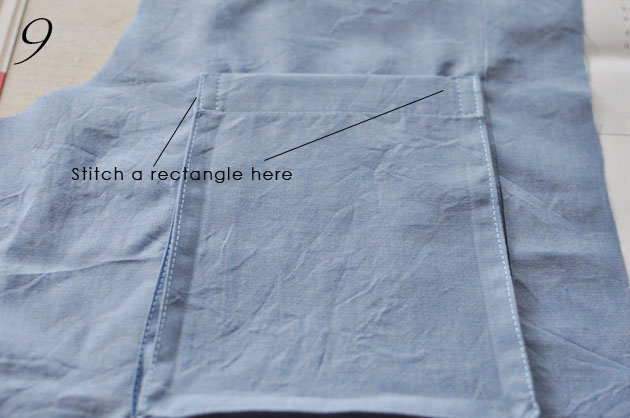
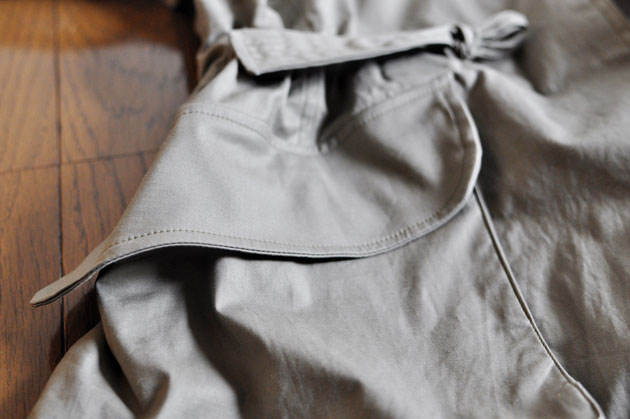
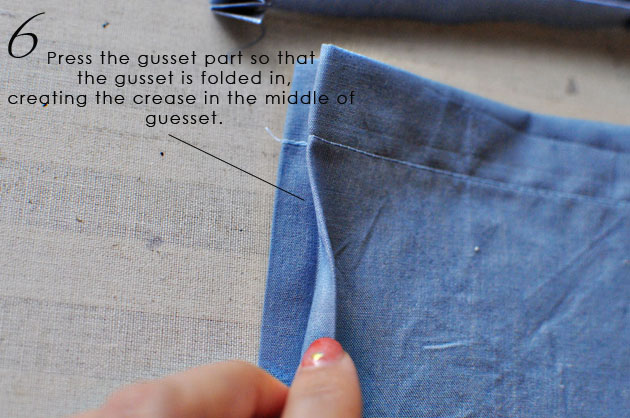
 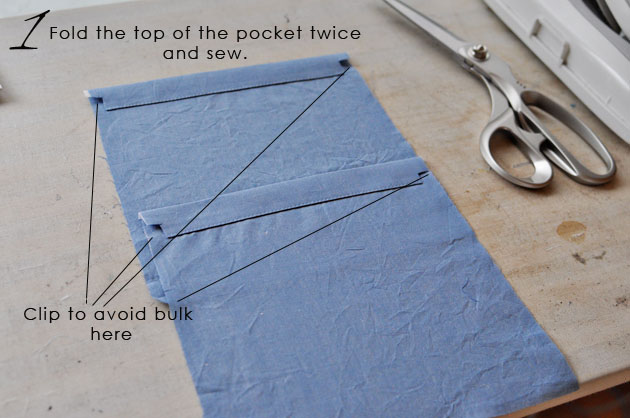 First you need to modify the pattern. Start with pocket pattern without any seam allowances on the sides and bottom. You can keep the top seam allowances as they are (usually folded over twice) but make sure to clip as pictured above to avoid bulk. For sides and bottom, first add for “gusset” width. I added 3cm all around. Then add 1cm seam allowances, so you will be adding 4cm around on sides and bottom.
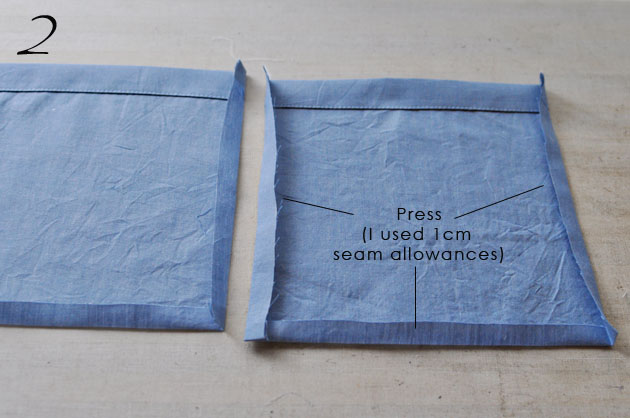
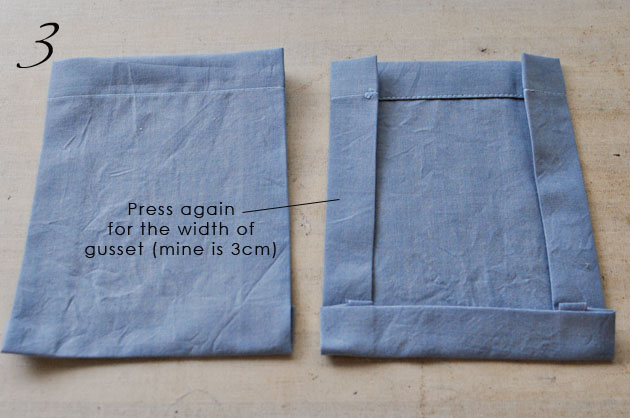
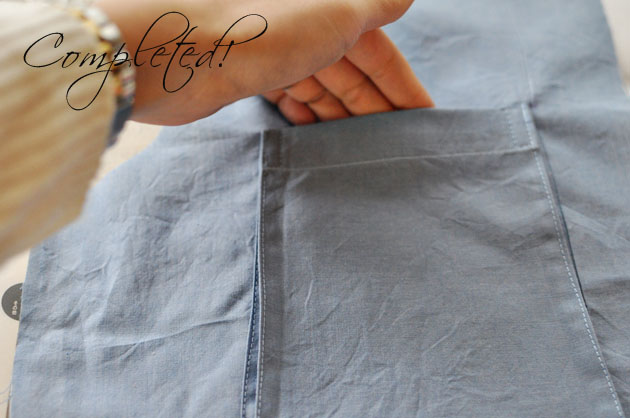
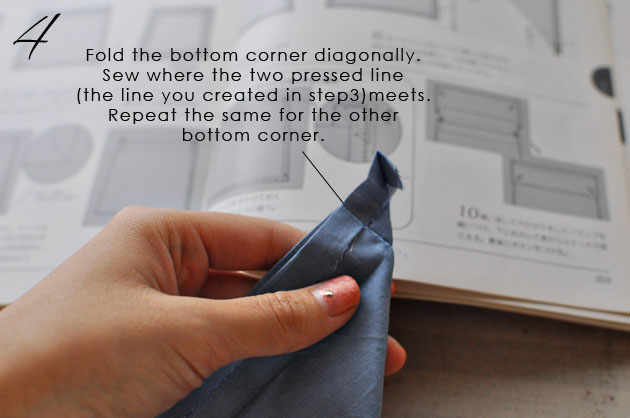 Here is the tricky part. Fold the bottom corner diagonally, meeting the pressed line you made in step 3. It’s similar to making a
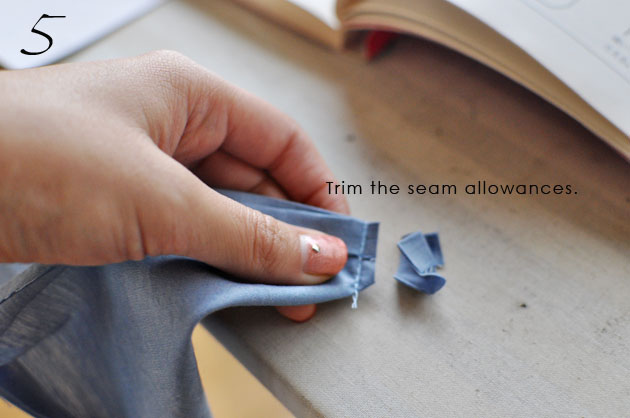
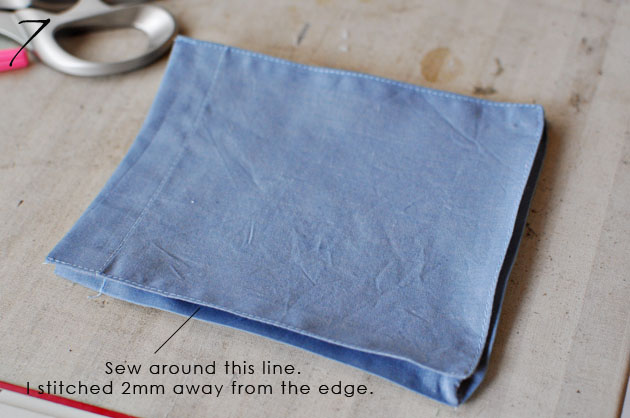
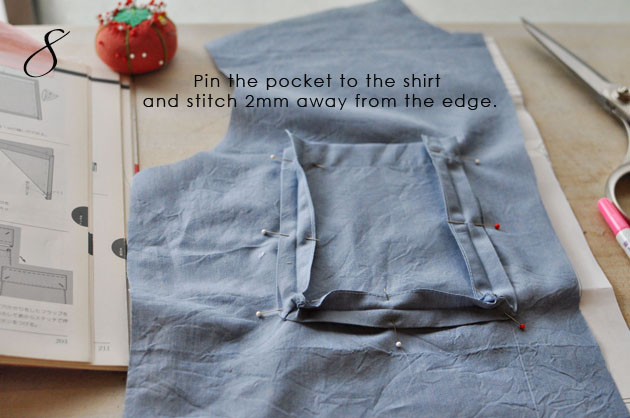 Before you pin the pocket to the shirt, I would transfer the line for pocket placement with a tailor’s chalk so you will know exactly where to place the pocket.