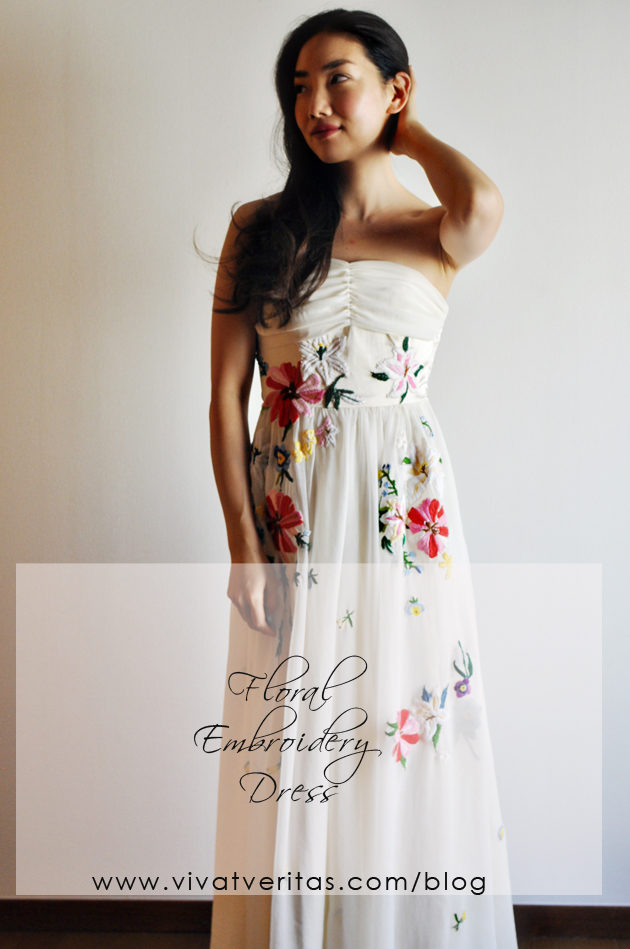
 This is my first completed project of 2017! Embroidery dress. I started on this in late November and it took me (according to my work hour log) about 70 hours. I went through two seasons of the BBC show, Poldark while stitching this together.
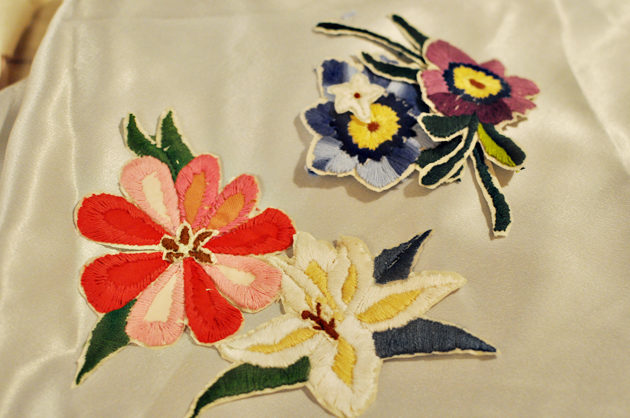
I made this dress for a customer and she will use it some kind of performance. She plays some kind of musical instrument. The inspiration comes from this Lilly Brown embroidery dress. I was intimidated at first by the number of embroidery pieces that would be required to complete the dress, but I decided to give it a try.
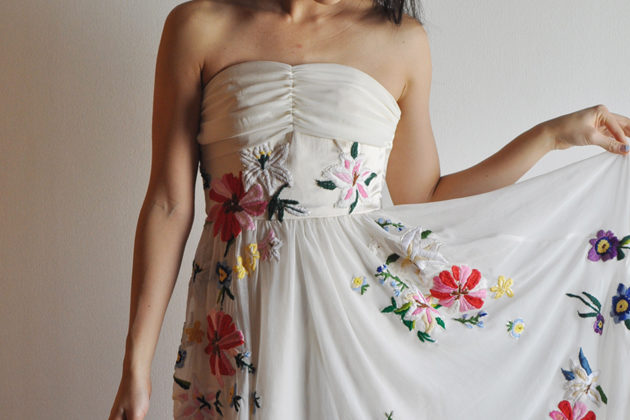
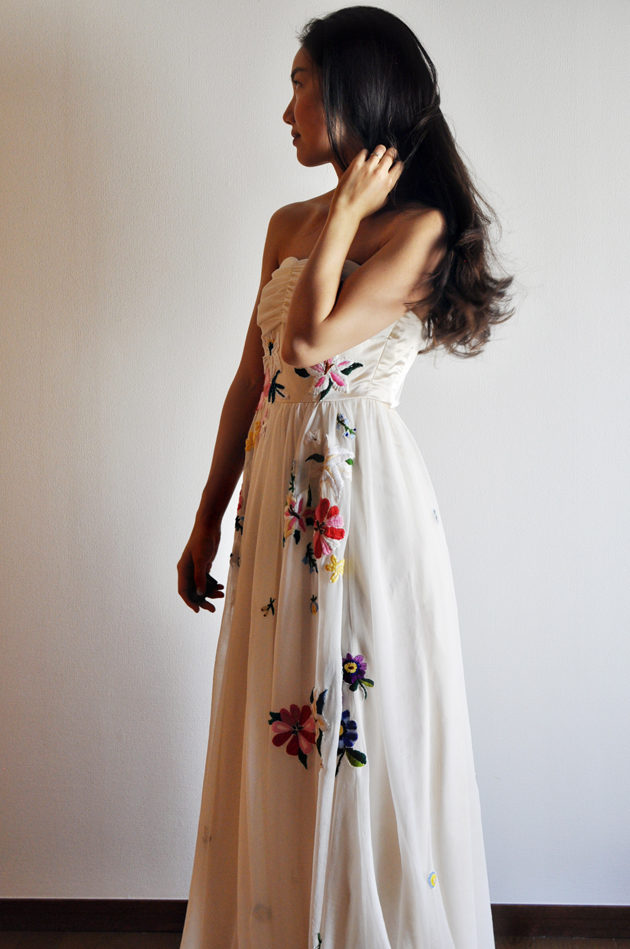
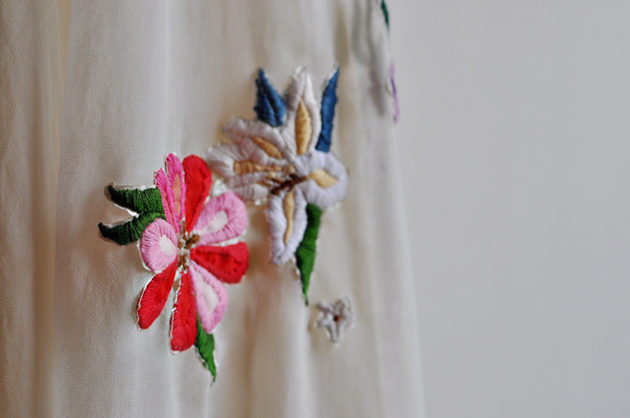
The dress is made of satin and chiffon. Since it would be difficult to embroider directly on chiffon without causing the fabric to pucker, I embroidered the flowers on satin, cut around the embroidery and applique on chiffon. It might have been possible to embroider directly on chiffon if I use the embroidery machine, but I did not have an access to it this time nor the time to play around with it. Has anyone have experience with embroidery sewing machine?
 {Flower pieces embroidered on satin, before being attached to chiffon}
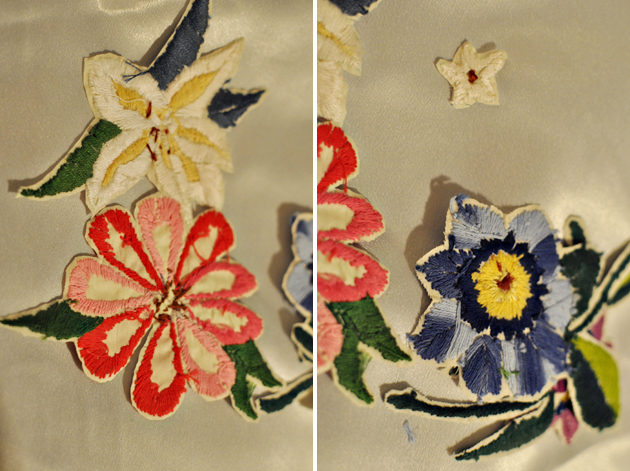 {Making sure the back is as pretty as possible}
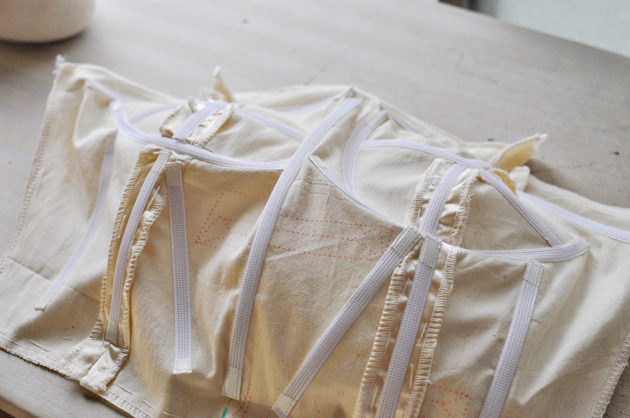 {Boned lining before being attached to the dress. I use white washi tapes to cover the ends of the bones, tip I learned in Tatiana Kozorovitsky’s class.}
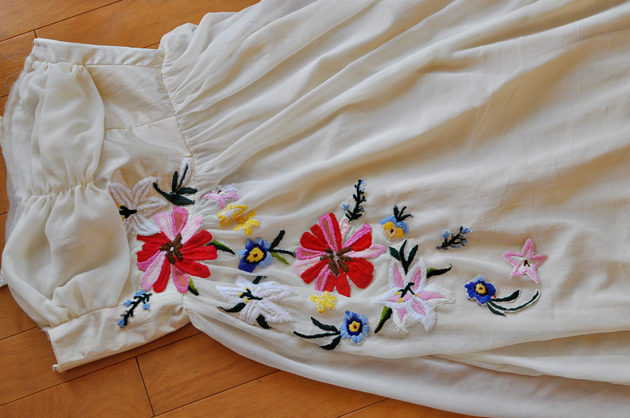 {Dress in works before the lining is attached.}
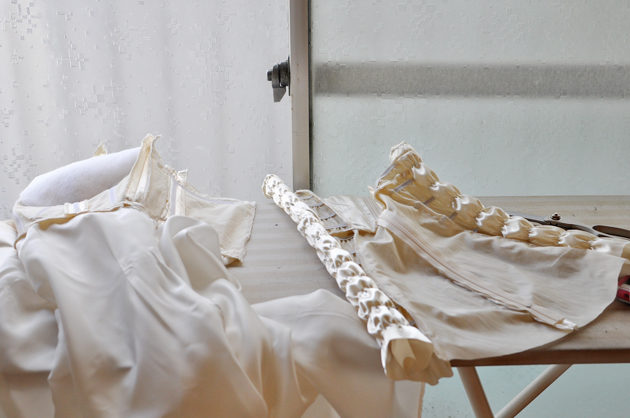 {Elasticized panel on the right}
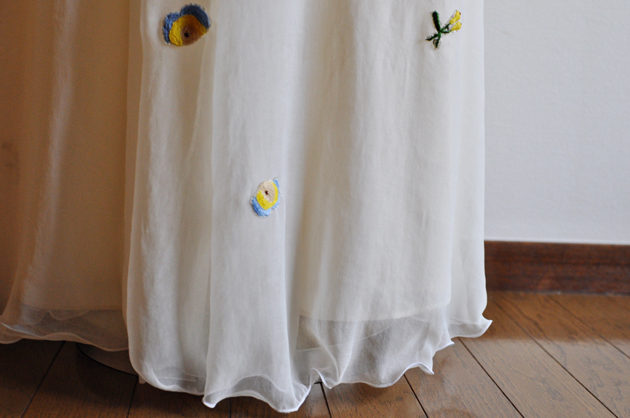
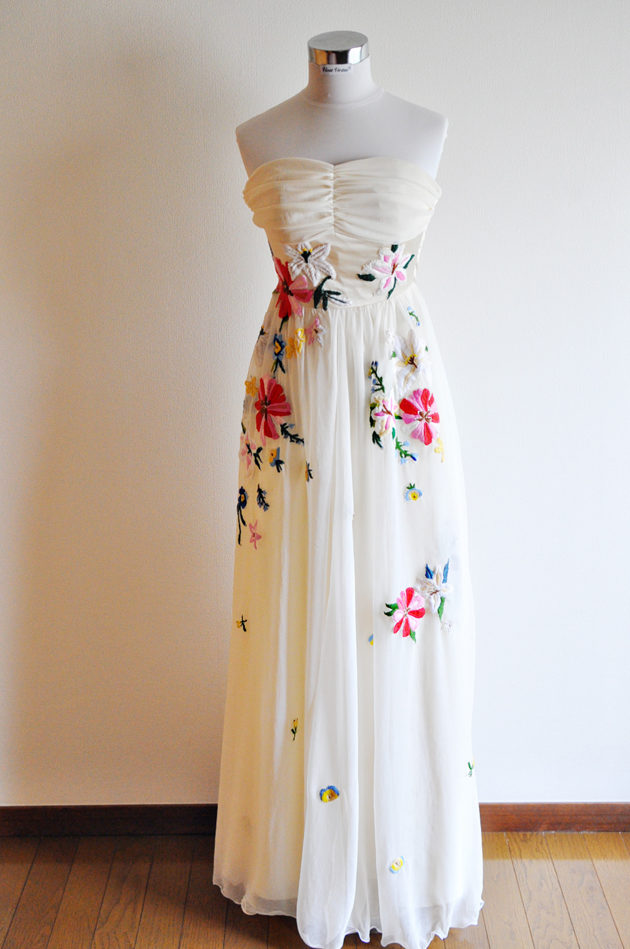
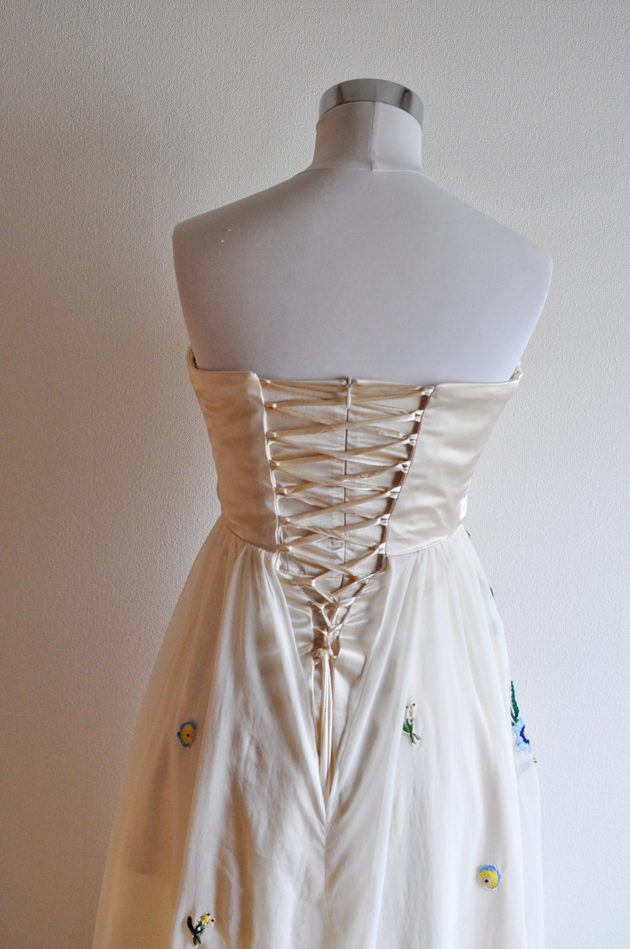
The dress has boning in the bodice and padded at bust area. The back has an elasticized panel with invisible zipper inside the lace-up panel so a bit of adjustment is allowed. The customer is smaller than my dress form but because of the elastic back and lace up, the dress still fit the dress form. 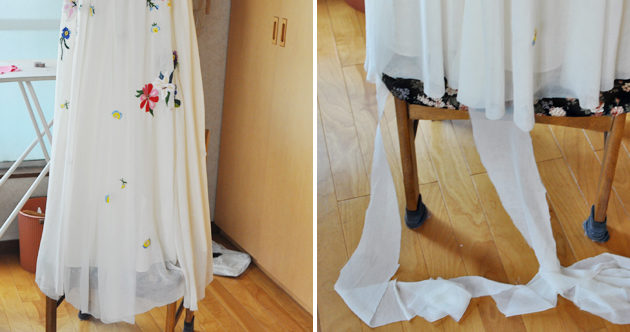 I waited to hem the chiffon skirt until the very end. I knew with the weight of the embroidery, some parts will be weighted down. I put the dress form on chair and mark the new hem line with erasable marker. Then I cut the chiffon hem and finished it with rolled hem.
Overall, it was a great experience making this dress.
このページを日本語で読む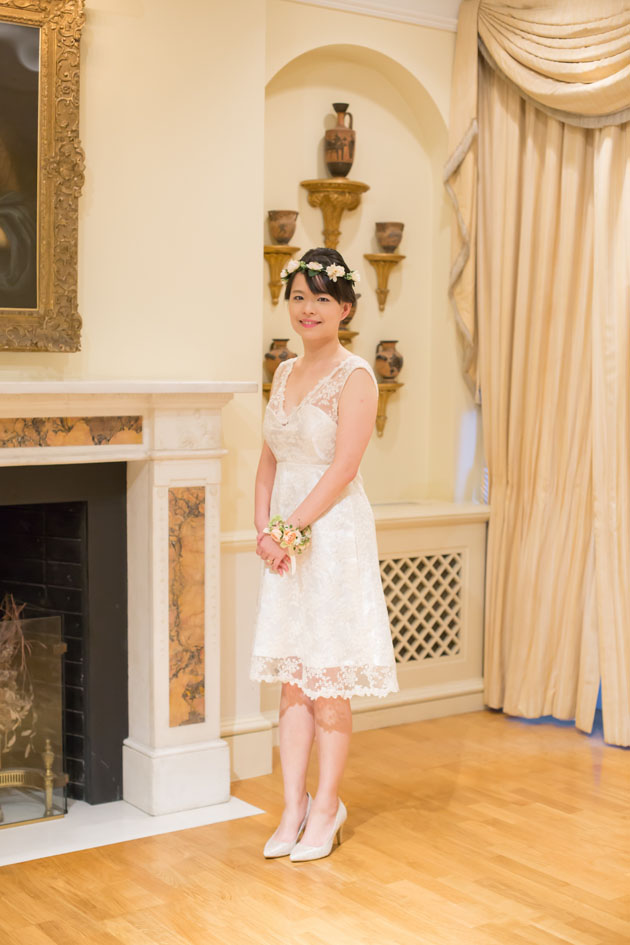
 Above pictures from
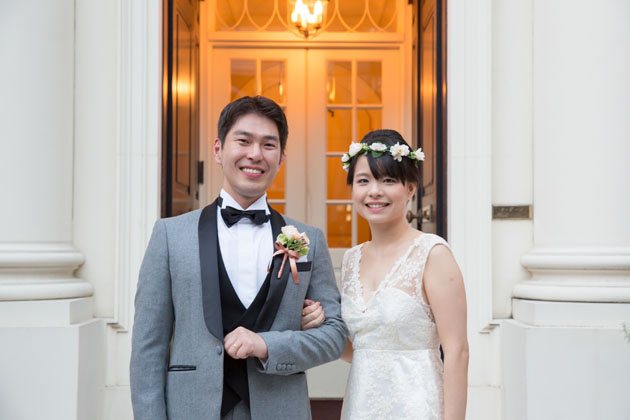
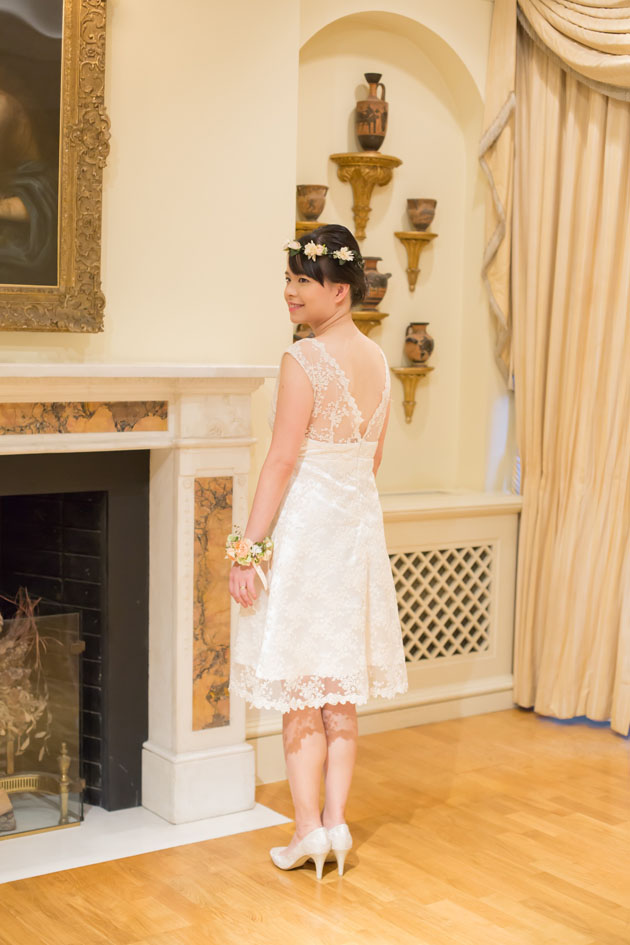
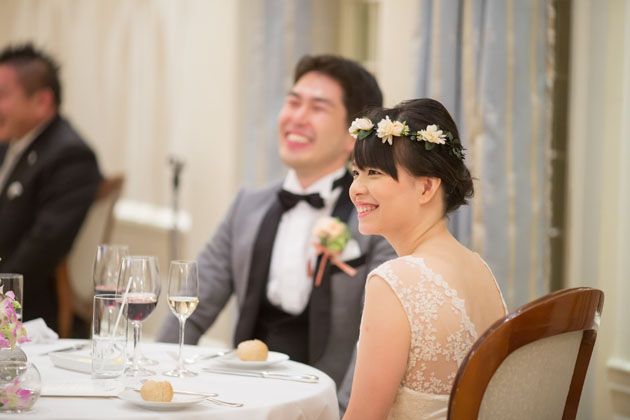
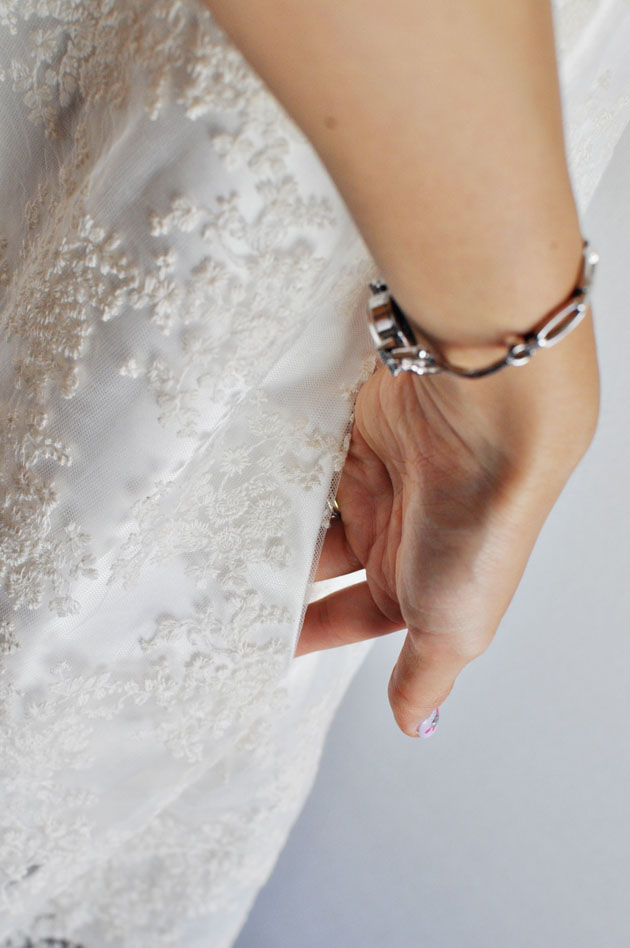
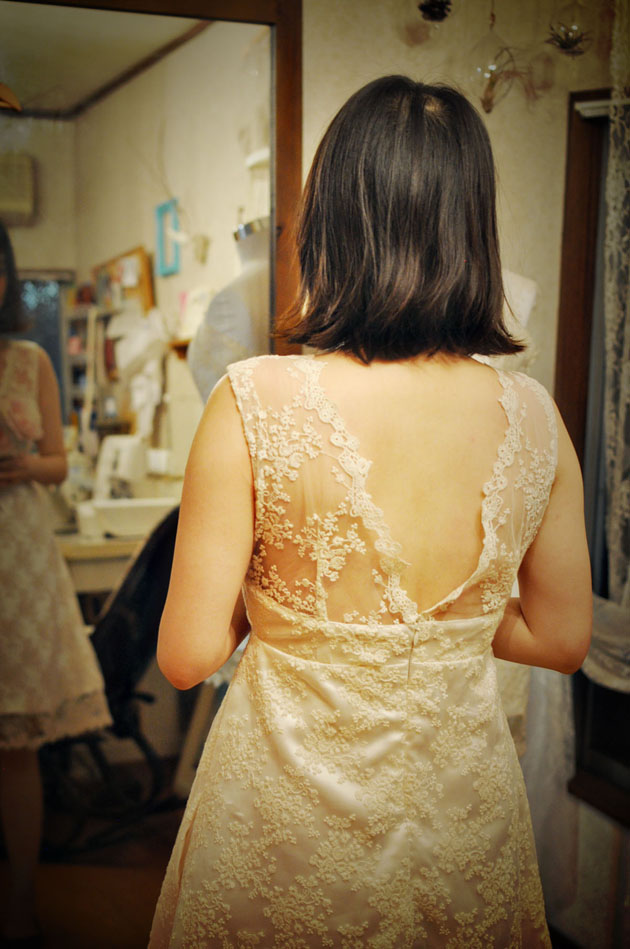
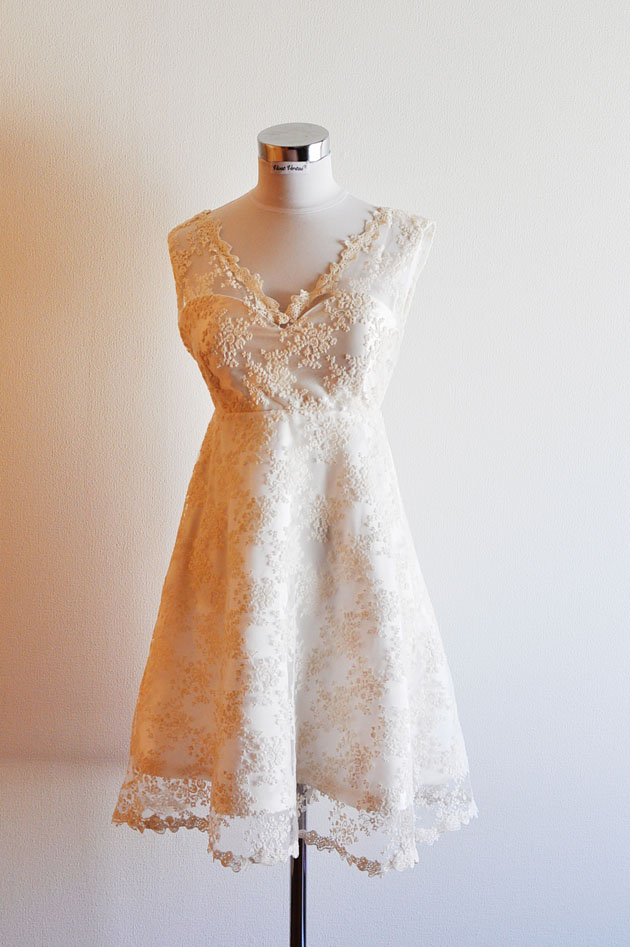
 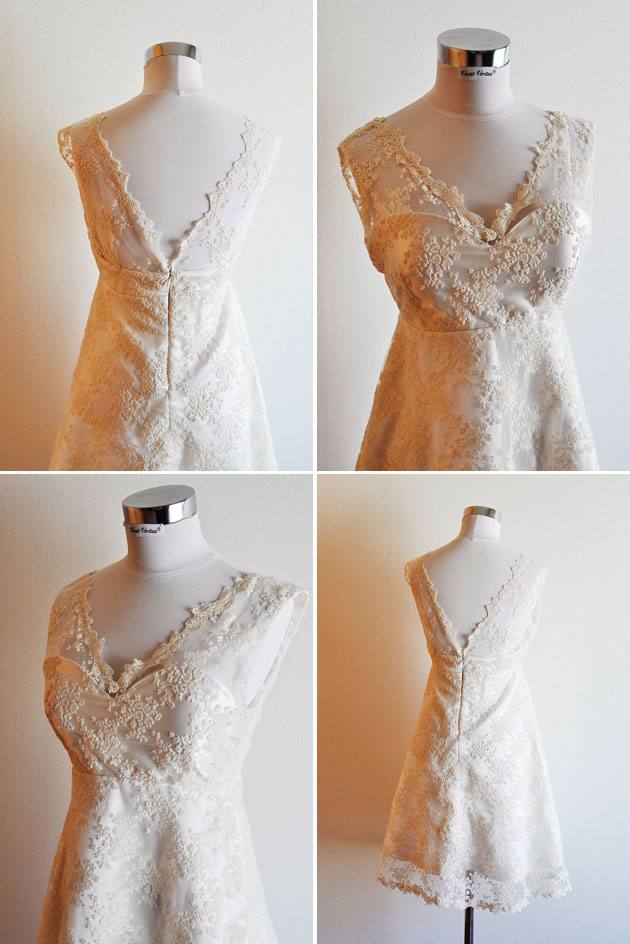 Here are some pictures of the completed dress. It’s made out of ivory color tulle lace I bought off of etsy (it’s hard to find good lace in Japan) with satin underlay with lining supported with boning and bra cups. It is pretty structured so she did not have to wear a bra. There are two things I adore about this dress – 1. V-line back cut with scalloped lace 2. pockets! I’ve seen some wedding dresses with pockets on Pinterest and was convinced that it was the coolest thing to have. Not only it works well for posing for pictures but also it is good for a bride to have for practical reasons. You can hide lipstick for a touch-up or if you were me, a few Reese’s peanut butter cups. It happened to me – In my case, I was too busy smiling for photos and chatting with people so I completely missed my wedding meal. So many reasons to have pockets for a bride.
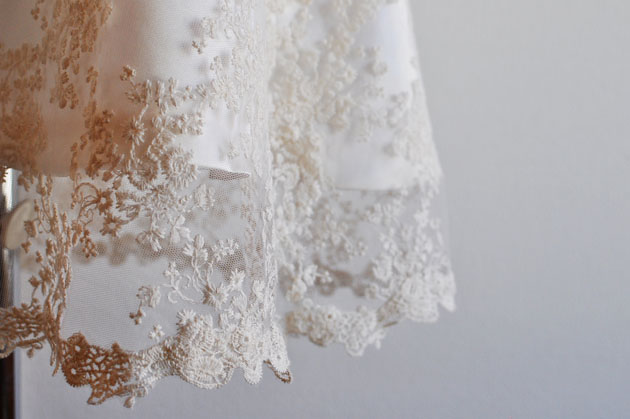
 Some pictures for the fitting – I am always nerve wracked before fitting sessions, worrying about whether it fits well or not. But I try to remind myself that I can always fix it if the fit is not right!
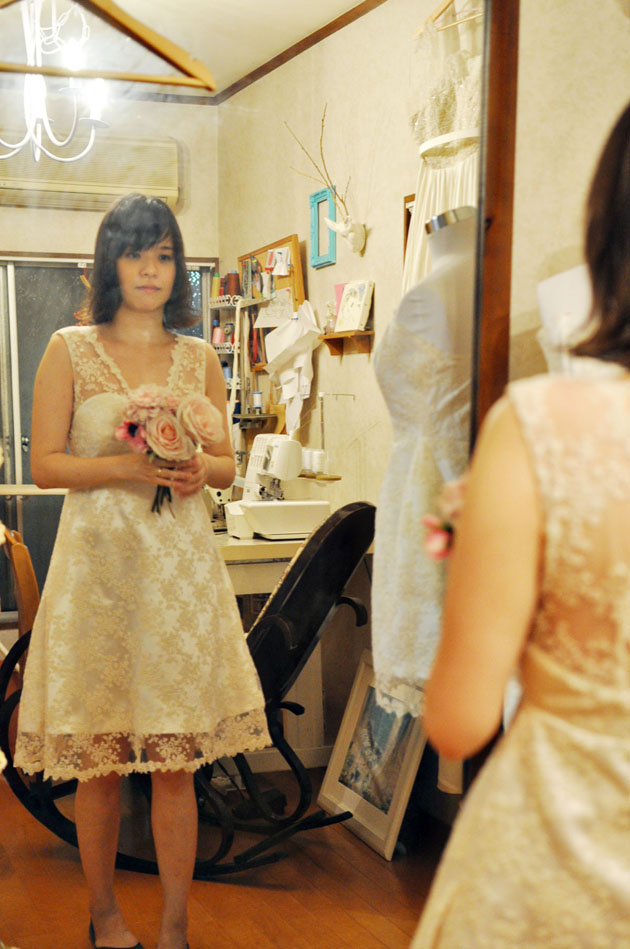
 I’m excited to show you some recent work I’ve been doing for a client. It is common to wear more than one dress at wedding in Japan. You wear one white wedding dress to walk the aisle and for the reception. After, you switch it up to what we call “color dress”. The color scheme can be anything…..except for something like an animal print, which makes you imagine dead animal and is against Japanese wedding custom. I have seen red, pink, gold, blue…pretty much every color in the past. I personally like all white for weddings, since I feel like it is the unique privilege of the bride on that day, but it’s not my wedding!
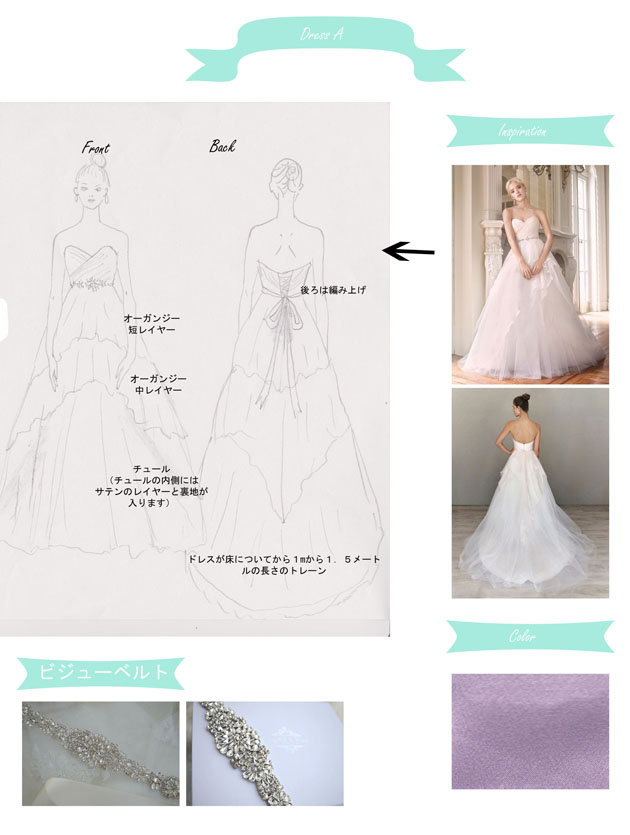 I made the bodice and satin skirt as usual – satin underlined with muslin for bodice, and organza for skirt. I chose organza for underlining for skirt instead of cotton muslin so the muslin won’t weight down the strapless dress. After that, I
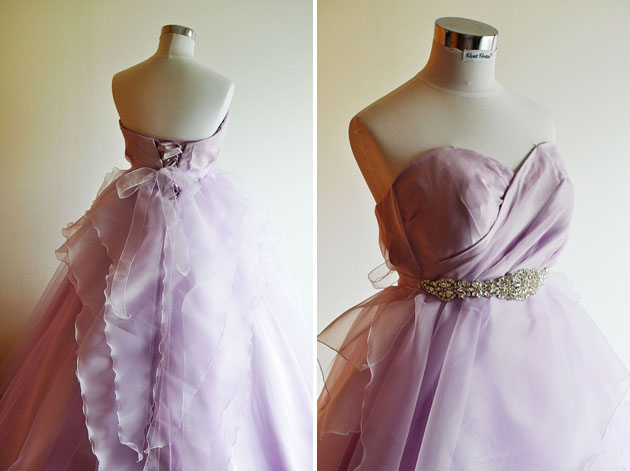
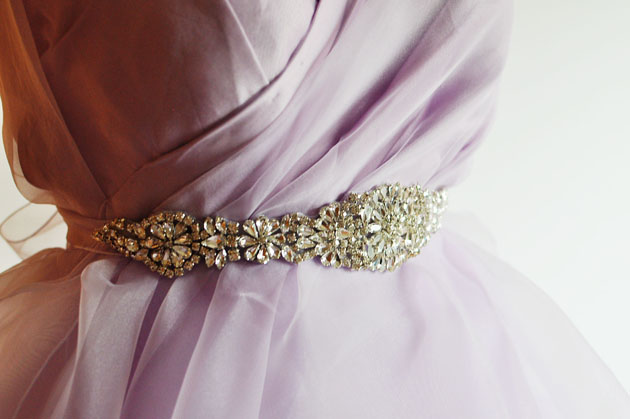 The bridal belt was purchased from
 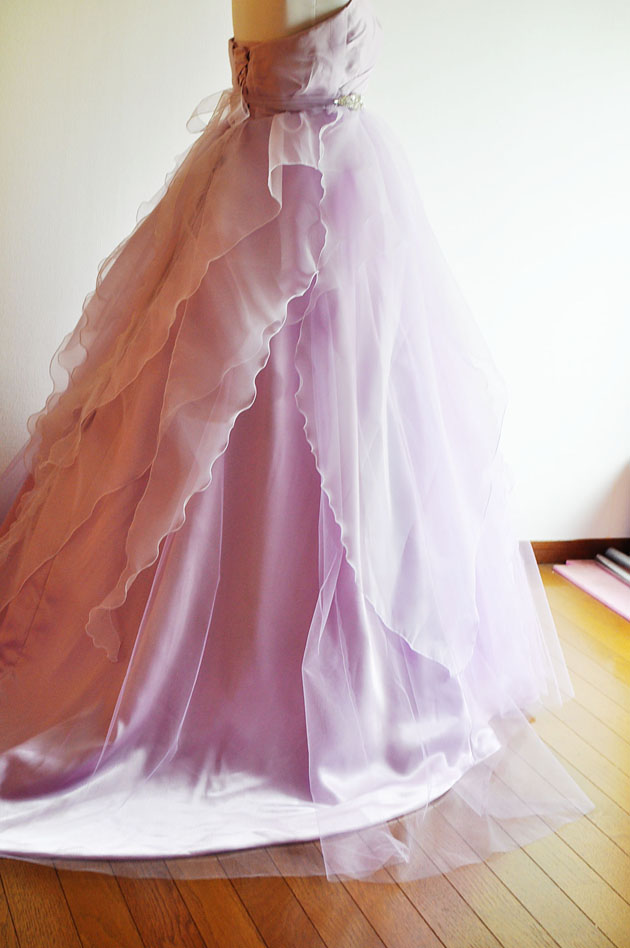 Here is a short video of the dress!