
As I promised, here is the tutorial on how to add a heart shaped cut out to the back of your dress! It’s pretty simple, and once you get the hang of it, you can make the cut out in any shape of your choice! Round, square, star shaped, whatever…variation possibilities are limitless 🙂 I’m not terribly good at explaining things, so I hope this tutorial makes sense! If anything is unclear, please feel free to leave a comment, and I’ll try to answer your questions.
1. First, pick out your pattern. Recommended patterns are something that’s fitted to the bodice, and has a separate panel for skirt part. For this tutorial, I used the Heidi pattern from BurdaStyle. I recommend Heidi or Danielle (although you might need to modify the pattern a bit to fit to your bodice) from BurdaStyle. If you have a basic bodice pattern that’s fitted to your size, you can use that as well.

2. Cut 4 pieces of back bodice pattern (not center folded). For Heidi pattern, you are supposed to insert a side zipper on the left side, so the back bodice pattern says “cut 2, center folded”. In that case, add 1/2″ seam allowance to center back. You will need this seam allowance when turning the pieces inside out and connecting them together later on.

3. Prepare a heart shaped pattern. I typed “heart shape” in Google image, and printed out the type of heart shape I wanted. You can make the heart bigger or smaller, depending on your preference!

4. Fold the heart shape in half, and place the heart 1/2″ from the center back line. I like to have the heart cut out about 2-3 inches from the back neckline, but not too low, so you can wear a regular bra and not show the bra line.

5. Cut out the half heart from your back bodice pieces. Do the same for all 4 pieces.

6. With the right sides facing, sew the neckline, arm hole and half heart shape as the picture above shows. For the places that’s circled in the above picture, leave 1/2″. You will need this space to connect two back bodice pieces later.

7. Clip the seam allowances for curves.

8. Turn the pieces inside out and iron.


9. Now we connect the heart pieces together. With right sides of the outer pieces facing, pin the right sides of the seam allowances you left in step 6. Top picture shows the seam allowances above the heart and the bottom picture shows the seam allowances bottom of the heart shape.
 10. Sew the outer back pieces together as you pinned in step 9. You are only sewing the outer side of the fabrics together, leaving the seam allowances of inner or lining fabrics open.


11. Iron, openning the seam allowances of the outer back bodice pieces you just sewed. Then you iron the seam allowances of the lining back bodice pieces so that the lining covers the seam allowances of the outer back bodice pieces.

12. You can either hand stitch the center seam in the back bodice pieces, or sew it with sewing machine. As you can see, I used my sewing machine to finish the seam.
You are done! Enjoy adding different shaped cut outs to your back:)
 Nails: Jewel on My Toes
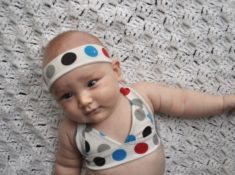 Mommy’s Diary 19 – DIY Baby Bathing Suits
 Shop Update: Early Fall Pieces
 little pink riding hood
Forgotten Fancies says
Thanks for the tutorial! I’ll definitely try it out in my next sewing project.
Chie says
i’m excited to see your variation! xo
Paunnet says
So sweet! Thanks for tutorial, Chie!
Sunni says
So darling! Lovely idea and super sweet! Thank you Chie!
Caroline says
Thanks for the tutorial! I have been meaning to make a cut-out back dress for ages. I am moving to Japan in 3 weeks so I need some clothes for the heat! I will have to ask your advice on fabric shopping in Japan 🙂
Chie says
hi caroline, oh wow that’s a big move! will you be working here? i can answer questions about fabric shopping in japan! feel free to email me:)
Caroline says
Yes, I’m so excited! I’ve got a job in Yuasa, so hoping to find lots of great shops in Osaka and Wakayama!
Ai says
thank’s for sharing your expertise again chie 😀
Eimma Miah says
Ah thank you for this helpful tutorial, not only did you show me how to do the heart but also how to get a pro finish for the neck lines and armholes (I’m a begginer sewer) Your explaining was fine!
Chie says
hi eimma, im glad to hear that my explanation made sense:)
Casey says
Lovely!!!! 😀 I’m going to include this in my weekly links, if that’s alright! 😉
Chie says
of course! thank you casey!
nette says
Love this Chie! 🙂 Reminds me on one fashion line of Luella in the past. I think they had similar heart shapes on the front decollete. I always wanted to try something like that, so your tutorial is just perfect right at the moment! Thanks for sharing!!!
Chie says
hi nette, i do remember the luella dress! it was a heart shaped cut out in the front, and some kind of print fabric in yellow! i love luella. so sad that they don’t come out with new collections anymore..
Tilly says
So cute! I’m adding this post to my sewing inspiration bookmarks. Might try to make a mini heart at some point… although those curves could be tricky if it’s too small, I guess…
Chie says
aw thank you so much tilly!
Ruth says
Thanks for sharing this!! Im a beginner at sewing so all the help is welcome!! This will be my next project!!
Love your site/blog/shop!!!
Chie says
aw thank you so much ruth!
Casey says
Hi!
I’ve been working on a blouse with a diamond shaped cut out in the front bust region, and I’m having trouble with the facing. It doesn’t stay put and the top part falls down through the diamond. Do you have any suggestions on what I should do to stabilize it so it doesn’t do that? I was thinking of attaching it to the neckline and/or armhole seams, but was wondering if there are other ways to do this to minimize the bulkiness, or if that’s the only option!
Thanks!
Chie says
Hi Casey! Thank you for your comment. I don’t know what your blouse looks like, so I can’t say for sure, but I’m thinking maybe below can be the cause:
1. Is the blouse loose fitting of tight fitting. I recommend to insert a cutout in pretty fitted design to really show off the cutout!
2. Perhaps the fabric is light weight like cotton lawn? It might work better with fabric with some body.
Hope this helps!