• Skip to primary navigation
  • Skip to main content
  • Skip to primary sidebar
  • Skip to footer

Looking for something?

Get in touch

  • Email
  • Facebook
  • Instagram
  • Pinterest
  • Twitter
  • YouTube

Vivat Veritas

Custom Wedding Dress & Kimono Upcycled Clothes | オーダーメイドウェディングドレス&着物ドレス

  • Home
  • About
    • Press
    • Collaborations
  • Blog
  • Bridal
    • Lovely Words
    • Price List
  • Sewing Class
  • Kimono Dress
    • MADE-TO-ORDER BUSTIERS
  • Contact
  • Location
  • 日本語
/ Archives for blogs / underwear

underwear

#BraMakingWithMadalynne

September 23, 2015 By Chie

Madalynne Sewing Studio2 via Vivat Veritas Blog

Long before I sewed my first bra, I came across Maddie’s blog, Madalynne. As you can see, her blog is very aesthetically pleasing and I decided if I have a chance to go to Philadelphia, I would take her bra making workshop. Thankfully for me, every time Andy and I go to the U.S., we go to NY and Philly. That’s where we went school, met each other and got married, so the place has a sentimental value for us.

I missed her latest workshop, but asked if she can do a private bra making session with me and she agreed.

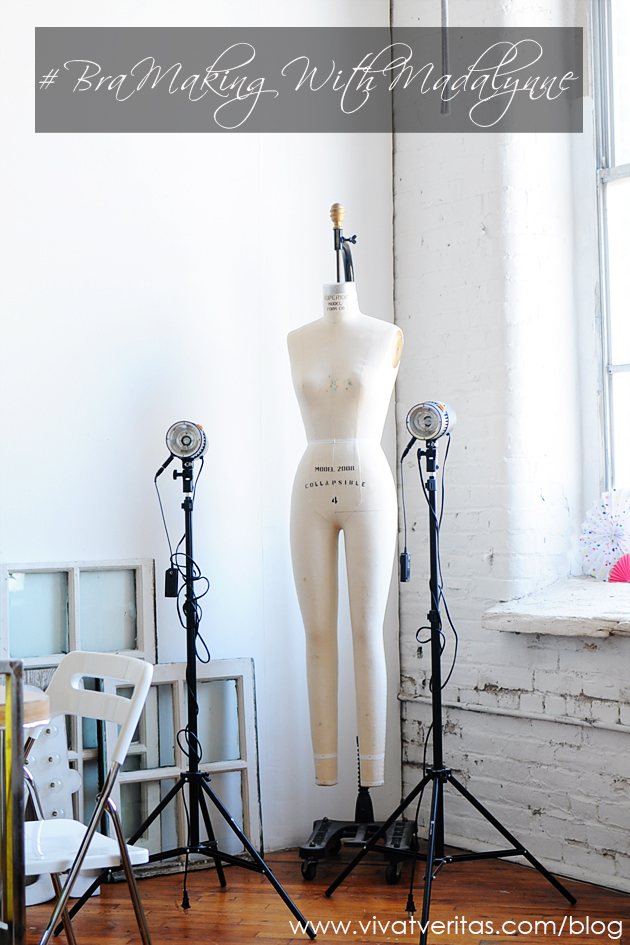
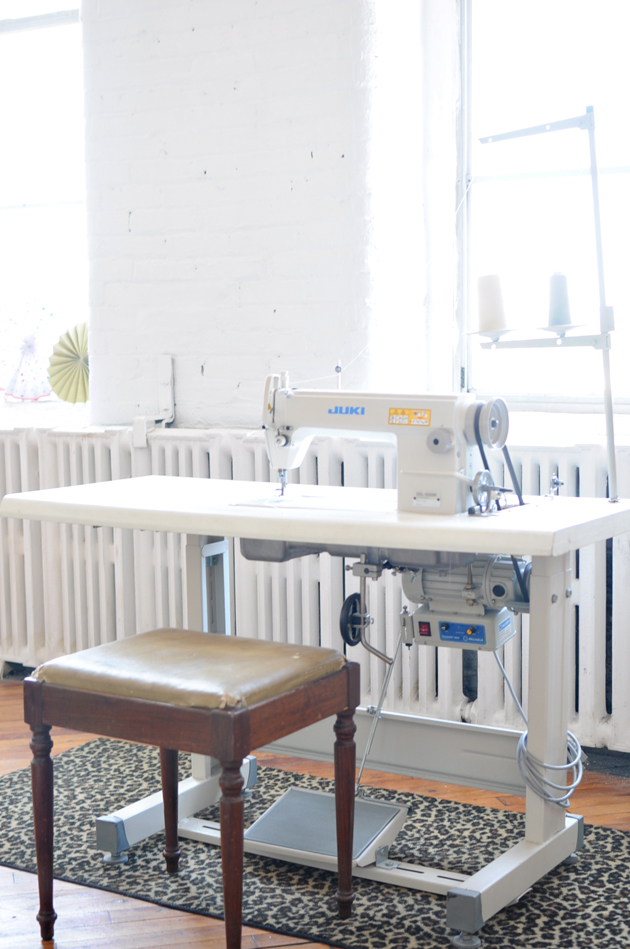
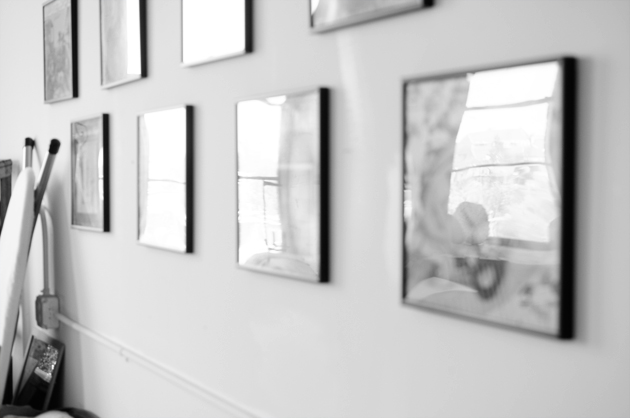
Here are some of the photos of her studio. You might be already familiar with it if you follow her on instagram…Madalynne Sewing Studio1 via Vivat Veritas Blog Madalynne Sewing Studio3 via Vivat Veritas Blog Madalynne Sewing Studio4 via Vivat Veritas Blog

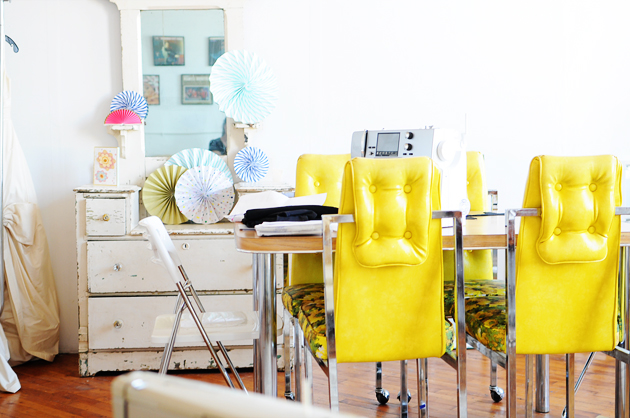
We decided to work on Merckwaerdigh pattern. Since I’ve only worked with Watson bra pattern by Cloth Habit, this will be my first underwire bra sewing. I bought BHS10 as well as the DIY bra kit. The bra kit does not come with the underwire. Although Merckwaerdigh sells the underwire and channeling, I decided to buy them locally (Japan). I purchased from a site called intimate jimura. I found the selection and pricing are good although the checkout process can be cumbersome for non-Japanese speakers. Jimura does not accept credit card, so you will have to do a direct deposit.

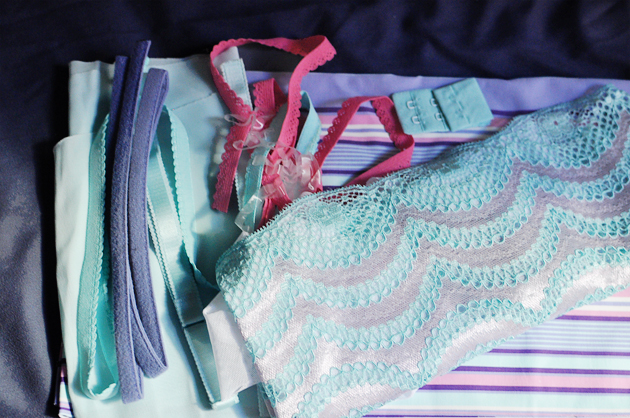
Maddie and I only had an hour to work together, so unfortunately we did not go beyond cutting out the fabric. One great tip I learned was to use a temporary spray adhesive to stick the lining and shell fabric together and cut the pattern pieces using rotary cutter. It made the cutting so much quicker and easier. Here, I am cutting two layers of power net as lining and lace together. Maddie recommended the two layers of power net when I told her I liked having a bit of support for the bra and avoid the sheer look.
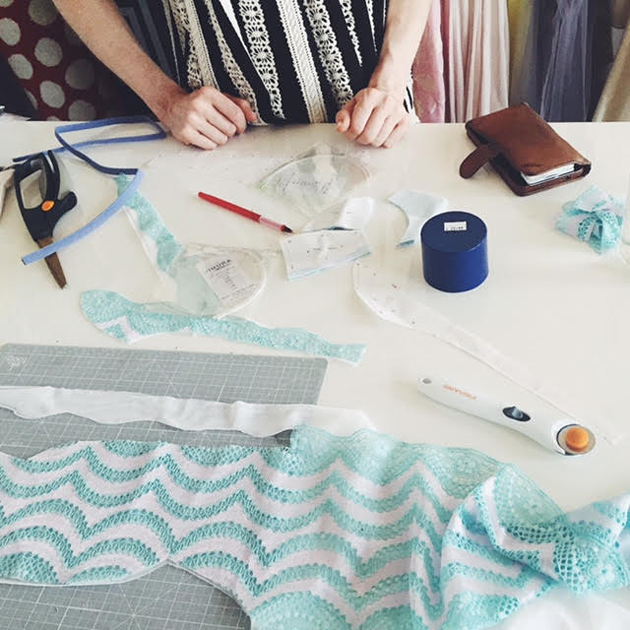
Beautiful sea foam color lace from Merckwaerdith! Can’t wait to finish it.DIY Bra Kit Lace Merckwaerdigh DIY Bra Kit Merckwaerdigh

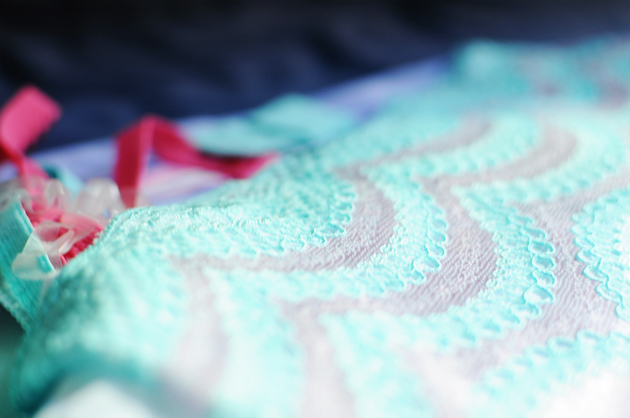
今月頭はNYとフィラデルフィアに旅行に行ってきました。
今回の旅行で目玉行事のひとつだった、ブラソーイングのクラスのご報告です♪
フィラデルフィアのMaddieさんというソーイングブロガーさんにプライベートレッスンしていただきました。
通常はワークショップをやっているそうですが、時期が合わなかったので個人レッスンで。

使用した型紙はMerckwaerdigh。
初めてのワイヤー入りブラです。
ワイヤーやワイヤーループは下着専門手芸店intimate jimuraで購入しました。
色々ランジェリーソーイング用品が揃っていて便利ですが、クレジットカード決済ができないのがマイナス点です。

レッスンでは裏地と表地をスプレー糊で一時的にくっ付けて、一緒にロータリーカッターで型紙裁断するなど教えていただきました。
時間がなく裁断のみで終わってしまったので、これから仕上げ頑張ります!
chie sig2

Find me elsewhere:

Filed Under: blog, blogs, every day life, travel, underwear, 日本語 Tagged With: bra sewing, BraMakingWithMadalynne, lingerie making, 手作りランジェリー, 洋裁教室

Tutorial | Watson Bra Racer Back Variation

August 31, 2015 By Chie

Cloth Habit Watson Bra Racer Back Variation Tutorial

Turn Watson Bra into Racer Back Version!

I’m so excited to share the tutorial for this racer back bralette variation of Watson bra! This is my third attempt to make Watson bra by Cloth Habit. You can see my first (black lace) and second bra attempts(apple print). This time, I made it with white stretch lace and changed the back to be racer back without hooks and eyes. It’s a pretty simple modification and a quick sew! Cloth Habit Watson Bra Racer Back Variation Tutorial (click through for more)

I made the Watson bra regular version (not long line version) but I bet you can make the racer back modification in long line version without problem. Here is what I did:

  1. Make the front version as the pattern instructions state. As I did for my first two bras, I added lining in the bra cups with power net and inserted bra cups so the bra is not sheer.
  2. For the back, instead of using the Cloth Habit pattern, I cut the stretch lace in the same length as the front length. Adjust so that the side seams match. Using french curve, draw a curved line making the center back length a bit shorter than the side seams. I finished the top seam with elastic band and scallop part of the same lace.
  3. For the neck strap, I cut the lace 46cm including 5mm seam allowances. Attach the neck strap to the top of the triangles of the bra cups.
    process1
  4. Here is the step-by-step pictures of how I made the straight line down the back. Cut the same stretch lace for 9cm. Cut two.
  5. Fold the lace you cut in step 4 in half, with right sides facing.
  6. Sew the diagonal line shown in the picture. Trim the seam allowances and press them open.
  7. Sew two of what you made in step 6 together.
  8. Add the elastic band in the center using zigzag stitch.
  9. Now you have the pointy hourglass-ish shape, sew it on to the center of the neck strap and the center of the back.
    Racer Back Bra Sewing Tutorial (via vivatveritas
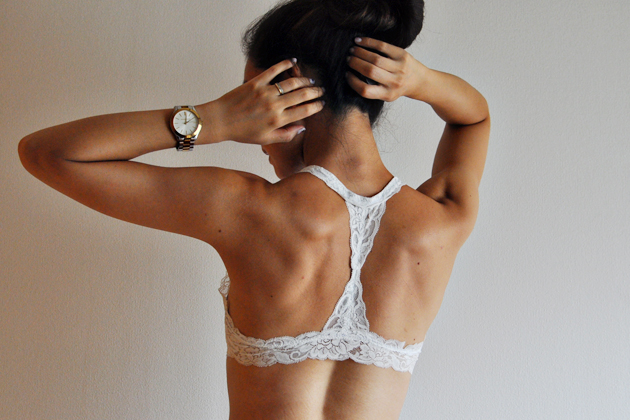
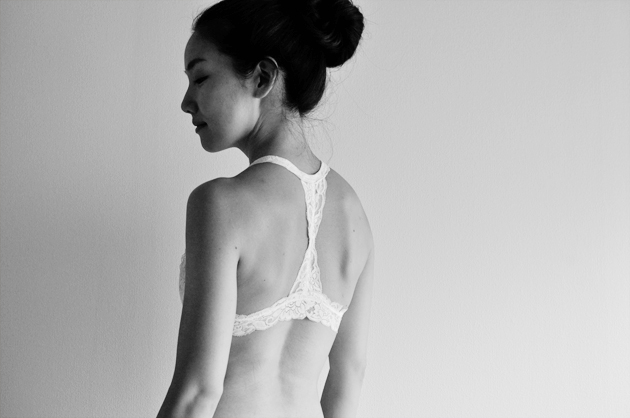
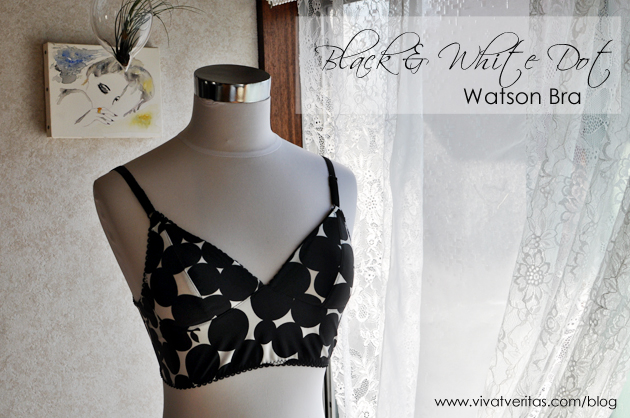
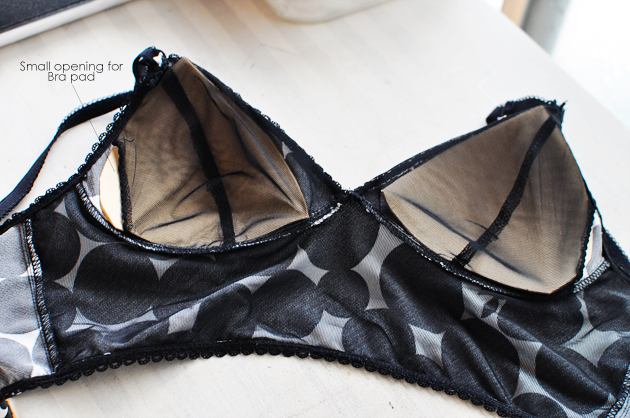
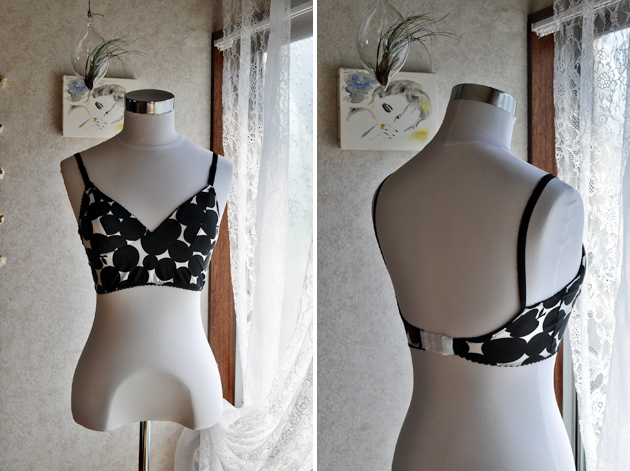
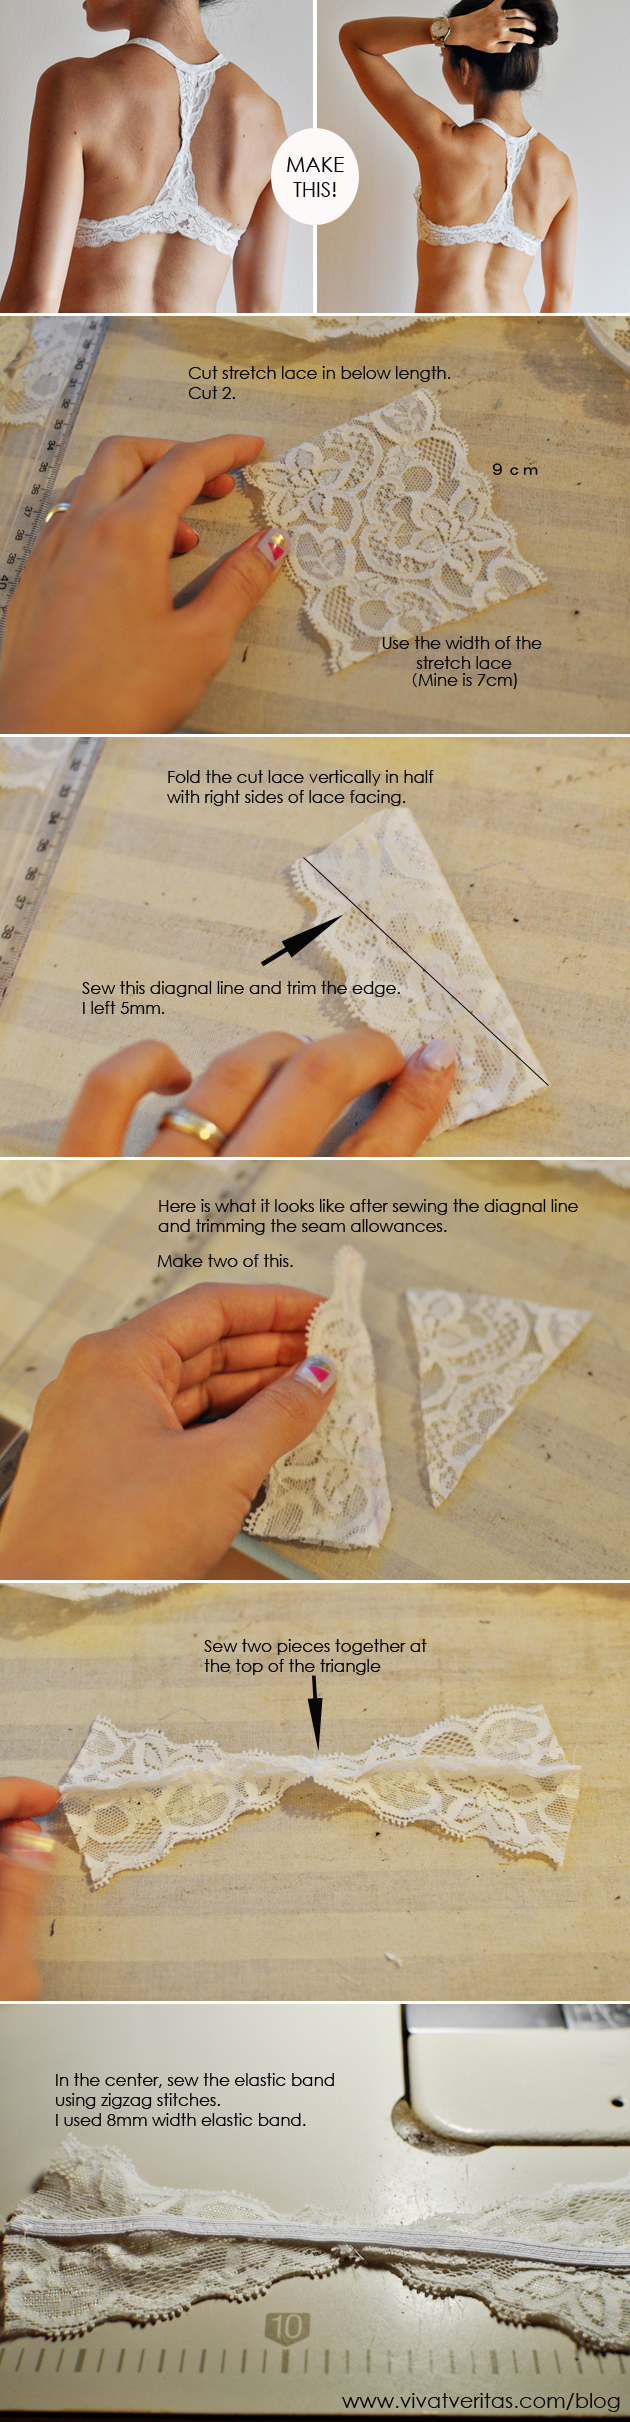
That’s it! Please comment if you have any questions. I’d love to see your version of racer back Watson! Please share it on instagram, twitter or facebook and tag me the pictures:)  I made another racer back (sneak peak), and will be sharing the pictures soon.Cloth Habit Watson Bra Racer Back Variation Tutorial via Vivat Veritas
    Sign me up!

    Want more inspiration post like this? 

    Get it in your inbox, once a month. Check out my previous newsletters to see if you would like one.

    レーサーバックブラを作りました。
    パターンは3度目のCloth Habit Watson Bra Pattern。
    後ろはフックではなくスポブラの様なつくりにして、被るタイプに変更。
    夏場に背中の空いたお洋服を着るとき便利です。

Filed Under: DIY, underwear Tagged With: bra, tutorial

Watson Bra in Black and White Dots

July 16, 2015 By Chie

Dot Print Watson Bra A32 via Vivat Veritas Blog

Soon after I made my first Watson Bra by Cloth Habit, I found left over fabric in my closet that had been used to make this dress (now on sale for $20!) back in 2013. I still had a meter or so left. It has stretch, and there are apples hiding among the black dots. Since I already had the notions and power net in black I decided to make another bra.

As before, I added bra pads and lined the cups with power netting. for my previous attempt, I enclosed the pads completely. However, this time I left a small opening so I would be able to take the pads in and out. After a number of washes, the pads can get old. This way I can replace them easily.

My second try went much quicker. I really had fun making it. I usually listen to podcasts while I sew, and my current sewing/crafting podcast favorite is Elise Gets Crafty.

Pattern: Watson bra pattern from Cloth Habit
Size: 32A
Fabric: Stretch poly mix fabric from Nippori Tomato
Notions: Flora’s Garden on etsy
Modifications: Added bra pad and lined the bra cups with power net.How I added a bra pad on Watson Bra (Click through for more)

So what’s next? I’m continuing to collect inspirational images for bra here. Lacey back, burgandy lace for fall, white racerback… Variations are endless. I’ll soon be back to stretch knit section in Nippori.

Watsonというインディーデザイナーの型紙を使って、ノンワイヤーのブラ2つ目を作りました。
2回目は1回目よりかなりスムーズで、1時間弱で完成。

ジグザグでランジェリー用のゴム(ピコゴム)をつけたりなどは普段余りしないので新鮮でした。
パワーネットやゴム、ストラップなどの小物はすべてアメリカからEtsyを使って購入したのですが、
次回はこちらのサイト(下着専門手芸店 intimate jimura)でオーダーしてみようかなと思います。
Watson bra by Cloth Habit in Black and White Dotschie sig2

Find me elsewhere:

Filed Under: blog, blogs, creation, underwear, 日本語 Tagged With: Cloth Habit, handmade, sewing, Watson bra, 手作り, 洋裁

« Previous Page
Next Page »

Primary Sidebar

JOIN MY EMAIL LIST

You can read a sample newsletter here, including my latest edition.

Recent Posts

  • UNPLAN shinjuku Pop Up
  • Japanese Iconic Pop Up & Mini Fashion Show 
  • Responsible Marché Vol.8 — A Day to Discover the Stories Behind Clothes
  • Seplumo Nihonbashi POP UP
  • Coaster Aobadai X VIVAT VERITAS POP UP

Categories

Follow me

  • Email
  • Facebook
  • Instagram
  • Pinterest
  • Twitter
  • YouTube

♥ Blog Archives

  • Etsy
  • Creema

Footer

ABOUT ME

My name is Chie. I design and make custom wedding dresses in Tokyo, Japan. Read More…

GET UPDATES!

Get monthly updates including new items in the shop, favorite links and more!

CONTACT

Feel free to send a message if you have any comment:

chie@vivatveritas.com

LET´S GET IN TOUCH

  • Email
  • Facebook
  • Instagram
  • Pinterest
  • Twitter
  • YouTube
1月末に行われたコレクティブファッションショーのルックスをご紹介💫 伝統的な生地の美しさを現代のス 1月末に行われたコレクティブファッションショーのルックスをご紹介💫

伝統的な生地の美しさを現代のスタイルへと落とし込めるように意識してデザインしました。

• 帯の巻きスカート
• 銘仙(めいせん)の風合いを活かした遊び心あるロンパース
• 袖のシルエットが際立つ、一枚仕立てのジャケット 

など🧚 

Introducing the looks from the Collective Fashion Show held at the end of January💫

In designing these pieces, my focus was on translating the timeless beauty of traditional Japanese textiles into contemporary, wearable styles.

• The Obi wrap skirt, reimagined for the modern wardrobe.
• The playful Meisen rompers, breathing new life into vintage silk.
• The unlined statement jacket, featuring a striking sleeve silhouette.

Photo credit:
Photographer @maiemilie 
Models @naka_kanar  @anna012945 @mae.suzu.ki @kotoha_mu @_kasumi.y @lei_seans
Event organizer @naka_kanar 

#コレクティブファッションショー #着物リメイク #銘仙 #帯リメイク #一点物 JapaneseTextiles KimonoStyle UpcycledFashion SustainableFashion ModernKimono
今回のオーダーはアメリカから🇺🇸 着物をツーピースにリメイクしました。 この繊細な刺繍、ずっと眺めて 今回のオーダーはアメリカから🇺🇸
着物をツーピースにリメイクしました。
この繊細な刺繍、ずっと眺めていられるくらい綺麗…😍
シルクの肌触りがとにかく柔らかくて、着心地も最高です。
ポケット付きなのも、地味に嬉しいポイント💡
しばらく関税の関係でアメリカに発送出来なかったのですが、UGXが使えるようになったので発送再開しました!

New custom order for a client in the USA! 🇺🇸✨

From vintage kimono to a chic two-piece set. Just look at that embroidery... absolutely stunning! 😍 The silk texture is pure luxury and so comfortable to wear. And yes, it has pockets! 🙌

📢 Shipping update: US shipping is officially BACK via UGX! Thank you for your patience.

#着物リメイク #アップサイクル #サステナブルファッション #着物コーディネート #kimonoremake upcycledfashion handmade
【Pop-up at UNPLAN Shinjuku】 I’ll be setting up a s 【Pop-up at UNPLAN Shinjuku】
I’ll be setting up a shop at UNPLAN Shinjuku @unplan_shinjuku from Feb 28 to March 6. If you’re in the area, come by and check out the pieces in person💕

When I’ll be there:
 * Feb 28 (Sat): 5 PM – 11 PM
 * March 6 (Friday): 5 PM – 11 PM

📍UNPLAN Shinjuku
Address: 5-chōme-3-15 Shinjuku, Shinjuku City, Tokyo 160-0022

Hope to see you there🫶🏻

【UNPLAN Shinjuku でポップアップします】
2月28日から3月6日まで、UNPLAN Shinjuku でポップアップを開催することになりました。
帯ビスチェや着物で作ったMA1などを直接手に取って頂ける機会なので、ぜひ遊びに来てください♡

在廊日(直接お会いできる日):
 * 2月28日(土): 17:00 – 23:00
 * 3月6日(金): 17:00 – 23:00

3月1日〜5日の期間中も、会場にアイテムを展示、販売しています。ふらっと立ち寄ってもらえると嬉しいです。

📍 UNPLAN Shinjuku(新宿)
160-0022 東京都新宿区新宿5-3-15

Photo credit:
Photographer @maiemilie 
Model @rima_a0905
Event organizer @naka_kanar 

#UNPLANShinjuku #東京ファッション #ポップアップ #TokyoFashion #PopUp
お客様の帯でリュックを作りました🪡 こだわりポイントは… ✔︎縁起の良い「青海波」の柄を活かしたデ お客様の帯でリュックを作りました🪡
こだわりポイントは…

✔︎縁起の良い「青海波」の柄を活かしたデザイン
✔︎荷物がたっぷり入る13cmのマチ
✔︎普段着に合わせやすい絶妙なネイビー

動画の最後で実際に背負ってみましたが、サイズ感もちょうど良く、デイリーユースにぴったりです!通勤でお使い頂けると聞いて嬉しい🥹🫶🏻

I remade a customer’s Obi belt into a backpack🪡✨

Here are the details:
✔︎ A design featuring the ""Seigaiha"" (wave) pattern—a symbol of good luck and peace.
✔︎ A spacious 13cm depth for plenty of storage.
✔︎ A beautiful navy that blends perfectly with everyday outfits.

As you can see in the video, the size is just right and it's perfect for daily use. I’m so glad to hear that she’ll be using it for work🥹🫶🏻

#帯リメイク #アップサイクル #ハンドメイドバッグ  #青海波
Paint the world collection ミニファッションショーから🎨 受け継がれてきた Paint the world collection ミニファッションショーから🎨
受け継がれてきた着物の美しさを、今の空気感に閉じ込めたMA-1。
さりげなく裏地も素敵💓

A glimpse from the "paint the world” collection mini fashion show.
Vintage kimono silk reimagined into a modern bomber jacket.
The vivid red lining tells a story of its own💕

▶︎ Online Shopにて販売中
詳細はプロフィール@vivatveritasのURLをチェック✔︎

Photographer @maiemilie 
Model @ppotatodesu
Event organized by @naka_kanar

#kimonoremake #fashioncollection #着物リメイク#upcycledfashion #kimonostyle tokyofashion
オーストラリアのお客様からオーダーいただいた、着物リメイクのドレスとバッグ。 海を越えてお届けしま オーストラリアのお客様からオーダーいただいた、着物リメイクのドレスとバッグ。

海を越えてお届けしました🌊

桜の柄がスカートの裾と袖🌸

お揃いの巾着バッグも🫶🏻

遠く離れた地で、このドレスが特別な時間を彩りますように💫

A custom-made kimono remake dress and matching bag for my client in Australia🇦🇺

Sent with love across the ocean🌊

The beautiful cherry blossom patterns bloom elegantly along the hem and sleeves🌸

I also crafted a matching drawstring bag to complete the look🫶🏻

#着物リメイク #着物ドレス #オーダーメイド #サステナブルファッション #桜 Kimonoremake Kimonodress UpcycledKimono Custommade Japanesestyle
視線を奪う、孔雀さん🦚💙 正絹の艶やかさを活かした、バックレスデザインのロングドレスです。 チョー 視線を奪う、孔雀さん🦚💙

正絹の艶やかさを活かした、バックレスデザインのロングドレスです。
チョーカー風のホルターネックが顔周りを華やかに見せてくれます。

特別な日は、特別なドレスで👗

▶︎ Online Shopにて販売中
詳細はプロフィール@vivatveritasのURLをチェック✔︎

Eyes on the peacock🦚✨

This backless gown is made from genuine silk kimono fabric. Featuring a chic choker-style halter neck, it’s designed to make an entrance at your next party or resort getaway.

Special days deserve a special dress👗

▶︎ Shop online now
Link in bio: @vivatveritas ✔︎

Photographer @maiemilie 
Model @ganguro_egg
Headband and jewelry @catwalk_bijoux
Event organized by @naka_kanar

#KimonoRemake #SustainableFashion #SlowFashion #Peacock #VivatVeritas
着物ドレス リメイクファッション リゾートコーデ 孔雀 ハンドメイドドレス
様々な表情をしてる唐子さんが可愛すぎる着物羽織を発見したので👀カジュアルに着れるMA 1にしてみまし 様々な表情をしてる唐子さんが可愛すぎる着物羽織を発見したので👀カジュアルに着れるMA 1にしてみました🍎

もちろんポケット付きで機能性アップ+リブの袖口とネックラインで気易く✨

Found this stunning vintage kimono fabric featuring ""Karako"" (children) with so many adorable facial expressions! 👀 I’ve transformed it into a casual MA-1 bomber jacket🍎

I’ve added pockets for extra functionality, and the ribbed cuffs and neckline make it super easy and comfortable to wear✨

Model @naka_kanar

#着物リメイク #着物アップサイクル #MA1 #唐子 
#KimonoRemake UpcycledFashion
Follow me on Instagram

Copyright © 2026 · vivien theme by Lovely Confetti DMCA.com Protection Status

Copyright © 2026 Vivat Veritas